42
Using Other Features
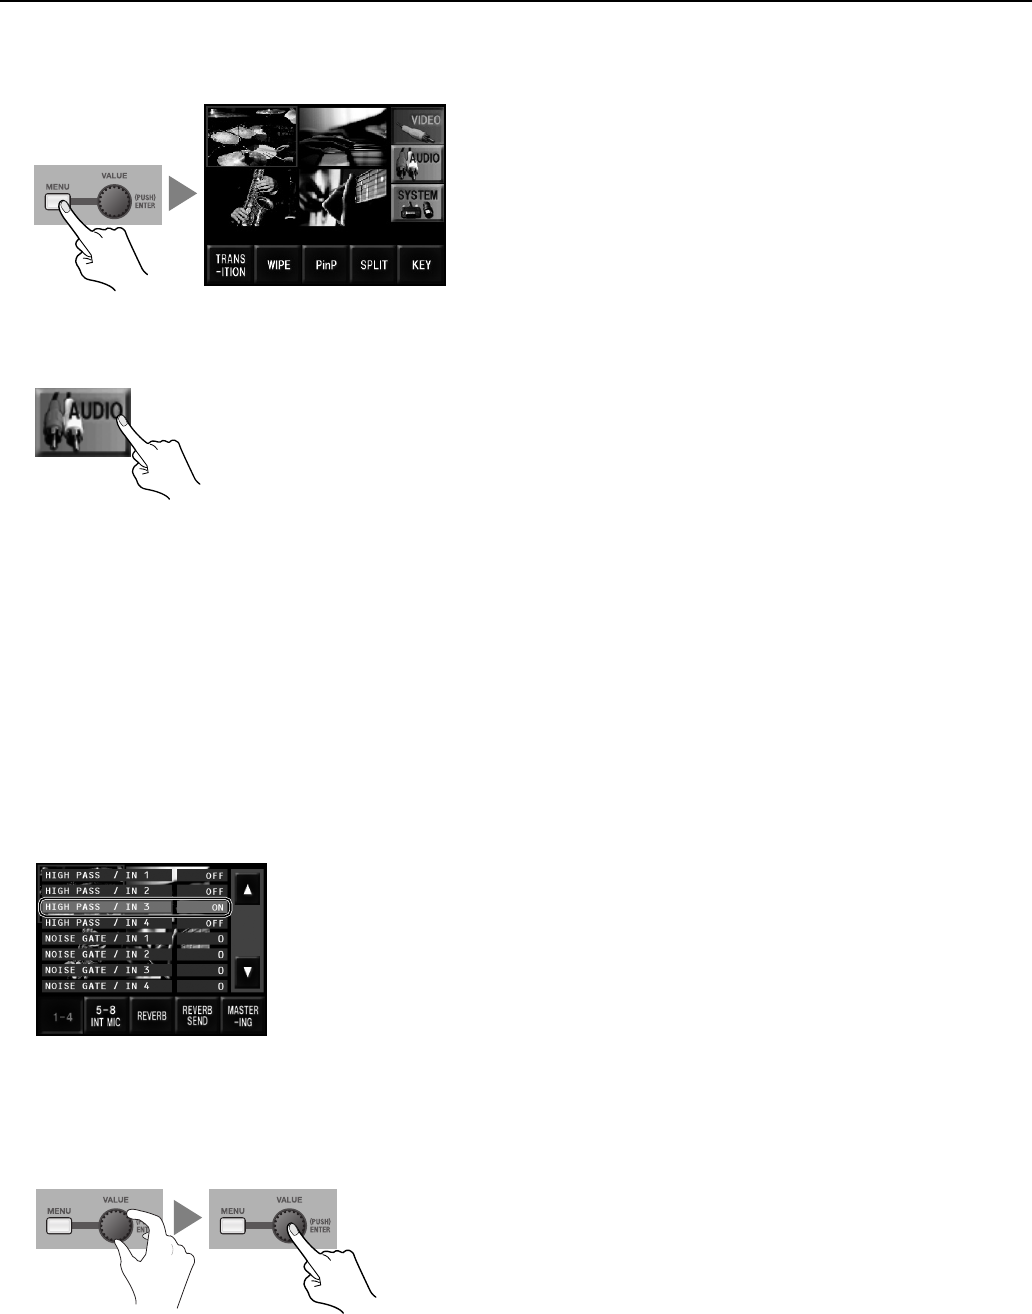
1. Access the menu.
Press the [MENU] button to display the menu on the monitor.
fig.open-menu.eps
2. Display the AUDIO menu.
Touch the [AUDIO] icon on the right side to display audio-related menus.
fig.audio-mix-menu.eps
3. Select the target for the effect.
Touch the icons arranged along the bottom of the screen to choose the target for applying the effect. You can select one from
below.
• [1-4] Select this when you want to apply the effect to the input on channels 1 through 4.
• [5-8 INT MIC] Select this when you want to apply the effect to the input on channels 5 through 8 or to the audio from the internal
microphones.
• [MASTERING] Select this when you want to apply the effect to the output.
* For [REVERB] and [REVERB SEND], you can use the menus to fine-tune the parameters for reverb. Refer to “Menu Operations” (p. 44) and “AUDIO
Menu” (p. 46).
4. Select the channel and the effect.
Choose the channel and the effect to apply to it. For example, to apply HIGH PASS on channel 3, select [HIGH PASS / IN 3], then
turn the [VALUE] dial to change the setting to [ON].
fig.select-audio-effect.eps
5. Adjust the amount of effect applied.
When you have selected NOISE GATE, EQ, or other effect whose setting is adjustable, turn the [VALUE] dial to adjust it. You can
apply the setting value by pressing the dial.
* You can change a setting value up or down by ten units at a time by holding the [VALUE] dial depressed as you turn it.
fig.value-dial.eps
6. Go back to the original screen.
Press the [MENU] button once to return to the screen called up in step 1. Press the [MENU] button once more to make the menu
display disappear.


