


70
Editing a song
You can edit a song by inserting or deleting patterns. Knob movements and your
own performance can also be added to a song.
If you want to keep a song that you edited, you must perform the
Write operation. If you switch songs or turn of f the power without
writing, the song will r evert to the state prior to editing.
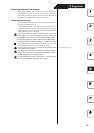
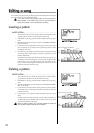
Inserting a pattern
INSERT PATTERN .....................................................................
This operation lets you insert a pattern at the desired position. Sub-
sequent patterns will move toward the end of the song.
1. If the EMX-1 is playing, press the STOP/CANCEL key to stop play-
back.
2. Hold down the shift key and press step key 9 (INSERT PATTERN).
(Key 9 will blink.)
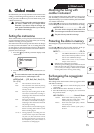
3. Use the dial to select the position at which you want to insert a pat-
tern. For example if you want to insert a pattern at position 3, make
the display read “003.”
4. Press step key 9 once again to insert one pattern at that position (the
key will go dark). If you decide to cancel the operation, press the
STOP/CANCEL key.
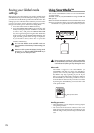
The pattern that will be inserted will be identical to the pattern (in-
cluding the note offset setting) that was previously assigned to that
position. Now you can change the pattern and note number as nec-
essary. All data following the inserted pattern will be moved one
position toward the end of the song.
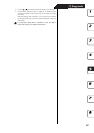
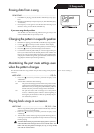
Deleting a pattern
DELETE PATTERN .....................................................................
This operation lets you delete the pattern from a position. Subse-
quent patterns will move toward the front of the song.
1. If the EMX-1 is playing, press the STOP/CANCEL key to stop play-
back.
2. Hold down the shift key and press step key 10 (DELETE PATTERN).
(Key 10 will blink.)
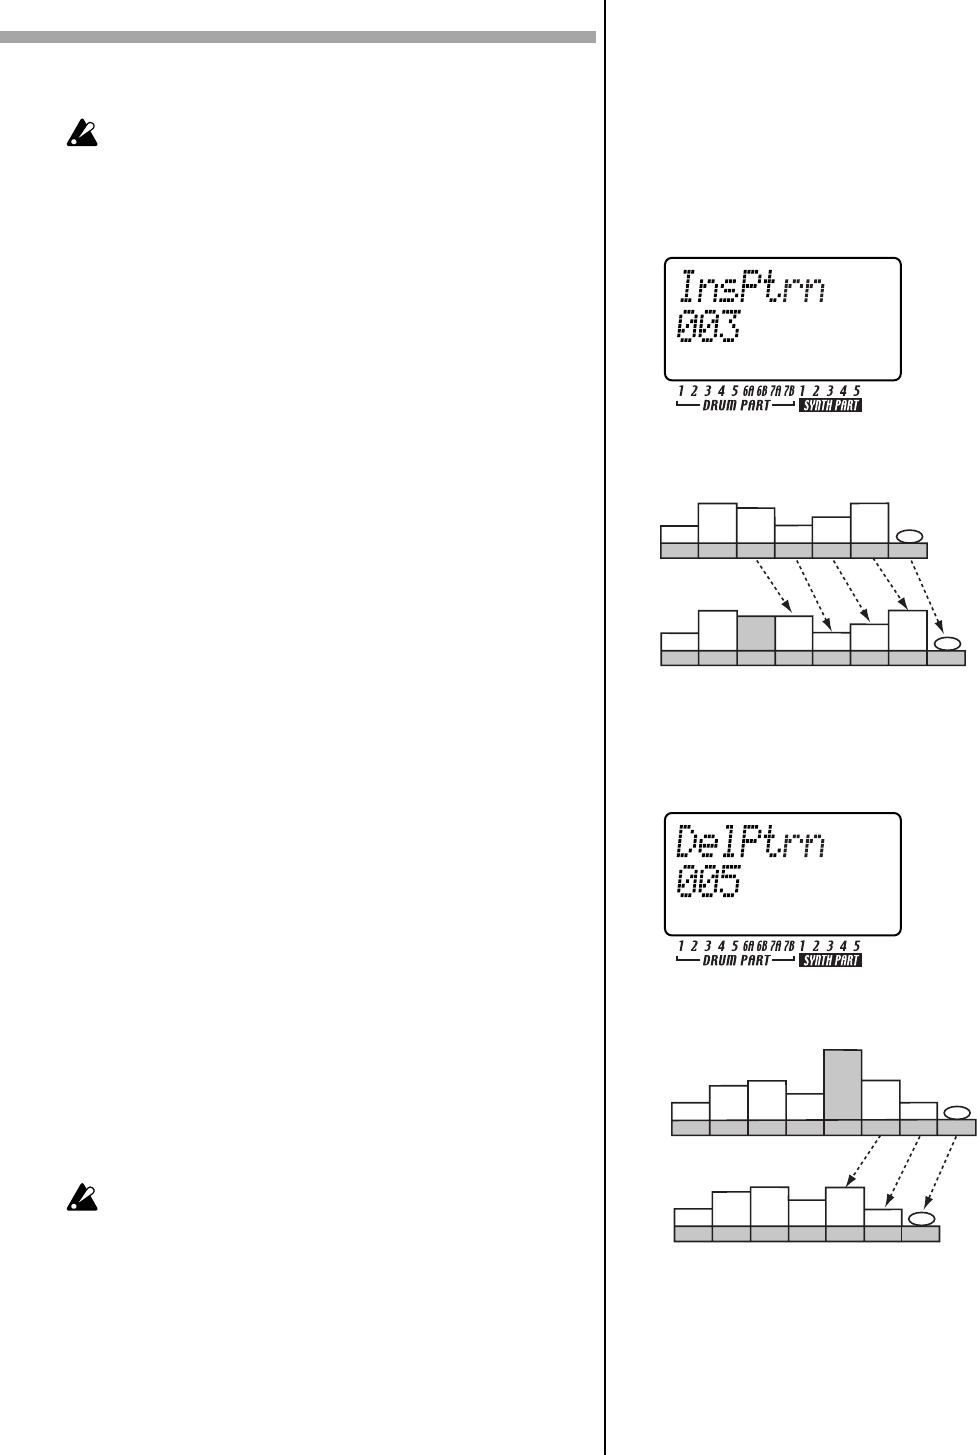
3. Use the dial to select the position whose pattern you want to delete.
For example if you want to delete the pattern at position 5, make the
display read “005.”
4. Press step key 10 once again to delete that pattern (the key will go
dark).
If you decide to cancel the operation, press the STOP/CANCEL key.
All data following the deleted pattern will be moved one position
toward the beginning of the song.
When you delete a pattern, any event data (explained below) that
was recorded in that location will also be deleted.
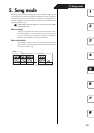
Insert a new pattern at position 3
Position
1
End
Pattern A.01
(16Steps)
Pattern D.01
(32Steps)
Pattern B.01
(36Steps)
Position
2
Position
3
Position
4
Position
5
Position
6
Position
7
Pattern A.01
(16Steps)
Pattern B.20
(24Steps)
Pattern B.01
(36Steps)
Position
1
End
Pattern A.01
(16Steps)
Pattern D.01
(32Steps)
Pattern B.01
(36Steps)
Position
2
Position
4
Position
5
Position
6
Position
7
Position
8
Pattern A.01
(16Steps)
Pattern B.20
(24Steps)
Pattern B.01
(36Steps)
Position
3
Pattern D.01
(32Steps)
Before
inserting
After
inserting
Position
1
End
Pattern A.01
(16Steps)
Pattern D.01
(32Steps)
Pattern B.01
(36Steps)
Position
2
Position
3
Position
4
Position
5
Position
6
Position
7
Position
8
Pattern A.01
(16Steps)
Pattern B.20
(24Steps)
Pattern A.10
(64Steps)
Pattern B.01
(36Steps)
Delete the pattern at position 5
Position
1
End
Pattern A.01
(16Steps)
Pattern D.01
(32Steps)
Pattern B.01
(36Steps)
Position
2
Position
3
Position
4
Position
5
Position
6
Position
7
Pattern A.01
(16Steps)
Pattern B.20
(24Steps)
Pattern B.01
(36Steps)
Before
deleting
After
deleting