


84
5. Make settings on your external MIDI device (mas-
ter) so that it will transmit MIDI clock messages.
6. Return to Pattern mode or Song mode.
7. When you start the sequencer of your external MIDI
device, the EMX-1 will playback in synchroniza-
tion with it.
If MIDI clock messages are being received at the
MIDI IN connector, you can press the EMX-1’s
PLAY/PAUSE key to make it start playing in syn-
chronization to the tempo of your external MIDI
device.
If the EMX-1’s MIDI Clock setting is “Ext” or “Auto”
and it is synchronized to an external MIDI clock, it
will follow the tempo of the external sequencer; you
will be unable to adjust the tempo on the EMX-1.
If the EMX-1 receives a MIDI Start message while
synchronized to MIDI clock, it will begin playing from
the beginning of the currently-playing pattern (in
the case of a song, the beginning of the pattern
that was playing when the Start message was re-
ceived).
Playing back in sync with other
Electribe models
You can enjoy even greater possibilities by playing the EMX-
1 in sync with other models in the Electribe series such as
the Electribe-S (ES-1) or M (EM-1).
To make the ES-1 play in synchronization to the tempo
of the EMX-1
Use a MIDI cable to connect the EMX-1’s MIDI OUT
connector to the ES-1’s MIDI IN connector. Use
audio cables to connect the ES-1’s line output jacks
to your mixer or powered monitor system (ampli-
fied speakers).
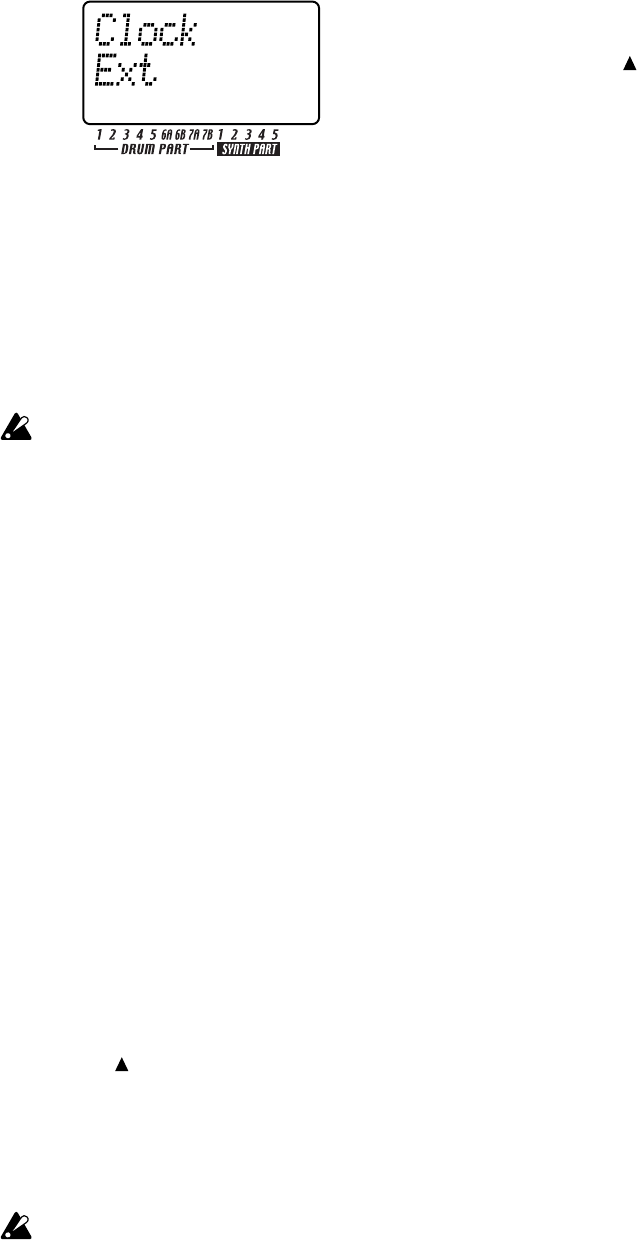
1. Press the MIDI key (it will light).
2. Press the [
] cursor key to change the display to
read “Clock.”
3. Turn the dial of each device to set the EMX-1 to
“Int” and the ES-1 to “Ext.”
4. Press the EMX-1’s PLAY/PAUSE key to start the
pattern or song (the PLAY/PAUSE key will light).
The ES-1 will play in sync with the EMX-1’s tempo.
If the MIDI channel of one of the EMX-1’s parts
matches the ES-1’s MIDI channel, the ES-1 may
sound in unison with the EMX-1. If this occurs,
change the MIDI channel settings so that they do
not conflict.
To make the EMX-1 and ES-1 play back the identically-
numbered pattern in synchronization
1. Press the MIDI key (it will light).
2. Press the [
] key to change the display to read
“Clock.”
3. Set the EMX-1 to “Int” (master) and the ES-1 to
“Ext” (slave).
4. Set the EMX-1’s synth part 1 and the ES-1 to the
same MIDI channel.
For example, set both to “01”.
5. Set the EMX-1’s MIDI Filter parameter “P” to “O”.
Set the EMX-1’s MIDI Filter parameter “N” to “X”.
About the MIDI messages used
for synchronization
The MIDI messages used for synchronization (Realtime
Messages) are Timing Clock [F8], Start [FA], Continue [FB],
and Stop [FC].
Only one master device (e.g., sequencer) in the connected
system can transmit these messages; the remaining slaved
devices (sequencers) will receive these messages.
Timing Clock
The slave device calculates its own tempo accord-
ing to the Timing Clock messages it receives from
the master device. Twenty-four Timing Clock mes-
sages are transmitted during each quarter note.
If you set the EMX-1’s MIDI mode CLOCK setting
to “Auto,” it will act as a slave (it will receive
Realtime Messages). However if the EMX-1 is not
receiving any Timing Clock messages, it will oper-
ate according to its own internal clock even with
the “Auto” setting.
Start
The Start message tells the slave device when to
begin playing. A Start message is transmitted when
you press the PLAY/PAUSE key. When a slave de-
vice receives the Start message, it will begin play-
ing from the beginning in synchronization with the
incoming Timing Clock messages.
Continue, Stop
If you press the START/PAUSE key on the master
device while it is paused, the master device will
transmit a Continue message. When a slave device
receives the Continue message, it will resume play-
back from the location at which it is currently
stopped. If you press the STOP key during play-
back, the master will transmit a Stop message.
When a slave device receives the Stop message, it
will stop playback.