14
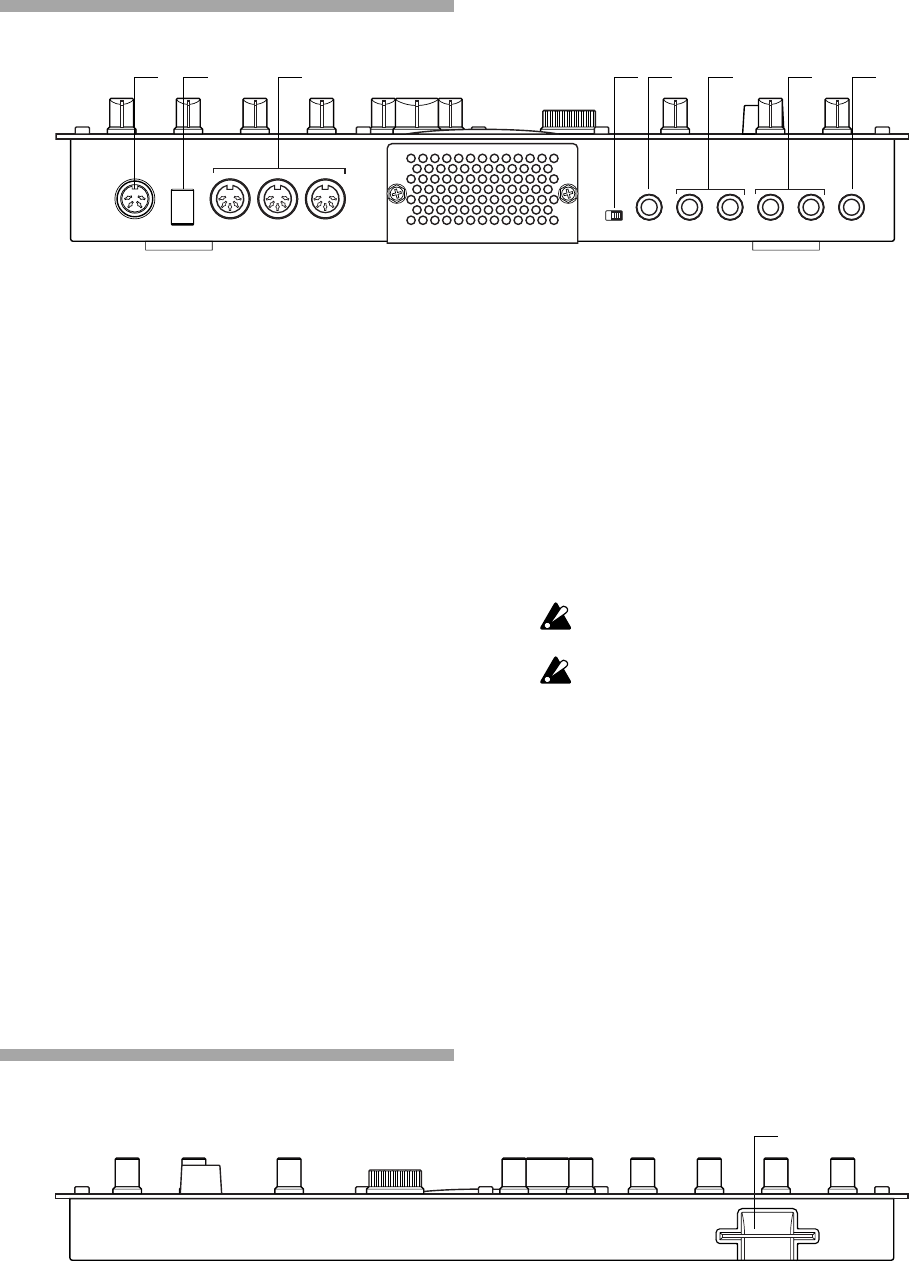
Rear panel
1. ~AC 9V
Connect the included AC/AC power supply to this
connector.
2. STANDBY, ON (power switch)
Pressing this switch will alternate between power-
on and standby conditions.
3. MIDI connectors
IN This connector receives MIDI data. Use
this when you want to control the ESX-
1 from an external MIDI device, or to re-
ceive a data dump.
OUT This connector transmits MIDI data. Use
this when you want to use the ESX-1 to
control another MIDI device, or to trans-
mit a data dump.
THRU This connector re-transmits MIDI data
that was received at the MIDI IN con-
nector. Use this when you want to send
the same data to two or more MIDI de-
vices.
4. MIC, LINE gain select switch
This switches the gain level of the audio in jack.
Set this to the MIC position if you are connecting
a mic, or to the LINE position if you are connect-
ing a synthesizer or audio device.
5. AUDIO IN, ST./MONO (audio in jack)
This jack is used by the Audio In oscillator type
setting. The sound input from this jack is used as
the sound of the Audio In part. If you want to make
connections in stereo, connect a stereo phone plug
to this jack.
6. INDIV.OUT 3, 4 (individual out) jacks
These are individual output jacks. If the output bus
of a part is set to 3/4, the sound of that part will
be output from these jacks.
For all of the factory-set sounds, the output bus is
set to the line out jacks (L/R).
The effect of the vacuum tubes applies to the line
out jacks (L/MONO, R) and headphone jacks.
7. OUTPUT L/MONO, R (line out) jacks
Connect audio cables from these jacks to your
mixer or powered monitor (amplified speaker)
system. If you are using a monaural connection,
use the L/MONO jack.
8. Headphone jack
You can connect a set of stereo headphones (phone
plug) to this jack.
Front panel
1 2 3 4 5 6 7 8
1
Card section
1. SmartMedia
TM
slot
You can insert a SmartMedia card here and use it
to store or load ESX-1 data.


