47
5. Pattern mode
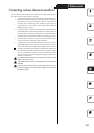
Assigning individual slices of a slice sample
SLICE NO. ......................................................... All, 001...128
The individual notes into which a sample is divided by the Slice
operation (☞p.27) can be assigned as one-shot samples to the drum
parts or keyboard parts.
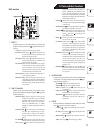
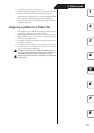
1. Make sure that the PART EDIT mode key is lit.
2. Press the [ ] cursor key to make the display read “(sample name).”
(The SAMPLE icon is lit).
3. Press the drum or keyboard part key to which you want to assign
the sample (the key will light). The display shows the name and
number of the sample assigned to that key. Here you can select the
slice sample (an “ ” is displayed following the number). Select the
slice sample that contains the sound you want to use.
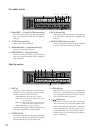
4. For a drum part, turn the dial and press the part key to audition the
sounds while you select a sample.
5. For a keyboard part, turn on the Keyboard function, turn the dial,
and use the step keys to audition a sound while you select a sample.
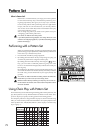
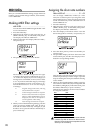
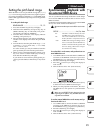
6. Use the [ ][ ] cursor keys to make the display read “SliceEdt.”
Turn the dial to select the sample number. If you select “All,” the
entire slice sample will be assigned as a one-shot sample. “1”~“128”
indicates the number of the step key to which the sliced samples are
assigned, and you can choose one of these to select an individual
sample. To audition the sound while you make your selection, press
the part key (the one you pressed in step 2).
You cannot select a sample in “SLICE NO” unless you first select a
slice sample in PART EDIT mode “SAMPLE.”
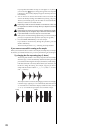
In the case of a drum part, the sliced waveform you select here will
play in one-shot mode, just like the slice part. In the case of a key-
board part, non-decaying reverse loop playback is used intention-
ally to make the sound sustain. If you feel that the playback is un-
natural, set the AMP EG to “ ” and use EG Time to adjust the de-
cay.
“SLICE NO” is invalid for the stretch, slice, audio-in, and accent pat-
terns.
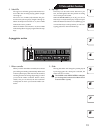
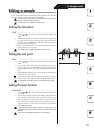
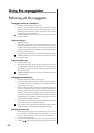
Editing the sound of a part
Editing the Part Common parameters
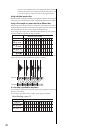
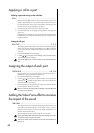
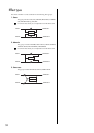
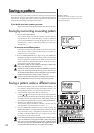
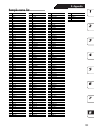
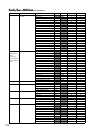
PITCH ....................................................................... -63...+63
Specifies the playback pitch. Raising the pitch speeds-up the play-
back; lower the pitch slows down the playback. The variable pitch
range is ±2 octaves, as shown below.
In some cases, raising the pitch will cause noise.
This parameter is invalid for the keyboard parts.
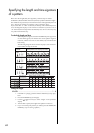
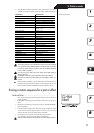
Knob value Pitch Pitch exampl (input note C3)
+63 2 octaves C5
+41, 43...59, 61 : C#4, D4...A#4, B4
+39 1 octave C4
+9, 12...33, 36 : D3, D#3...A#3, B3
+6 Semitone up C#3
0(center) ±0C3
-6 Semitone down B2
-9, -12...-36 : A#2, A2...C#2
-39 -1 octave C2
-41, -43...-61 : B1, A#1...C#1
-63 -2 octaves C1