


61
Record and Playback Your Performance
Recording a Performance
You can record the performance that you play. You can also record your performance
while playing rhythms or automatic accompaniment.
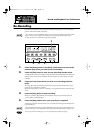
fig.08-02
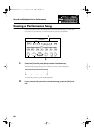
1.
Select the panel settings needed for recording the performance.
2.
Make sure that a floppy disk is not inserted in the disk drive.
If a floppy disk is in the disk drive, press the Eject button (p. 37) and remove the floppy
disk.
3.
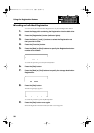
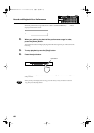
Enter the recording standby mode by pressing the [Rec] button.
The [Rec] button’s indicator will light. The [Play] button indicators will blink.
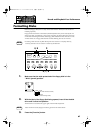
4.
Press the [Play] button to start recording.
When you press the [Play] button, the metronome will play two measures (bars) of
count-in before recording begins.
If you wish to use Rhythm and Automatic Accompaniment as you record, press the
[Start/Stop] button instead of the [Play] button to begin recording. Also, if the [Sync]
button is lit (i.e., if Sync Start is ON), recording will begin the instant you play the Lower
keyboard.
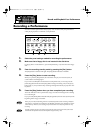
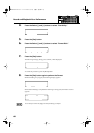
5.
Press the [Stop] button when you have completed your recording.
The Track indicator where a performance song is recorded will change from a flashing
to a constant light.
If you press the [Reset] button instead of the [Stop] button, the unit resets (returns) to the
beginning of the song just recorded.
When you press the [Intro/Ending] button (or [Start/Stop] button) while recording a Rhythm
performance or Automatic Accompaniment, the Rhythm performance and Automatic Accompa-
niment will stop. However, the recording itself will continue. Press the [Stop] button to stop
recording.
The Play and Stop functions can both be assigned to the foot switch. Each touch of the switch
will alternate the operation between the Play and Stop functions (p. 90).
3
4
5
Composer
Demo
Load SaveFunction Registration
Stop
Reset
Play Rec FwdBwd
Select
Clear
Rename
Lower Upper Solo ControlAccomp BassRhythm
Tr ack
AT-20S.e.book 61 ページ 2003年11月10日 月曜日 午後2時37分