


70
TASCAM DP-008EX
10 – Miscellaneous Functions
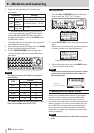
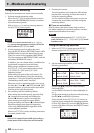
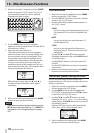
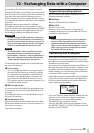
3. When the recorder is stopped, press the TUNER
button to open the
TUNER
screen. The
CALIB
item (standard frequency) value is selected
(highlighted) when it opens.
4. Use the DATA wheel to set the standard
frequency of the A note between 435 and 445 Hz.
(default value: “440Hz”)
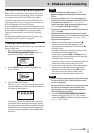
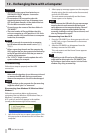
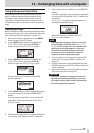
5. Play the instrument and tune it.
The pitch name closest to the string appears
above the meters. Tune the string roughly until
the sound name that you want appears. Then,
fine tune the string until the rectangle at the
middle of the meter darkens, showing that the
string is in tune. If the pitch is too low, a bar
extends to the left of the middle and if it is too
high it extends to the right. The longer the bar is
the more out of tune the string is.
When the pitch is just right, the t and g to
the left and right of the pitch name appear
unblinking.
6. When you are finished tuning, press the HOME
button to open the Home Screen.
NOTE
If you want to monitor the input signal, press the
REC button of the track that has
IN A
(INPUT A)
assigned to it. (See “Assigning inputs” on page
44.)
Oscillator mode
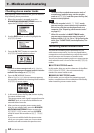
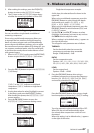
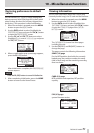
1. When the recorder is stopped, press the TUNER
button to open the
TUNER
screen.
2. Press the F4 [OSC.] button to show the oscillator
mode on the
TUNER
screen.
3 Make the following oscillator mode settings on
the
TUNER
screen.
CALIB
Use this to adjust the standard frequency of A4
(la) between 435 Hz and 445 Hz (default: 440
Hz).
NOTE
Use this to set the note output between C3
and B5 (default: A4).
LEVEL
Use this to set the output level between a
minimum value of 10 and a maximum of 100
(default: 50).
Use the F3 [5] and F4 [b] buttons to select
(highlight) parameters, and use the DATA wheel
to set their values.
Use the F2 [ON] button to turn the output ON
and OFF.
Use the F1 [CHROM.] key to switch to chromatic
tuner mode.
4. When you are finished tuning, press the HOME
button to return to the Home Screen.
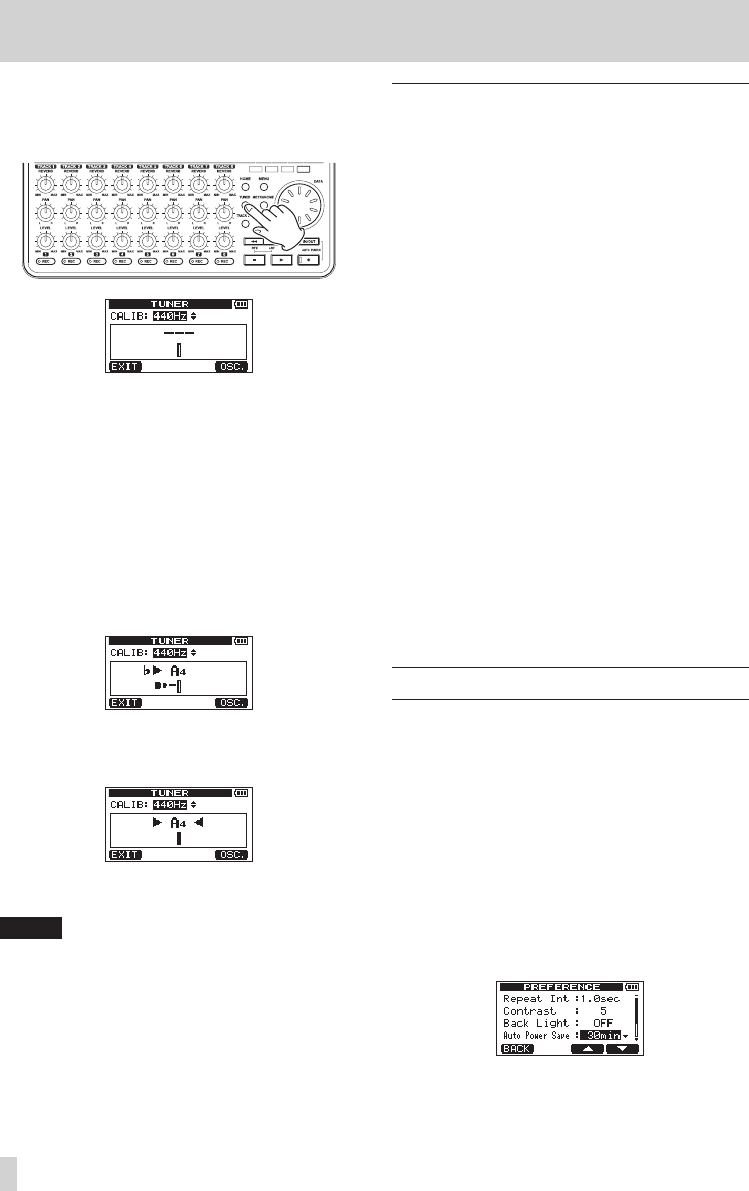
Automatic power saving function
You can set the amount of time until the unit
automatically turns OFF (enters standby) after its last
activity or operation.
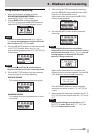
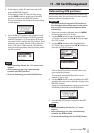
1. When the recorder is stopped, press the MENU
button to open the
MENU
screen.
2. Use the DATA wheel to select (highlight) the
PREFERENCE
item and press the F4 [t] button
to open the
PREFERENCE
screen.
3. Use the F3 [5] and F4 [b] buttons to select
(highlight) the
Auto Power Save
item setting
value, and use the DATA wheel to set it to one of
the following values.
Options: OFF (does not turn off automatically),
3min, 5min, 10min, 30min (default value)
4. After completing the setting, press the HOME
button to return to the Home Screen.