


TASCAM DP-03 25
the recording level when bouncing or mixing down
tracks.
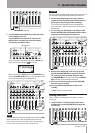
j MUTE button
Press to open the
TRACK MUTE
screen. (See “Muting
tracks” on page 54.)
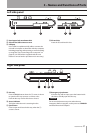
k STOP (ª) button
Press to stop playback, recording and searching
forward/backward.
Press at the same time as you press the REW (Ô) (TO
ZERO) button or F FWD () (TO LAST REC) button
to locate the beginning of the song (ZERO point) or
the last position that recording started (last recording
position). (See “Locate and search functions” on page
44.)
lPLAY (Á) button/indicator
Press this button to start playback.
To start recording, press and hold the RECORD (–)
button and press this button. During recording, press
this button to stop recording and start playback (punch
out).
During playback or recording, this indicator lights.
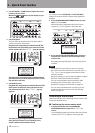
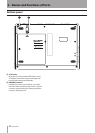
;MIC B
This built-in omnidirectional microphone becomes the
input source for INPUT B when set to INTERNAL MIC
B.
This built-in microphone does not function when
using the tuner.
zRECORD (º) button/indicator
To start recording, press and hold this button and
press the PLAY (Á) button. During recording, this
indicator lights.
During playback, if you press this button when a track
REC indicator is blinking, recording to that track will
begin (punch in). (See “Automatically punching in and
out” on page 48.)
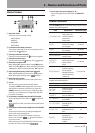
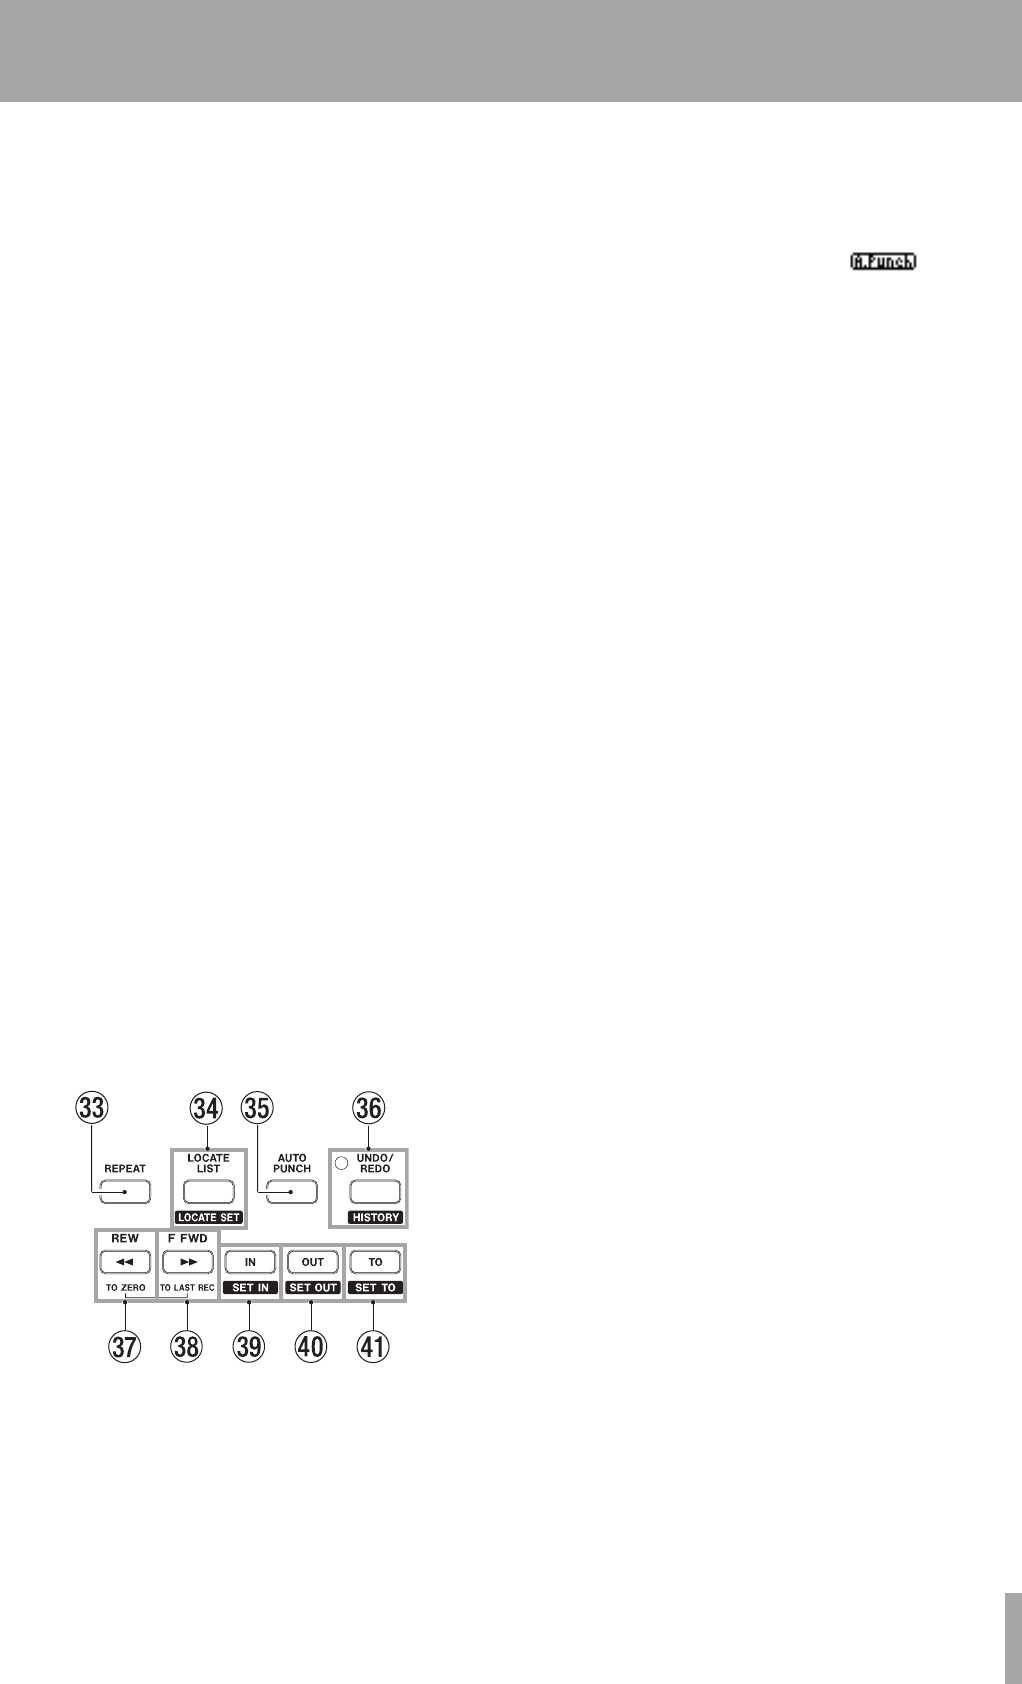
xVarious function buttons
cREPEAT button
Press to turn repeat playback mode ON and OFF.
(See “repeat playback” on page 46.)
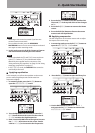
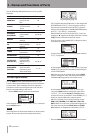
v LOCATE LIST [LOCATE SET] button
Press this to open the
LOCATE LIST
screen. If the
current song does not contain any location marks,
press this to open the
I/O SETTING
screen.
Press and hold this button to add a mark at the current
location.
b AUTO PUNCH button
Press to turn the auto punch mode ON and OFF.
When auto punch mode is active, appears on
the screen. (See “Automatically punching in and out”
on page 48.)
n UNDO/REDO [HISTORY] button/indicator
Press this button to undo the immediately previous
action (single undo) or cancel a single undo (redo). (See
“Undoing an operation” on page 41.)
After a single undo or multi-undo, the UNDO/REDO
indicator lights, showing that and operation has been
undone.
Press and hold this button to open the
HISTORY
screen where you can view the recording and editing
history and also conduct multi-undo operations.
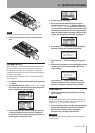
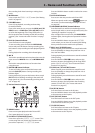
m REW (Ô) (TO ZERO) button
When stopped, press this button to search backwards.
Press it repeatedly to change the speed from 10x to
50x, 100x and 1000x.
During playback, press this button to search backward
while pressing.
Press and hold the STOP (ª) button and press this
button to locate to the beginning of the song (ZERO
point =
00:00:00:00
). (See “Locate and search
functions” on page 44.)
, F FWD () (TO LAST REC) button
When stopped, press this button to search forward.
Press it repeatedly to change the speed from 10x to
50x, 100x and 1000x.
During playback, press this button to search forward
while pressing.
Press and hold the STOP (ª) button and press this
button to locate to the last position that recording
started (TO LAST REC). (See “Locate and search
functions” on page 44.)
. IN [SET IN] button
Press this button to locate to the IN point.
Press and hold this button to set the playback position
at that moment as the IN point.
/ OUT [SET OUT] button
Press this button to locate to the OUT point.
Press and hold this button to set the playback position
at that moment as the OUT point.
! TO [SET TO] button
Press this button to locate to the TO point.
Press and hold this button to set the playback position
at that moment as the TO point.
3 – Names and Functions of Parts