4 Use the F3 (§) and F4 (¶) buttons to select the
FROM
item, and use the DATA wheel to select the
track (song) to import.
5 Use the F3 (§) and F4 (¶) buttons to select the
TO
item, and use the DATA wheel to select the
pair of tracks that you want to use as the import
destination (
Trk1-2
,
Trk3-4
,
Trk5-6
or
Trk7-8
).
6 Press the F2 (
EXEC
) button to open a confirmation
message, and press the F3 (
YES
) button to import
the file from the CD.
The
CD
screen reopens after importing completes.
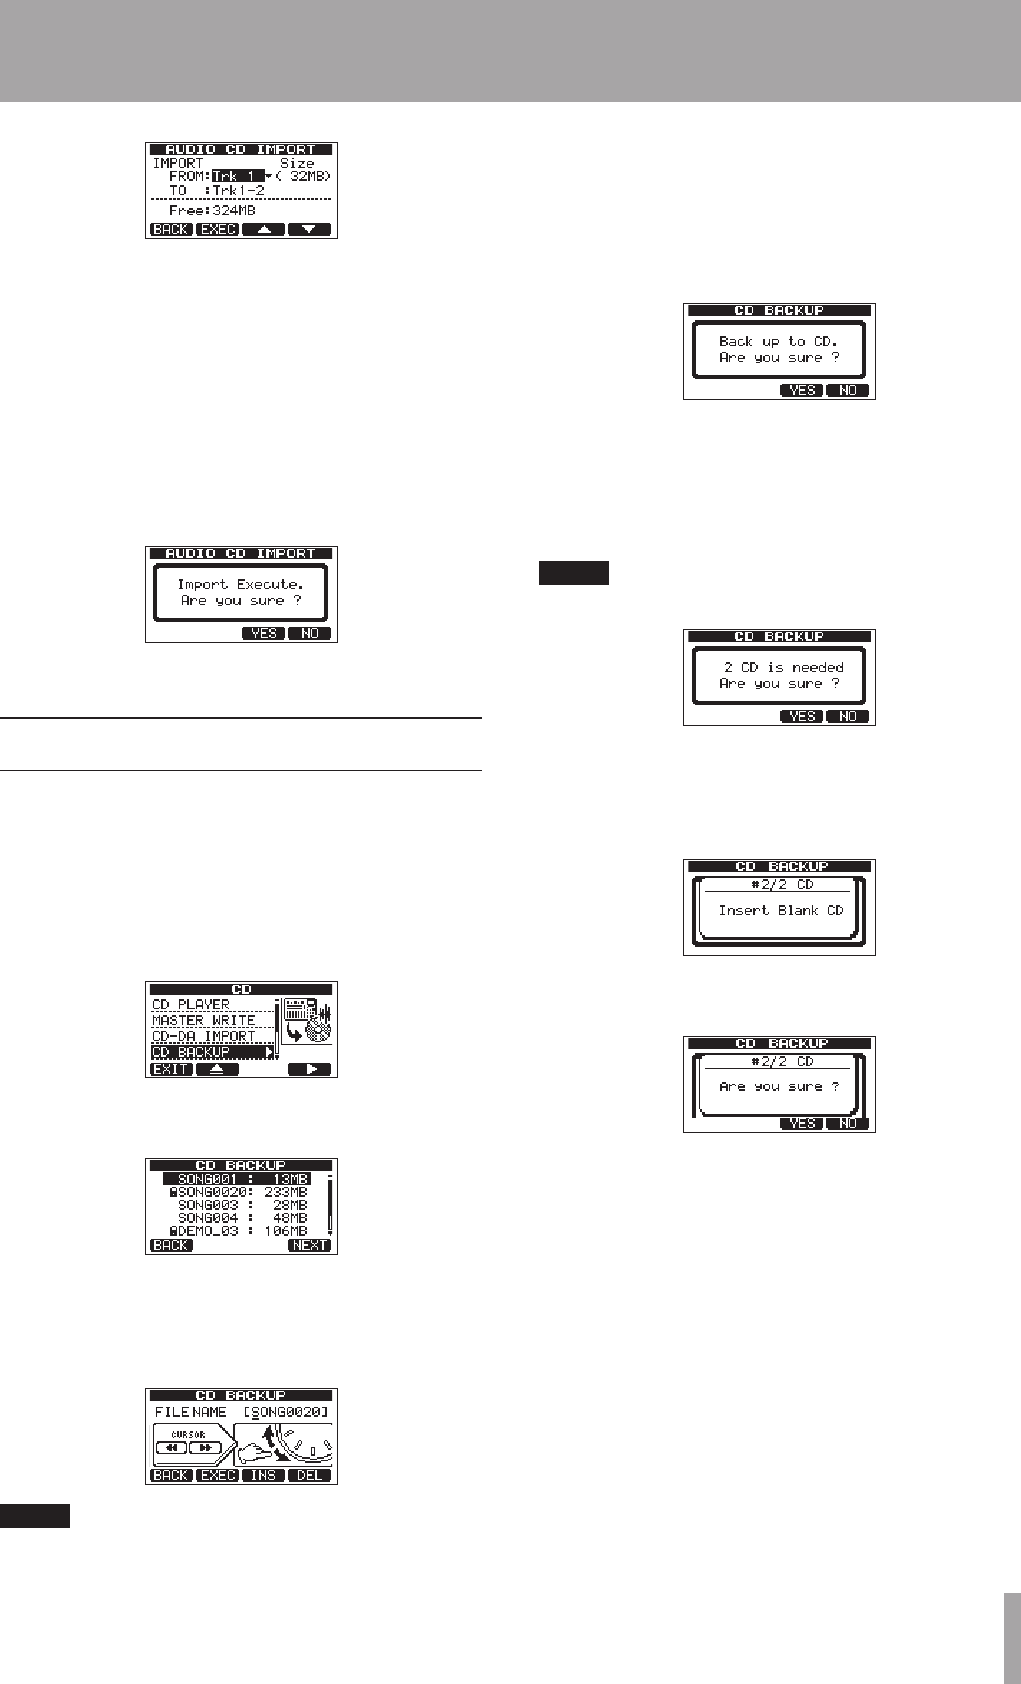
Backing up song data to CDs
You can also back up (write) song data to CDs.
1 In MULTITRACK mode, press the CD button to open
the
CD
screen.
2 Put a blank CD-R/CD-RW or a CD-RW that you want
to erase into the disc tray.
3 Use the DATA wheel to select
CD BACKUP
, and
press the F4 (¥) button.
A list of songs (on the currently selected partition) is
shown.
4 Use the DATA wheel to select the song that you
want to back up, and press the F4 (
NEXT
) button.
A screen where you can enter the name of the file that
you will write to the CD appears.
NOTE
Only one song can be written to a backup CD.
5 Use the REW (Ô) (TO ZERO) and F FWD () (TO
LAST REC) buttons and the DATA wheel to set the
song name with up to 8 characters). (See “Editing
names” on page 35.)
6 Press the F2 (
EXEC
) button to open a confirmation
message.
7 Press the F3 (
YES
) button.
8 The number of discs necessary to make the backup
will be shown. Prepare that number of discs. These
discs should be identical with the same type,
manufacturer and capacity.
NOTE
Backing up a long song could require more than 2 CDs.
9 Press the F3 (
YES
) button again.
10 When writing to the first CD has completed, a
message appears requesting the next CD. Put the
next blank CD into the disc tray.
11 After mounting the CD, a confirmation message
appears. Press the F3 (
YES
) button.
12 When writing to the CDs has been completed, the
CD
screen reopens.
13 – Using CDs


