


TASCAM DP-03 43
7 – Recorder Functions
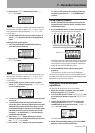
Punching in and out
Punching in/out is a technique to replace a part of an
already recorded track.
Start playback and when you reach the part that you want
to replace, switch to record (punch in), then switch back
to playback (or stop) when you finish the part that you
want to replace (punch out).
1 Decide what part of the track you plan to replace
and choose a point to begin where the new
recording can sit well with the existing recording.
2 Press the REC button of the track that you plan
to replace part of to start record standby (REC
indicator blinks).
3 Start playback before the part of the track that you
want to replace.
4 Press the RECORD (–) button to start recording
(punch in) when you reach the part. Play or sing
what you want to record.
5 Press the PLAY (Á) button to switch to playback
(punch out) when you finish the replacement
recording.
NOTE
When the recording source is set to a built-in microphone
(INTERNAL MIC A/B), the sound of pressing a button
to punch in and out could be recorded. This can be
avoided by using a foot switch to punch in and out
or the automatic punching in and out functions. (See
“Automatically punching in and out” on page 48.)
TIP
You can also press the STOP (ª) key to punch out at the
end of the replacement recording.
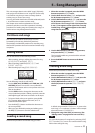
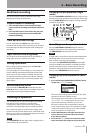
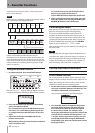
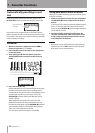
Using the foot switch to punch in/out
Using a foot switch connected to the REMOTE jack on the
rear panel, you can punch in and out.
In step 4 above, step on the foot switch instead of pressing
the RECORD (–) button. In step 5, step on the foot switch
again instead of pressing the PLAY (Á) button.
Foot switch
TASCAM RC-3F (optional)
NOTE
Press the switch (pedal) that you have set to
PUNCH
in
the foot switch settings. By default, the center pedal (Foot
SW C) is set to
PUNCH
. (See “Setting the foot switch” on
page 43.)
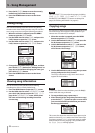
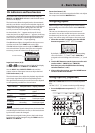
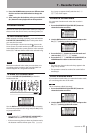
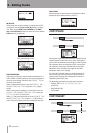
Setting the foot switch
Set the foot switch on the
PREFERENCE
screen.
1 When the recorder is stopped, press the MENU
button to open the
MENU
screen.
2 Use the DATA wheel to select
PREFERENCE
, and
press the F4 (¥) button to open the
PREFERENCE
screen.
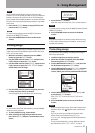
3 Use the F3 (§) and F4 (¶) buttons to select
FootSW L
.
4 Use the DATA wheel to select the function to assign
to the left foot switch pedal.
5 In the same way, use the
Foot SW C
item to set
the function of the center pedal and the
Foot SW
R
item to set the function of the right pedal.
6 After making the settings, press the HOME button
to return to the Home Screen.
Setting Function
PLAY
Same as the unit’s PLAY (Á) button
REC
Same as the unit’s RECORD (–) button
STOP
Same as the unit’s STOP (ª) button
F FWD
Same as the unit’s F FWD () (TO LAST
REC) button
REW
Same as the unit’s REW (Ô) (TO ZERO)
button
PUNCH
Press during playback to PUNCH IN and
during recording to PUNCH OUT
PLY/STP
Press when stopped to start playback, and
press at any other time to stop
CUE
Locate to the last point where playback
started
Default values:
CUE
(L),
PUNCH
(C),
PLY/STP
(R)
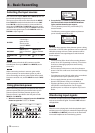
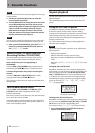
Bouncing tracks
Use this unit’s bounce function to mix already recorded
tracks (1–8) down to one or two tracks.
Multitrack tape recorders can only bounce to an open
track (in other words, they can not record to a track that is
also a source of the mix). For example, tracks 1–7 could be
bounced to track 8, but tracks 1–8 could not be bounced
to track 1. This unit, however, does not have this limitation.
You can bounce tracks 1–8 to mix down to tracks 1 and 2