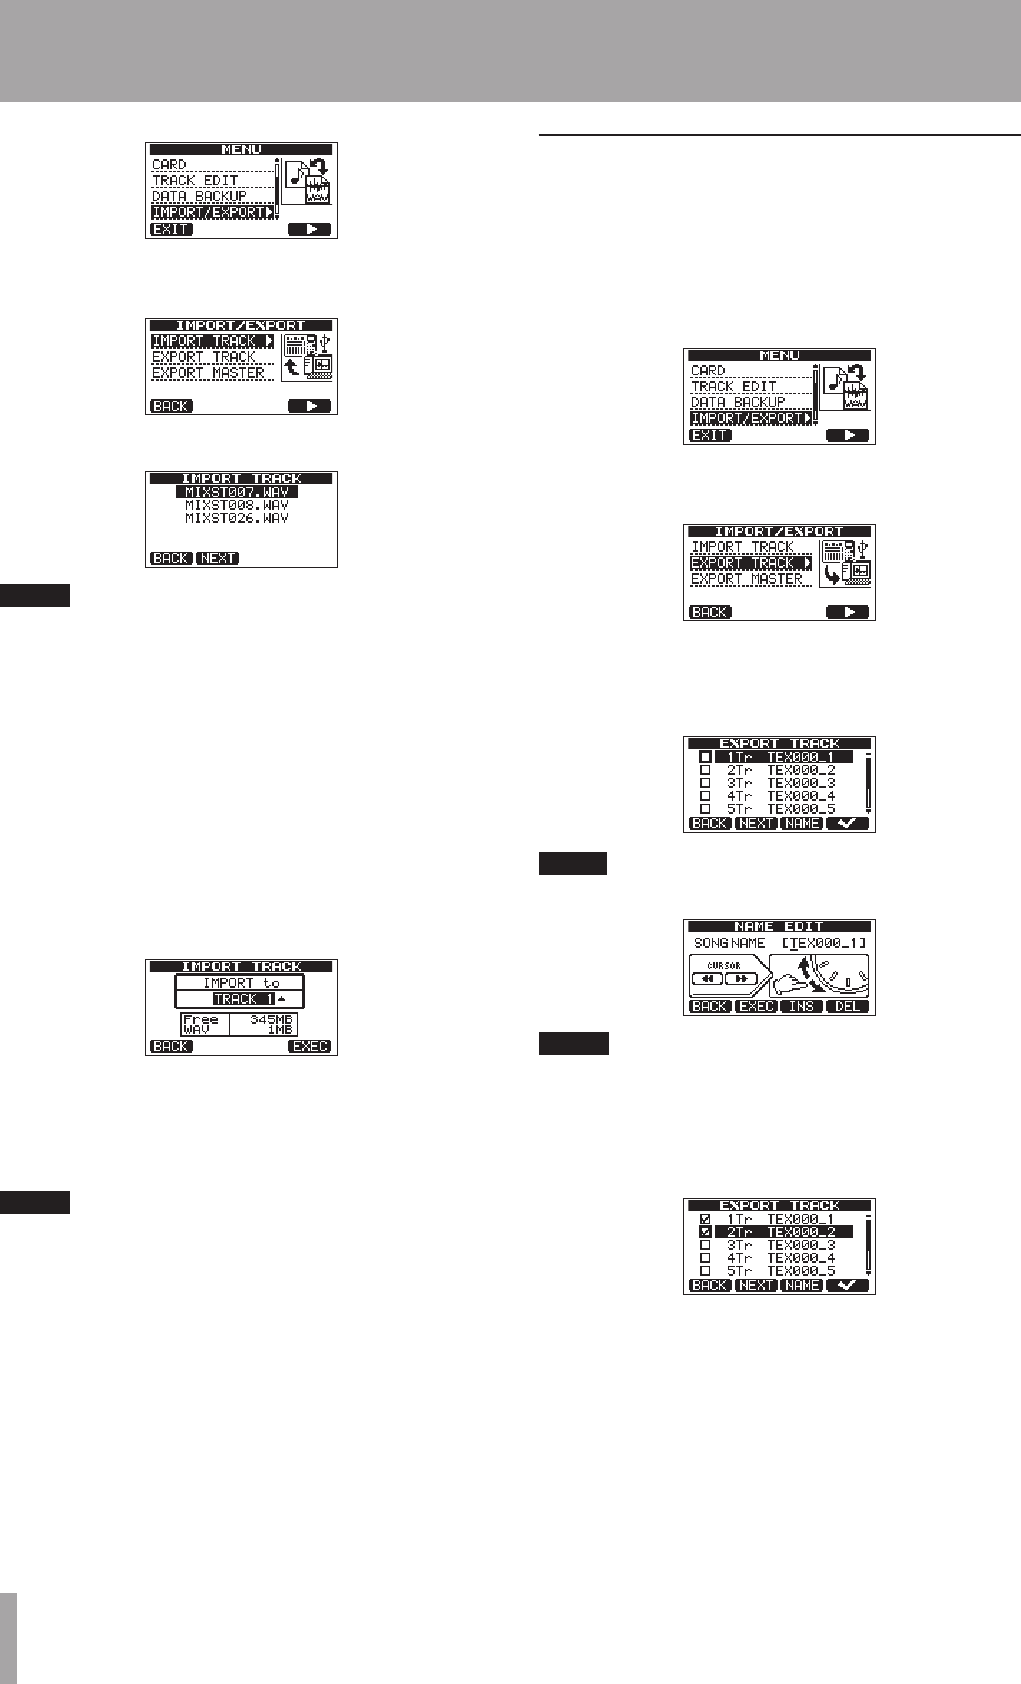
6 Turn the DATA wheel to select
IMPORT TRACK
,
and press the F4 (¥) button.
WAV files on the FAT partition are shown.
NOTE
This unit cannot use WAV files that are a sampling
•
frequency other than 44.1 kHz. Such files are not
displayed even if they have been imported.
If no files that can be imported are on the FAT partition,
a pop-up saying
Import File Not Found
appears.
If the file name is short, spaces appear after the file
•
name on the FAT partition, but those spaces are not
included in the actual file name.
7 Turn the DATA wheel to select the WAV file that you
want to import, and press the F2 (
NEXT
) button.
The amount of open space on the MTR partition and
the size of the selected WAV file appear on the display.
8 Turn the DATA wheel to select the track that you
want to import the WAV file to, and press the F4
(
EXEC
) button.
Importing begins.
NOTE
If there is not enough open space or the file format is
•
wrong, an error message appears.
The track that is the destination for the import must be
•
empty.
This unit reads the file from the FAT partition, and
imports it to the designated track. The beginning of the
file is set at the start of the song (00:00:00:00).
In the same way as other recording tracks, you can
edit the track that has received the imported file (see
“8-Editing tracks” on page 49).
To import a stereo WAV file, an empty track pair is
•
necessary.
9 After importing completes, press HOME to return
to the Home Screen.
Exporting tracks
You can export tracks as 16-bit, 44.1-kHz mono WAV files.
1 When the recorder is stopped, press the MENU
button to open the
MENU
screen.
2 Turn the DATA wheel to select
IMPORT/EXPORT
,
and press the F4 (¥) button to open the
IMPORT/
EXPORT
menu.
3 Turn the DATA wheel to select the
EXPORT
TRACK
item, and press the F4 (¥) button.
Song tracks that have audio recordings are displayed
in a list. The file name makes the source track number
clear.
TIP
Press F3 (
NAME
) to change the file name.
NOTE
Song tracks that do not have audio recordings are not
displayed in the file list.
4 Turn the DATA wheel, to select a track for export,
and press the F4 (✔) button to put a check in the
checkbox.
By checking multiple checkboxes, you can export
more than one track at once. Select a track and
press the F4 (✔) button again to remove the check
from its checkbox.
5 When you finish putting checks next to the tracks
that you want to export, press the F2 (
NEXT
)
button.
The amount or open space on the FAT partition (which
is the destination for the exported tracks) and the total
number of tracks to be exported is shown.
12 – Exchanging Data with a Computer


