


11
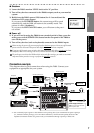
Introduction
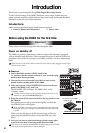
Before using the D888 for
the first time
Main featuresParts and their functionScreens and operations
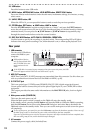
MST/MON
The audio output of the MASTER L,R, MONITOR L,R, and mixer channels 5, 6, 7, and 8 will be
sent from the OUTPUT jacks.
INDIVIDUAL
The audio output of mixer channels 1, 2, 3, 4, 5, 6, 7, and 8 will be sent from the OUTPUT jacks.
17 PHONES jacks and level knobs
You can connect two sets of headphones here and use the respective knob to adjust the volume
level. These are 1/4" stereo phone jacks that carry the same audio as the
MONITOR
jacks.
18 PHANTOM button
The XLR jacks for
INPUT 1–8
provide a +48V phantom power supply for use with condenser
mics. Pressing this button will toggle between the phantom power being on (button lit) or off (but-
ton dark). Always observe caution when using phantom power. In certain cases, you can mix con-
denser microphones and balanced dynamic microphones (usually those with a detachable cable
and an XLR connector) when using phantom power. Unbalanced dynamic microphones must
never be connected to the XLR inputs when phantom power is on. In most case, unbalanced
dynamic microphones are connected to the 1/4” inputs, avoiding this issue.
Phantom power will not be supplied to INPUT jacks to which a TRS phone plug is connected.
If a condenser mic is connected or disconnected while the PHANTOM button is on, damage to your equipment
may occur. For this reason, always turn the phantom power switch off before connecting or disconnecting a con-
denser mic.
If the PHANTOM button is on, you must never connect any device other than a condenser mic. Doing so may
damage your equipment.
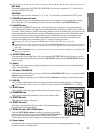
19 OUTPUT ASSIGN button
This selects the audio signals that will be sent from the
OUTPUT (16)
jacks. Each time you press
this button, the setting will alternate between
MST/MON
(button lit) and
INDIVIDUAL
(button
dark) (
→
p.24).
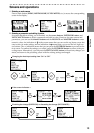
20 Display
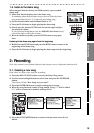
This shows the song name, recording or playback volume (level meters), time information (loca-
tions), and parameters.
21 ON button, STANDBY LED
This button turns the D888’s power on/off. When the
STANDBY LED
is lit, you can press the
ON
button
to turn on the power.
When the D888 is operating, you can hold down the
ON button
to display the shutdown screen.
22 HDD LED
This will light when the hard drive is being accessed during recording, playback, or editing, etc.
Never power-off the D888 or subject it to vibration or physical shock while the HDD LED is lit or blinking.
23 EFFECT selector
This is used to select the program that the effect processor will use.
24 PARAMETER knob
This is used to adjust the parameter values of the selected effect.
25 EFFECT RTN knob
This adjusts the depth of the effect.
26 EFFECT ON button
Each time you press this button, the effect will alternate between on
(button lit) and off (button dark).
27 ENTER/OK button, EXIT/CANCEL button
Press the
ENTER/OK button
to confirm or execute an operation
and proceed to the next screen. Press the
EXIT/CANCEL button
to
halt or cancel an operation and return to the previous screen.
These buttons are also used in response to messages that appear in the screen.
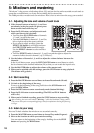
28 Cursor buttons
Use these buttons to perform operations in the screen, such as selecting parameters, moving
between screens, or editing values.
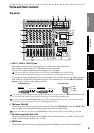
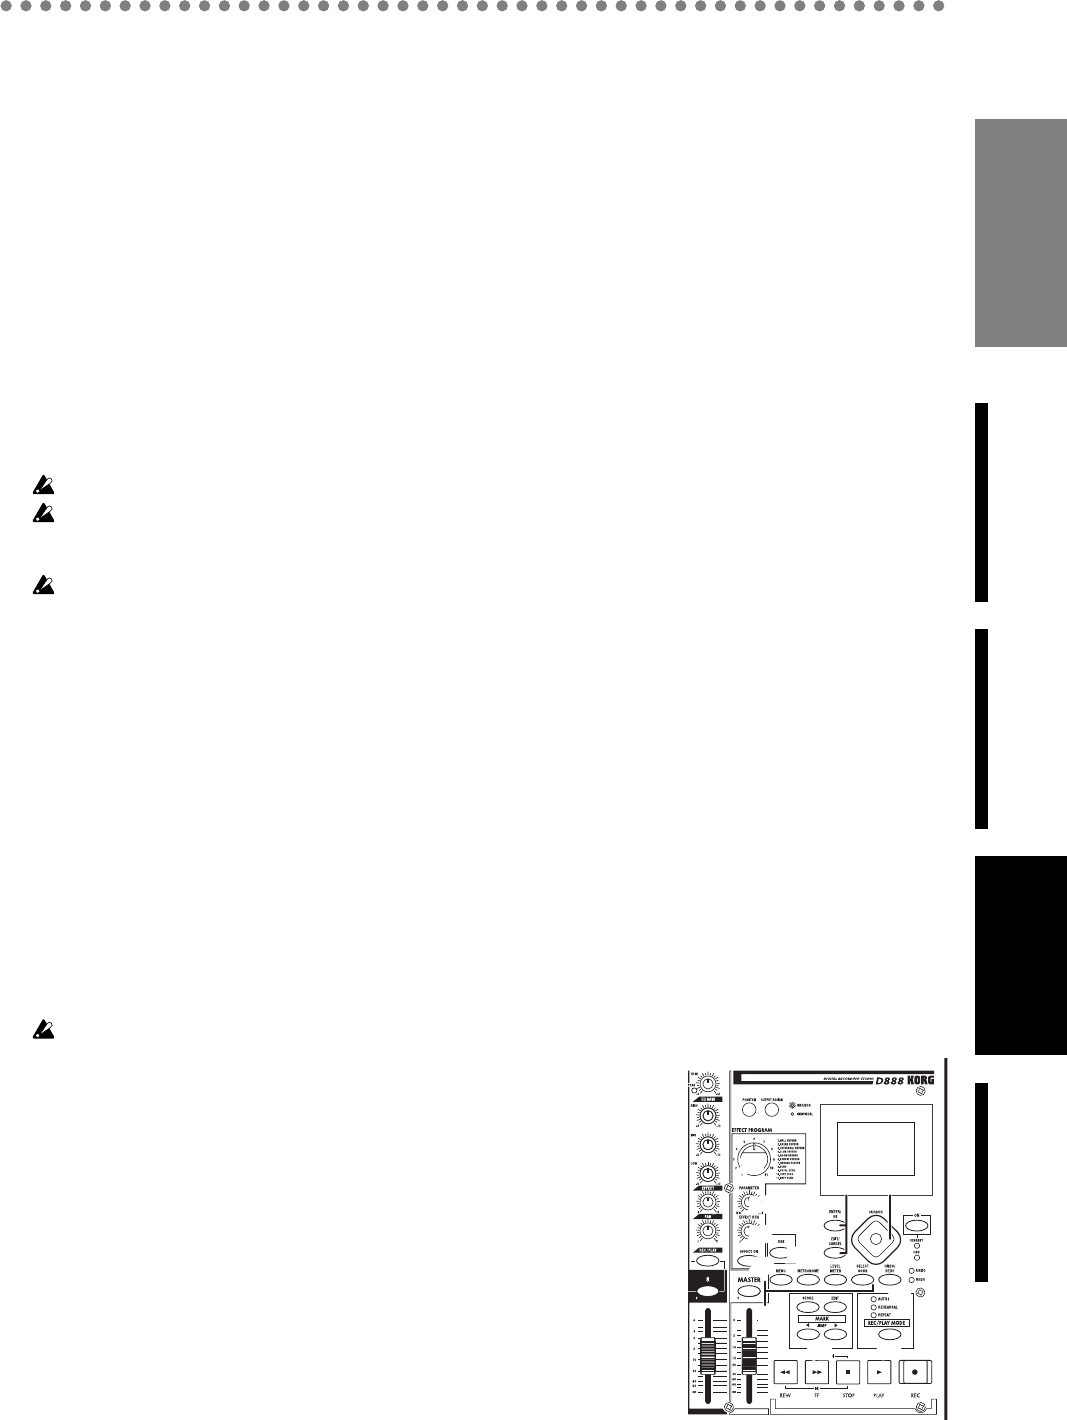
28
27
23
24
25
26
29
30
31
32
33
Parts and their function