


16
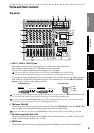
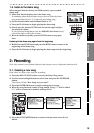
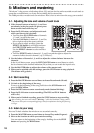
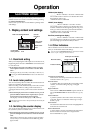
2-2. Connecting your input device
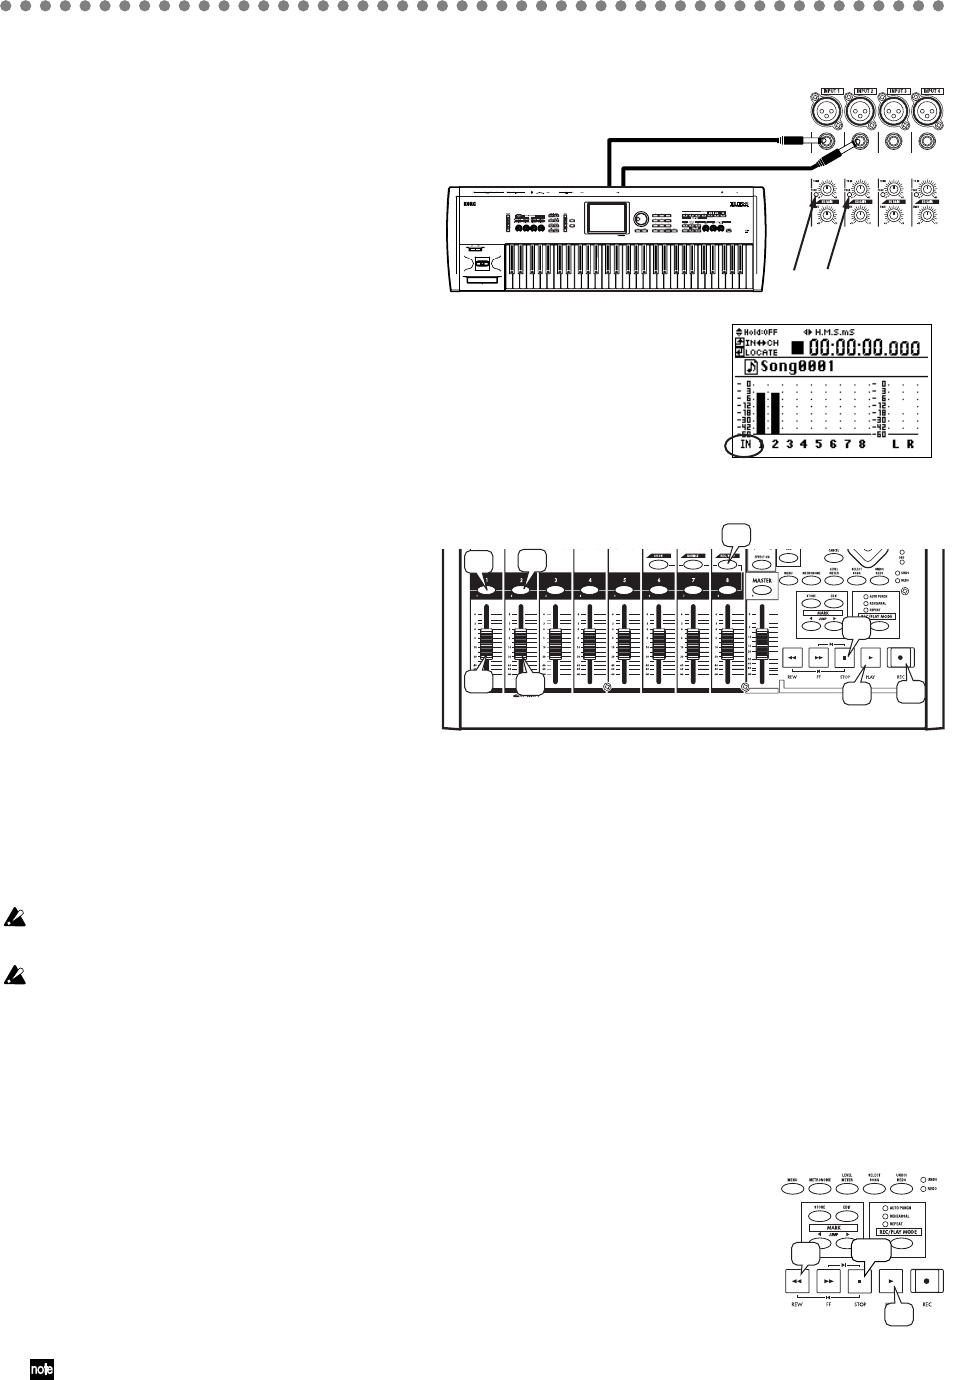
Next, we’ll connect the L and R outputs of
your keyboard to channels 1 and 2.
1) Connect output L of your keyboard
to INPUT 1, and output R to INPUT
2.
2) Turn the TRIM knob to adjust the
level so that the PEAK LEDs light
when you play most strongly.
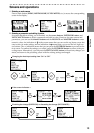
In the Level Meter screen, press the
EXIT/CANCEL button several times to switch the
level meters so that they show the inputs (IN), and
check the input level.
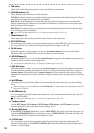
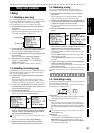
2-3. Start recording
1) Press the REC/PLAY button (it will
light).
2) Press the channel buttons of tracks 1
and 2 several times to put these tracks
in record mode (lit red).
3) Gradually raise the faders of tracks 1
and 2, and check the volume of your
monitor speakers (or headphones).
4) Press the REC button to enter record-ready mode (the button will light).
5) Press the PLAY button to start recording. (The REC and PLAY buttons will light.)
6) Begin performing.
7) When you’re finished performing, press the STOP button to stop recording (the
button will go dark).
The
D888
’s recording level is set “pre-fader”; meaning the record levels are adjusted only by the
TRIM knobs. The channel faders only adjust the audio level to the master and monitor outputs.
After recording, the screen will indicate “Working...” while the Undo data is being created. This
process will require a correspondingly longer time for completion as the length of the song is longer.
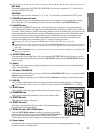
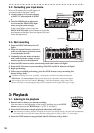
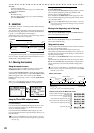
3: Playback
3-1. Listening to the playback
1) Rewind back to where you started recording.
You can return to the beginning of the song by holding down the STOP
button and pressing the REW button (→p.22 “2. Location”).
2) Press the PLAY button to begin playback (the button will light).
Since automatic switching between record/play is turned on (the factory setting), the tracks will automatically
be in Play mode even if you don’t change the track settings after recording (→p.31 “2-2. Auto input”).
3) Press the STOP button to stop playback (the PLAY button will go dark).
OUTPUT L
OUTPUT R
Peak LEDs
Input indication
4
3
1
2
2
3
5
7
2
1, 3
1