


28
If the bounce-destination already contains recorded data, it
will be overwritten and replaced by the newly recorded data;
i.e., you will lose the previously recorded data.
3) Adjust the EQ and pan of each playback track.
Press the PLAY button to play back. Use the track 1–8
EQ GAIN knobs to adjust the tone, and the PAN knobs
to adjust the stereo position.
4) Adjust the playback and recording levels.
Use the channel faders to adjust the playback levels.
You can press the LEVEL METER button and watch the
channel level (CH) corresponding to each fader.
5) Use the MASTER fader to adjust the recording level.
When you’ve finished making adjustments, press the
STOP button.
6) Move the current location to the point at which you
want to start recording.
You can move to the beginning of the song by holding
down the STOP button and pressing the REW button.
7) Put the recorder in record-ready mode.
Press the REC button (it will blink).
8) Begin recording.
Press the PLAY button. (The REC and PLAY buttons
will light.)
Playback will begin.
9) Stop recording.
When playback ends, press the STOP button. (The REC
and PLAY buttons will go dark.) Return to the location
at which you began recording, and play back to verify
that recording occurred correctly.
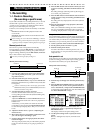
Combining multiple tracks into one track (monaural)
1) Make sure that you’ve selected the desired virtual
track for each playback track you want to bounce.
If there are any tracks you don’t want to include, lower their
faders or press the CH ON button and then press the corre-
sponding channel buttons to mute (silence) those tracks.
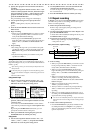
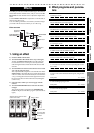
2) Press the BOUNCE button, and then press a channel
button to specify the bounce-destination.
The channel button you selected as the bounce-destina-
tion will blink red.
As the bounce-destination, you should select an unrecorded
channel track or an unrecorded virtual track of a track that’s
not playing back. If you select an already-recorded track or a
virtual track of that track, the existing data will be overwrit-
ten, so the data originally recorded in that channel track will
be lost.
3) Adjust the EQ of each playback track.
Press the PLAY button to play back. Use the track 1–8
EQ GAIN knobs to adjust the tone.
4) Perform steps 4) through 9) of the preceding section
“Combining multiple tracks into two tracks (stereo)”.
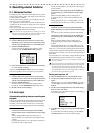
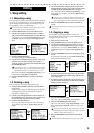
2-4. Recording the master track
When you’re finished recording, you can apply EQ and an ef-
fect to the playback to adjust the final overall balance, and
then create a master track.
Each master track you create is preserved as a stereo WAV
file. The files will automatically be named MST0001.WAV,
MST0002.WAV, MST0003.WAV, and so on, in order of their
creation.
The WAV file that was most recently recorded in this way will al-
ways be selected for the master track, so if you want to hear the
WAV file of a master track you recorded earlier, you’ll need to use
the operation described on p.39 “Selecting a master track file”.
A master track WAV file you create in this way can be selected for
a channel track and played back (→p.39).
1) Make sure that you’ve selected the desired virtual
track for each playback track 1–8 you want to record to
the master track.
2) Select the desired playback tracks.
Press the CH ON button, and press the channel button
for each track you don’t want to play, making the chan-
nel button go dark.
3) Press the MASTER button several times to make it
light red.
The channel buttons of the playback tracks will be
green.
4) Perform steps 4) and following of “2-3. Bounce record-
ing”.
You can also use the effect while you record the master track
(→p.33).