


29
Operation
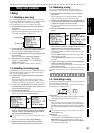
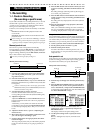
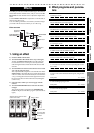
Level Meter
screen
Song and
Location
MixerRecording
(basic)
Recording
(advanced)
PlaybackEffectsEditingOther
1. Re-recording
1-1. Punch-in Recording
(Re-recording a specific area)
If you made a mistake in a recorded performance, or are not
satisfied with a portion of the performance, you can use
“punch-in/out” recording to fix just that portion without
having to record the entire part over again.
Punch-in/out recording can be done manually or automati-
cally.
Punch-in: Switches from the playback mode to the
record mode.
Punch-out: Switches from the record mode back to the
playback mode.
After recording, the screen will indicate “Working...” while the
Undo data is being created. This process will require a correspond-
ingly longer time for completion as the length of the song is longer.
Manual punch-in/out
Here’s how to punch-in and punch-out manually.
During playback, press the REC button or a foot switch (we
recommend the separately sold Korg PS-1 pedal switch) to
begin recording, and then press the REC button, PLAY but-
ton, or foot switch to stop recording.
You can’t punch-in again after punching-out.
1) Connect your audio source device to the channel that
you want to partially re-record (→p.24 “1-1. Connect-
ing audio sources”).
2) Select the tracks that you want to play back.
Press the REC/PLAY button, and press the channel but-
tons of the desired tracks to put them in Play mode (but-
ton lit green).
If there is a track that you don’t want to play, press the CH
ON button and then press the channel button for that track
to mute it (the button will go dark).
3) Arm the track that you want to re-record.
Press the channel button of the track you want to re-
record, putting it in Record mode (button blinking red).
4) Adjust the input level.
Adjust the TRIM knob so that the PEAK LED does not
light even when the audio source device is played at its
loudest level.
At this time, you may find it convenient to select the
Level Meter screen and press the EXIT/CANCEL button
to select the input display (IN) so that you can view the
levels.
5) Adjust the monitor level (→p.24 “1-3. Adjusting the
monitor level”).
6) Move the location to a point slightly earlier than where
you want to begin re-recording (→p.22).
7) Press the PLAY button to begin playback. (The PLAY
button will light.)
The song will play back, and you will hear the playback
tracks as well as the track you’re going to partially re-
record.
8) Press the REC button at the location at which you want
to start re-recording. (The REC and PLAY buttons will
light.)
Recording will begin (manual punch-in), allowing you
to re-record your performance.
9) Press the REC button or PLAY button at the location at
which you want to stop re-recording. (The REC button
will go dark.)
Recording will end, and playback will resume (manual
punch-out).
10) Press the STOP button to stop playback. (The PLAY
button will go dark.)
After you’ve finished recording, move the current loca-
tion to a point slightly earlier than where you began
recording, and play back to verify the recorded content.
Using a foot switch for manual punch-in/out
You can alternately punch-in or punch-out by pressing a foot
switch (we recommend the Korg PS-1 pedal switch). This is
convenient when your hands are occupied with playing your
instrument, or if you need to punch-in/out from a distance.
1) Connect your foot switch to the FOOT SWITCH jack.
2) Set the polarity of the foot switch (→p.40).
3) Perform manual punch-in/out.
Proceed as described in “Manual punch-in/out”. In
steps 8) and 9), you can press the foot switch to punch-in
and punch-out.
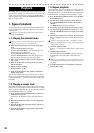
Auto punch-in/out
Auto punch-in/out recording is a function that automatical-
ly starts recording (punch-in) and stops recording (punch-
out) at the locations that you specify beforehand.
1) Perform steps 1) through 5) of “Manual punch-in/out,”
above.
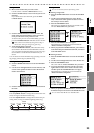
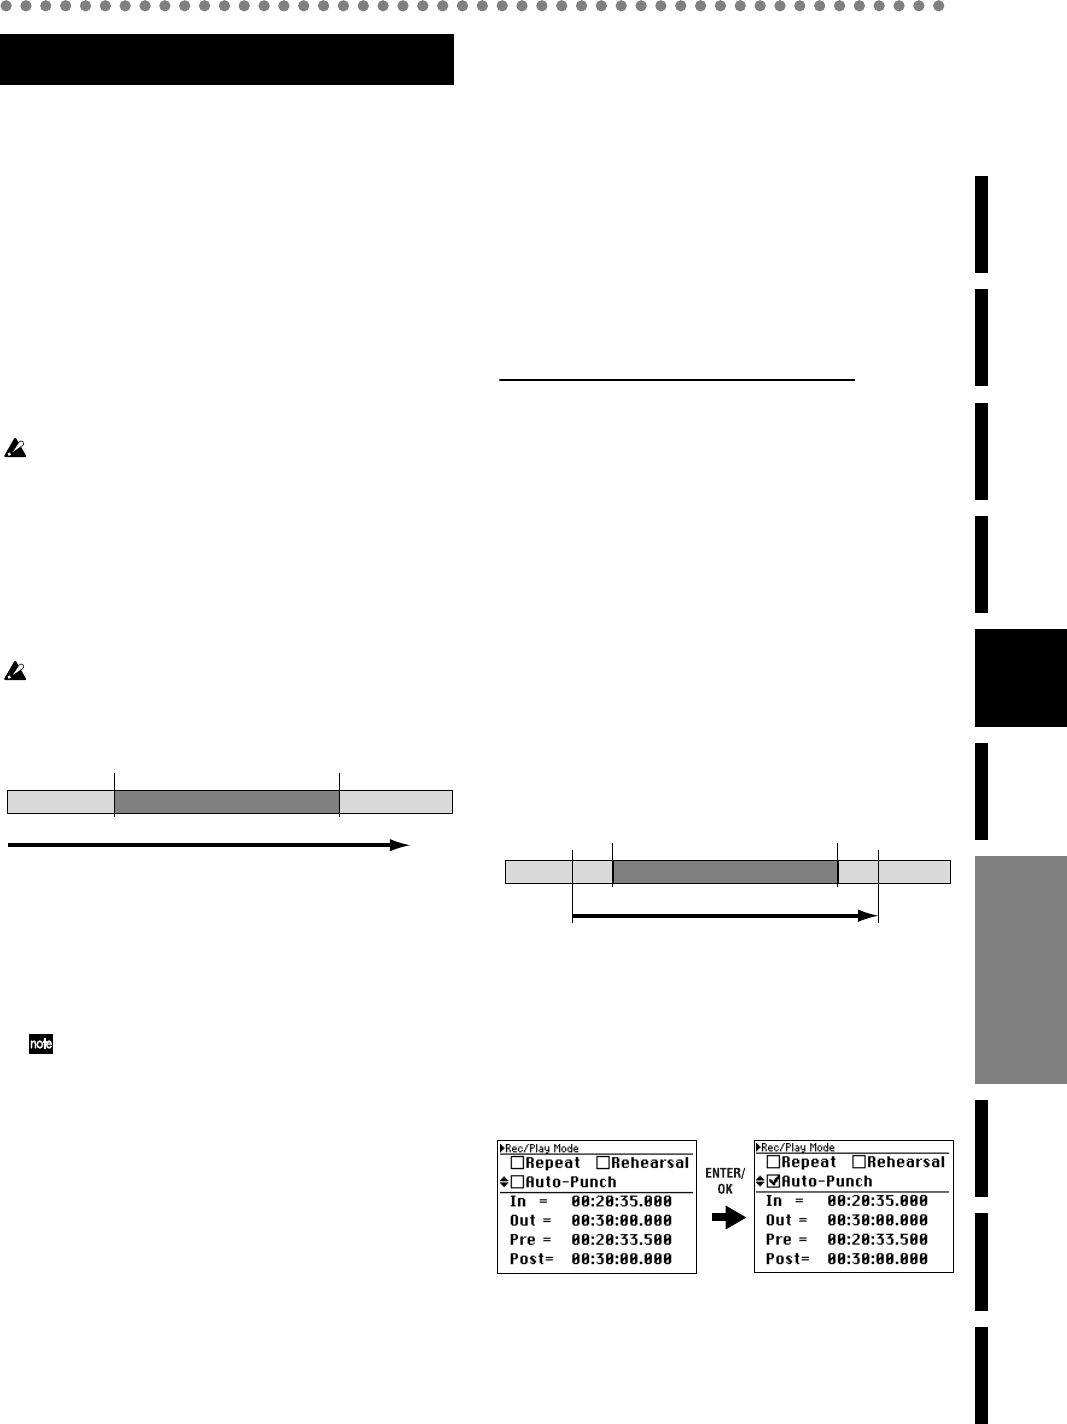
2) Press the REC/PLAY MODE button to access the Rec/
Play Mode screen, use the cursor up/down buttons to
select “Auto-Punch,” and press the ENTER/OK button.
A check mark will be added to the Auto-Punch field, and
the AUTO PUNCH LED will light.
3) Use the cursor up/down buttons to select “In= ...”
(punch-in) or “Out=...” (punch-out), and press the
ENTER/OK button.
The display will show the point setting screen.
4) Use the point setting screen to specify the locate
points.
Refer to “Setting the In, Out, Pre, and Post locate
points”.
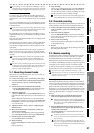
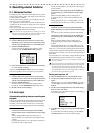
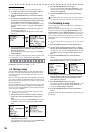
Recording (advanced)
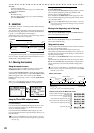
Stop recording
Start recording
Manual punch-in/out recording
Punch-in
Punch-out
Playback PlaybackRecording
Punch-in
Punch-out
In
Out
Post
Pre
Start playback
Stop playback
Auto punch-in/out recording
Stop recordingStart recording
Playback Playback
Recording
Recording
(advanced)