52
5. Recording other tracks
1 As described in “Recording the bass track,” use
“Track Select” to select Track03: Elec. Piano, and
record about 16 measures.
6. Step recording
The TRITON STUDIO provides two main methods of
recording a song. The first is realtime recording, in which
your performance on the keyboard and operation of the
joystick and other controllers are recorded in realtime.
This is how we recorded the bass and electric piano tracks
in the preceding sections.
The second method is step recording, in which you can
specify the timing, note length, and velocity of each note.
in the LCD screen, and use the keyboard to input the pitch
of the note. Only the note-on/off data is recorded. Step
recording is suitable when you want to create a distinctive
mechanical feel, or when you want to record phrases that
would be impossible or too rapid to play “live.”
Rapid phrases can also be recorded in realtime by
temporarily slowing down the sequencer tempo.
Here’s the procedure for step recording.
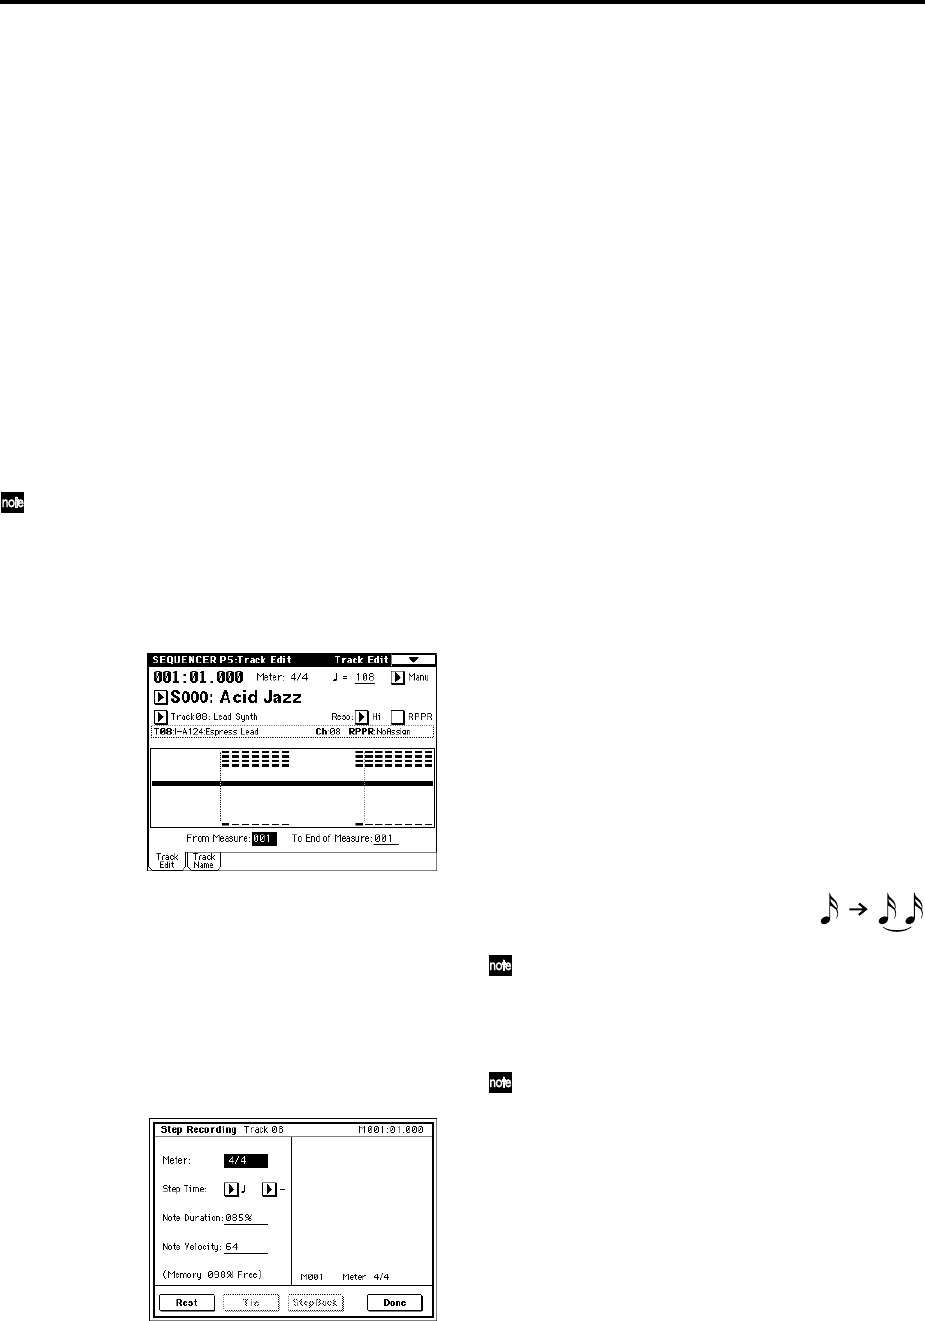
1 Press the [MENU] key to access the Jump menu, and
press P5: Track Edit.
The P5: Track Edit, Track Edit page will appear.
2 Set “Track Select” to Track 08: Lead Synth.
For this example we will input a lead performance
using an analog synthesizer sound.
3 Set “From Measure” to 001.
With this setting, step recording will begin from mea-
sure 1.
4 Press the page menu button to access the page menu,
and press “Step Recording.”
A dialog box will appear.
5 Set “Step Time” to specify the basic timing value at
which you will input notes and rests.
In the popup menu at left, you can specify a value in
the range of (whole note)– (32nd note). For this
example, select (16th note).
If you want to input triplets or dotted notes, use the
popup menu at the right to select “3” for triplets, or “.”
for dotted notes. Select “–” if you want to use the
unmodified length of the note that is selected at the
left.
“Note Duration” indicates the length that the note
itself will sound. Smaller values will produce a staccato
note, and larger values will produce a legato note. For
this example, leave this setting unchanged.
“Note Velocity” is the velocity (playing strength), and
larger values will produce a louder volume. Set this to
about 090.
If you select Key for this parameter, the velocity with
which you actually play the keyboard will be input.
6 On the keyboard, press and then release the first note
that you want to input.
The data you input will appear in the LCD screen as
numerical values. In the upper right, M001 01.000 will
change to M001 01.048. The next note you input will be
placed at this location.
Continue pressing notes to input a melody.
You can also delete notes or rests, or input rests or ties.
• To delete a note or rest that you input, press the Step
Back button. The previously-input note will be
deleted.
• To input a rest, press the Rest button. This will input a
rest of the “Step Time” value.
• To modify the length of a note, you can modify the
“Step time” value before you input the note. However
if you want to extend the length (tie) of the note,
press the Tie button. At this time, the previously-input
note will be extended by the length of “Step time.”
If you want to check the note that you will input
next, press the [PAUSE] key. In this state, playing a
key will produce sound, but will not input a note.
Press the [PAUSE] key once again to cancel the
record-pause state, and resume input.
To input a chord, simultaneously press the notes of
the desired chord. Even if you do not press them
simultaneously, notes that were pressed before you
took your hand off of all keys will be input at the
same location.
However in the above example, the program of track
8 will not sound chords. This is because the program
is set to mono mode, and the song follows the setting
of the program.
7 When you are finished inputting, press the Done but-
ton.
8 Press the SEQUENCER [START/STOP] key to play
back.
