


11
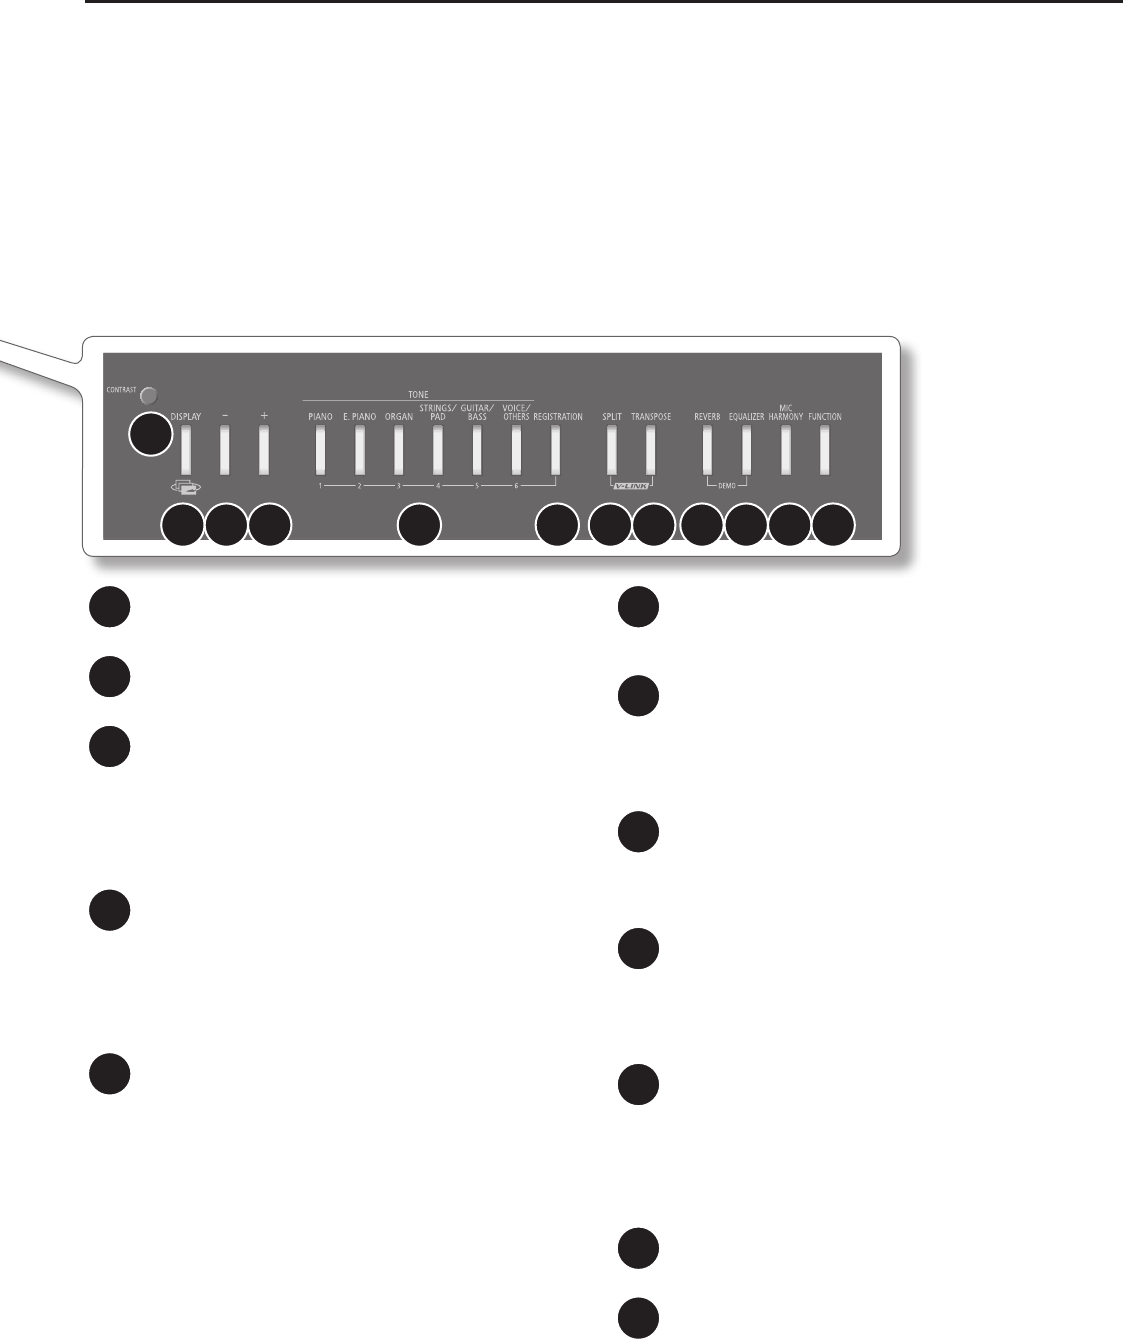
Panel Descriptions
15
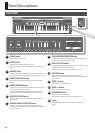
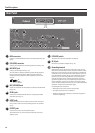
[CONTRAST] knob
Adjusts the brightness of the screen (p. 18).
16
[DISPLAY] button
Returns you to the previous screen, or cancels an operation.
17
[-] button
Selects sounds or edits a function’s setting.
By pressing the [-] button and [+] button simultaneously, you can
reset the setting to its default value.
If the song select screen is shown and a song is playing, you can
rewind by holding down this button.
18
[+] button
Selects sounds or edits a function’s setting.
By pressing the [-] button and [+] button simultaneously, you can
reset the setting to its default value.
If the song select screen is shown and a song is playing, you can
fast-forward by holding down this button.
19
TONE buttons
Select the type (tone group) of sound to play on the keyboard (p. 20).
If the [REGISTRATION] button is lit, TONE buttons [1]–[6] operate as
registration select buttons (p. 49).
In some screens, pressing the [PIANO] button will conrm an
operation or take you to the next screen. In such cases, the [PIANO]
button will blink.
20
[REGISTRATION] button
Stores the tone selection and Session Partner settings as a
“registration” (p. 49).
21
[SPLIT] button
Allows you to play dierent tones in the left and right zones of the
keyboard (p. 27).
By holding down this button and pressing the [TRANSPOSE]
button, you can turn the V-LINK function on/o (p. 86).
22
[TRANSPOSE] button
Transposes the pitch of the keyboard or song (p. 30).
By holding down this button and pressing the [SPLIT] button, you
can turn the V-LINK function on/o (p. 86).
23
[REVERB] button
Applies reverberation to the sound, creating the impression that
you are performing in a concert hall (p. 24).
By holding down this button and pressing the [EQUALIZER] button,
you can listen to the demo songs (p. 19).
24
[EQUALIZER] button
Turns the equalizer on/o (p. 25).
You can use the equalizer to adjust the tone quality by boosting or
cutting just the low or high range.
By holding down this button and pressing the [REVERB] button, you
can listen to the demo songs (p. 19).
25
[MIC HARMONY] button
This button switches the Mic Harmony on/o (p. 76).
26
[FUNCTION] button
Takes you to Function mode, where you can modify sound settings
and functions (p. 64).
By holding down the [FUNCTION] button for several seconds, you
can disable the panel buttons (Panel Lock) so that they will not
operate (p. 40).
15
16 17 18 19 20 21 22 23 24 25 26