


IMPORTANT SAFETY INSTRUCTIONS
TASCAM DP-02/DP-02CF 11
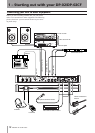
1 – Starting out with your DP-02/DP-02CF
Navigation
The unit uses 4 menu systems (MENU, SONG, TRACK
EDIT) (and also CD on the DP-02 only) which allow you to
make settings, and perform many operations. This section
explains how to use the menu system and to check and
make settings.
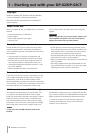
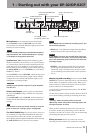
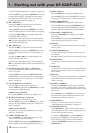
Here the TRACK EDIT system is explained as an example.
1. Press the TRACK EDIT key to bring up the opening
menu screen:
2. Use the DATA dial or the cursor (§/¶) keys to scroll
up and down through the list of top-level menus.
Here the CLONE TRACK action is highlighted.
An inverted triangle appears when the menu is
highlighted.
T I P
The DATA dial icon is also shown right at the bottom
which indicating the dial can be used to select items.
At the bottom right of all menu screens is a symbol
showing whether there are more menus below the
current list (¶), above the current list (§), or above
and below the current list ( ).
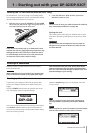
3. Press the ¥ cursor key or YES/ENTER key to enter
the selected menu. The screen shows as below:
4. Use the cursor (§/¶) keys to highlight the value of
the item shown on the left.
Rotate the DATA dial to change the value.
T I P
To go up a level in the menu “tree”, press the NO/EXIT
key or the ˙ key.
Some screens show a number of lists to select, or confirm
the action. In these cases, you should use the cursor (§/¶
) keys or the DATA dial to highlight and select the item, or
use the YES/ENTER key to enter the action.
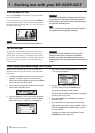
If you want to adjust the contrast of the display:
1. Press the MENU key and select the PREFERENCE
action using the cursor (¶/§) keys or the DATA dial.
2. Press the YES/ENTER or ¥ cursor key to bring up
the PREFERENCE screen.
3. Select the value shown to the right of the CONTRAST
preference using the cursor (¶/§) keys, and rotate
the DATA dial to adjust the value 1 to 10. The
contrast of the display changes equally as the value
is changing.
4. Press NO/EXIT to go back to the MENU screen.
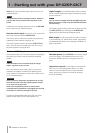
The SHIFT key modifies the behavior of a number of
different keys. When you press and hold it while pressing
another key, the other key takes on the function shown in
the label shown below the key (black-on-orange).
The SHIFT key
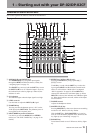
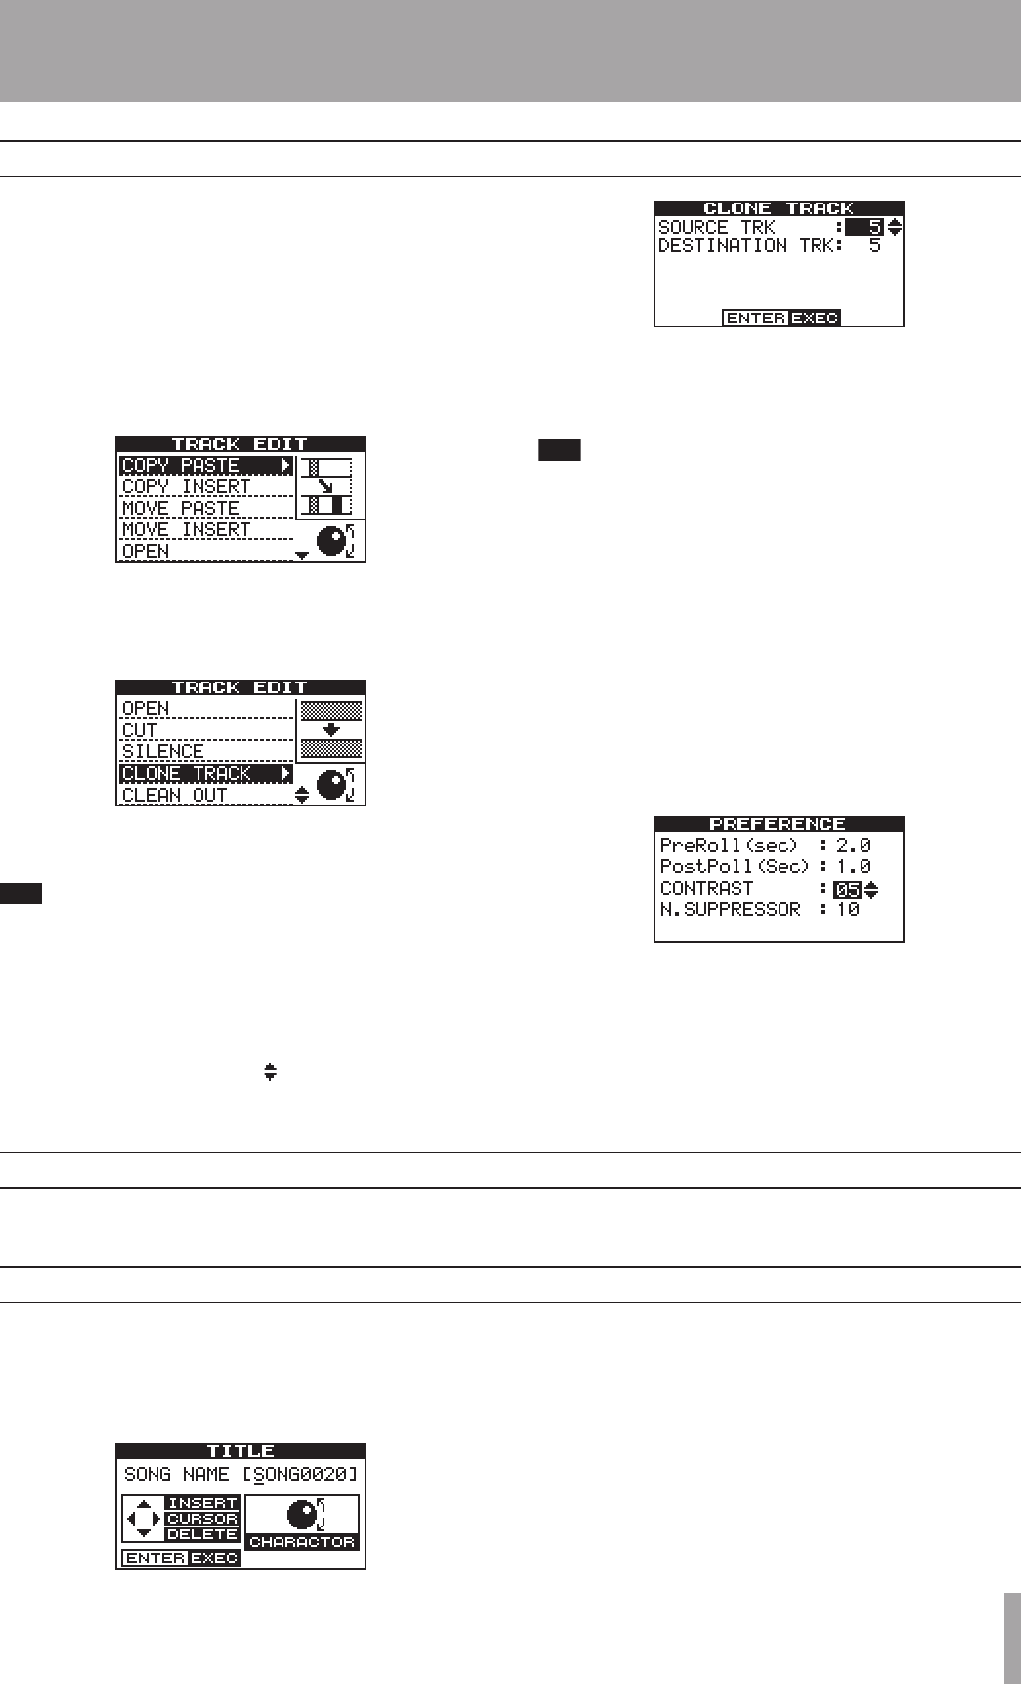
You can give titles to your songs, exported tracks, etc.
Here’s how you do it:
Press and hold the SHIFT key and press the TITLE key to
bring up the screen like the one below:
Use the DATA dial to change the letter above the under-
lined cursor. You can choose from common punctuation
marks, numbers, capital (UPPERCASE) letters, and small
(lowercase) letters.
Use the § cursor key to insert a blank space at the cursor
position, and use the ¶ cursor key to delete the character.
When you have finished entering the name, press YES/
ENTER. The song, with its new name, is stored to record-
ing media.
Titling