


IMPORTANT SAFETY INSTRUCTIONS
TASCAM DP-02/DP-02CF 13
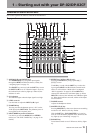
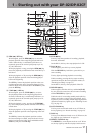
1 – Starting out with your DP-02/DP-02CF
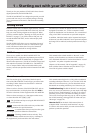
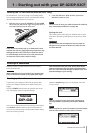
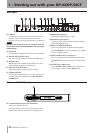
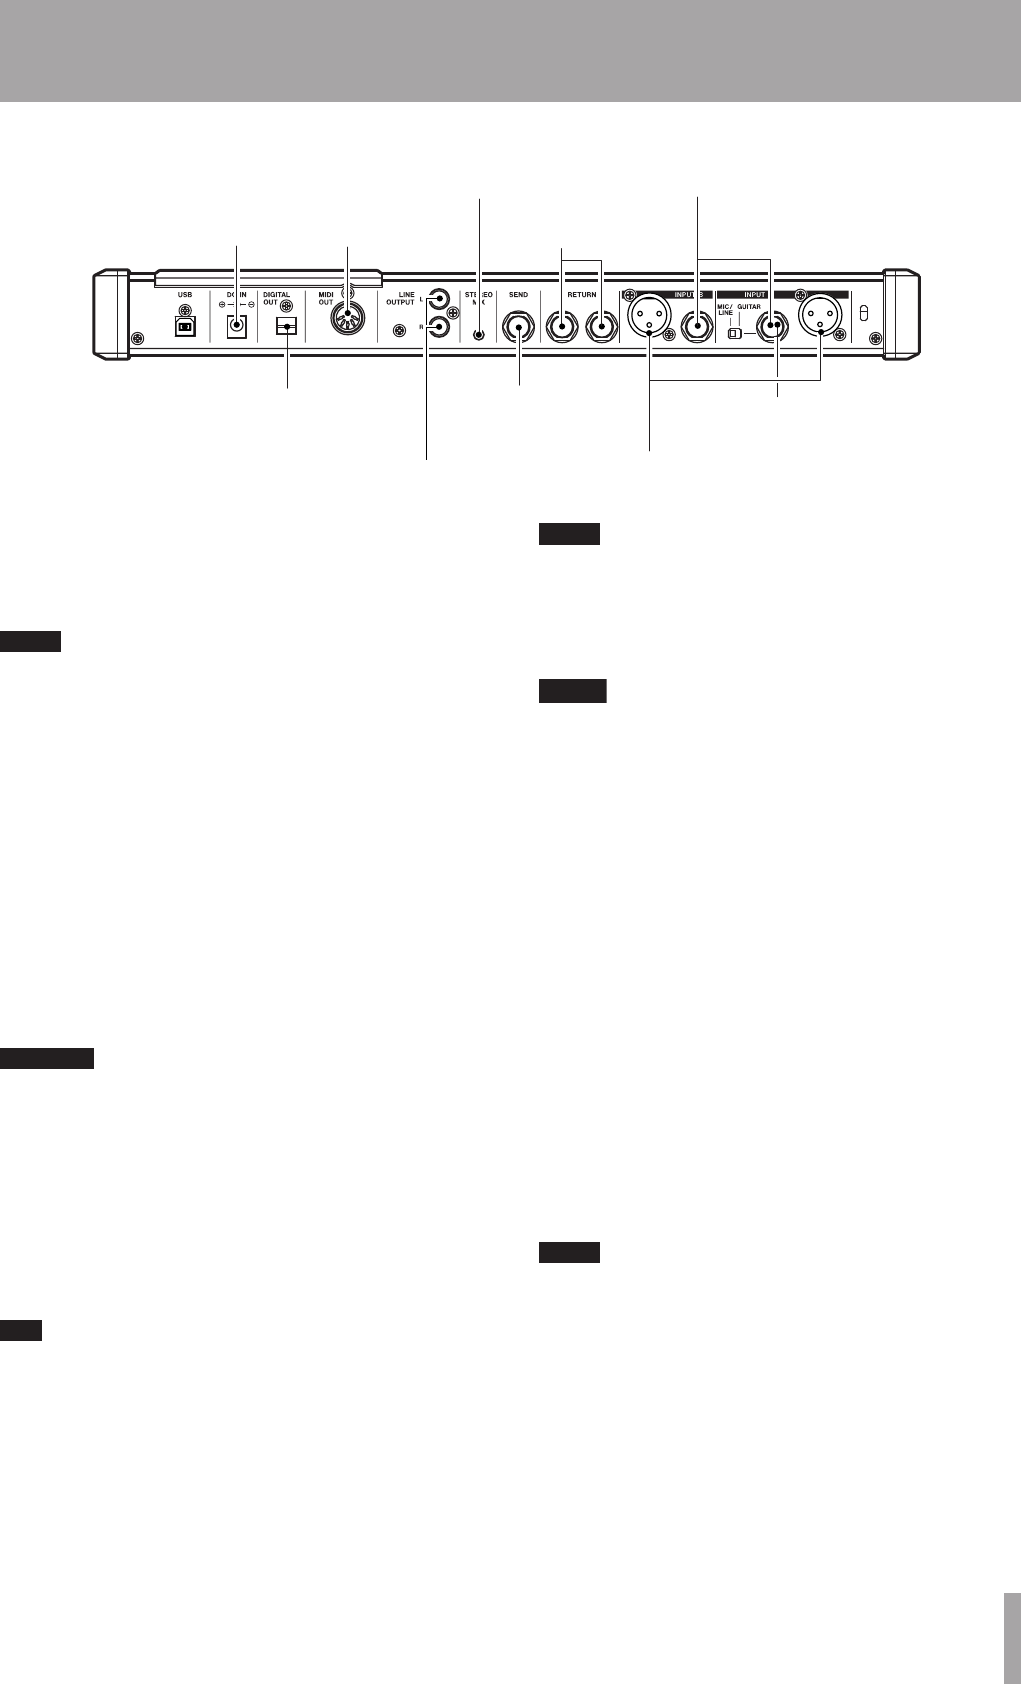
DC input
To MIDI sequencer,
drum machine, etc.
From stereo effects
unit outputs
Synths, pre-amps etc.
fo here
Guitars, basses etc. go here
From submixer/MIDI tone
generator, etc.
To analog recorder,
monitoring system, etc.
To effects unit
To digital
recorder, etc.
Microphones go here
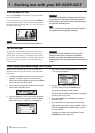
Microphones are connected to the rear panel inputs.
Set the GUITAR switches to MIC/LINE. Turn the input
level controls so that the OL indicators light up only in the
loudest part of the recording.
NOTE
The unit includes phantom-powered XLR microphone
input connectors. See “Balanced XLR inputs” on page
14 for details of using these connectors.
Synthesizers, etc. including drum machines, guitar
amplifier simulators, active basses, etc. as well as CD play-
ers, cassette decks, and so on can be connected to the rear
panel input jacks using standard 1/4” mono plugs (unbal-
anced). When you are recording a stereo source, make sure
the INPUT MODE key is set to STEREO (see “The INPUT
MODE key” below).
Set the GUITAR switch to MIC/LINE. Adjust the input level
controls and use the instrument’s output volume controls
to adjust the level so that the OL indicators light up only
during the very loudest passages.
WARNING
NEVER plug the speaker outputs of a guitar amplifier
into the unit.
Guitars and basses (passive types) are connected to
the rear panel INPUT A using a standard 1/4” mono plug
(unbalanced).
Set the MIC/LINE switch to GUITAR. Turn the input level
control until the OL indicators barely light on the loudest
passages.
T I P
Use the built-in tuner (on the DP- 02 only) to tune the
guitar or bass (see “Tuning a guitar” on page 58).
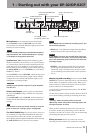
The INPUT MODE key You will use this key when you
are recording from input A and input B at the same time.
This top panel key affects the way that you monitor the
input signals, both through the headphones and/or through
the LINE OUTPUT jacks. There are two positions:
NOTE
INPUT MODE does not affect the recording at all—just
the monitoring process.
MONO x 2—The signals from input A and input B are
both sent to the center of the monitoring “stage”.
NOTE
In the MONO X 2 mode, the A and B input signals are
added together in the center, and you may hear distor-
tion in the monitoring system This does not affect the
recording, though.
STEREO—The signal from input A is sent to the left,
and the signal from input B is sent to the right of the
monitoring “stage” forming a stereo pair for use when
you are recording stereo instruments such as synthesiz-
ers, etc.
Monitoring and recording Use the rear panel LINE
OUTPUT RCA jacks to connect the unit to your monitoring
system (that is, an amplifier/ speaker setup). When you’re
ready to make your final stereo master, you can use these
jacks to connect to an analog recorder.
A typical setup would connect these jacks to the AUX IN
of a stereo system.
Use the stereo system’s selector switch to listen to the AUX
source when tracking, bouncing or mastering on the unit.
NOTE
“Tracking” means recording tracks on the unit.
“Mastering” means taking these recording tracks and
mixing them down to stereo.
When you have mastered the stereo track and you want
to record it, set the stereo monitoring system so that the
recorder is set to the AUX source. Now you are monitoring
(or listening) through your stereo system.
Effect processor When you want to use an exter-
nal effect processor with the unit, connect the rear panel
•
•