30
Basic Operation
Additional Options for Creating Waypoints
Waypoints may also be created by manually entering position coordinates through the Points Tab of
the Main Menu. This method can be useful for creating a waypoint at a specifi c latitude/longitude posi-
tion from a chart. You can also manually change the location coordinates in the New Waypoint Page to
create a new waypoint.
To create a waypoint through the Main Menu:
1. Press MENU twice to display the Main Menu.
2. Use the
ARROW KEYPAD to highlight the ‘Points’ from the vertical list of tabs and press MENU.
3. Highlight ‘Create Waypoint’ and press
ENTER/MARK.
To change the any information on the New Waypoint Page, highlight the appropriate fi eld and press
ENTER/MARK. After entering and confi rming your changes, highlight ‘OK’ and press ENTER/MARK.
To create a new waypoint by entering location coordinates:
1. Create a waypoint using your favorite method (discussed in previous sections). The new waypoint is
created with the next available waypoint number and the receiver’s last know position as the default
name and position.
2. Use the
ARROW KEYPAD to highlight the ‘Location’ fi eld and press ENTER/MARK. Use the ARROW
KEYPAD
to enter the desired position coordinates and press ENTER/MARK when fi nished.
To change any of the other information on the New Waypoint Page, highlight the appropriate fi eld
and press
ENTER/MARK. After entering and confi rming your changes, highlight ‘OK’ and press
ENTER/MARK.
Using Waypoints
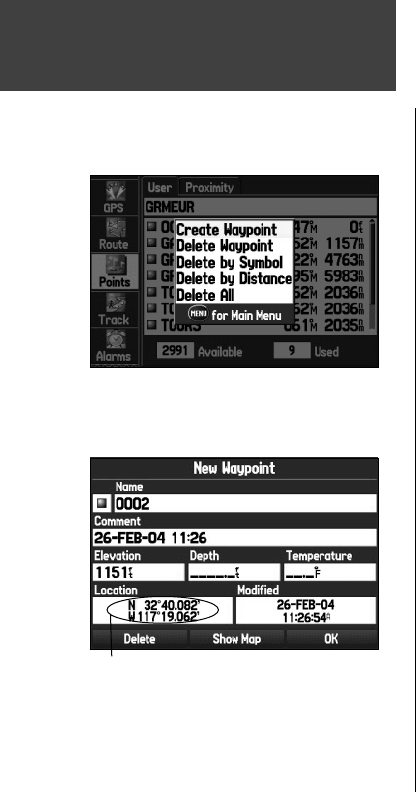
Points Tab Options Menu
Creating a waypoint through the Points Tab of the Main Menu
To change the location of a waypoint, highlight the character
you want to change in the Location fi eld. Press UP or DOWN
on the ARROW KEYPAD to change the character.
190-00335-00_0A.indd 30 4/7/2004, 1:50:28 PM


