Building a Preset
Only elements of the preset highlighted (given focus) are saved as a preset. <Ctrl + A>
highlights all elements within the DSP Configurator.
To build a preset, highlight the desired DSP Configurator elements (gain and processor
blocks, and mix-points) using standard keyboard and mouse actions as follows:
1. Click the desired block to select a single block,
2. <Ctrl + click> to select multiple blocks that are not adjacent,
3. With the first block selected, hold <Shift>, then click the last block in either a vertical
column or horizontal row to select multiple blocks,
4. Click and drag a selection rectangle to select multiple adjacent blocks in either the
vertical or horizontal direction,
5. Go to Tools>Presets>Mark All Items or press <Ctrl + A>. This marks all
elements within the DSP Configurator.
6. To save the selections see Save Preset below.
Save Preset
A preset can be saved in either Emulate or Live mode.
Saving a preset in Emulate mode stores it in the currently open file. The DSPConfigurator
file must then be saved to disk using File menu>Save (recommended), or pushed to the
device after a connection is established. This differs from Live mode where a created
preset is saved in real-time to the device and becomes part of the configuration file.
To save a preset use the following instructions:
1. Highlight the desired preset blocks using the previous instructions.
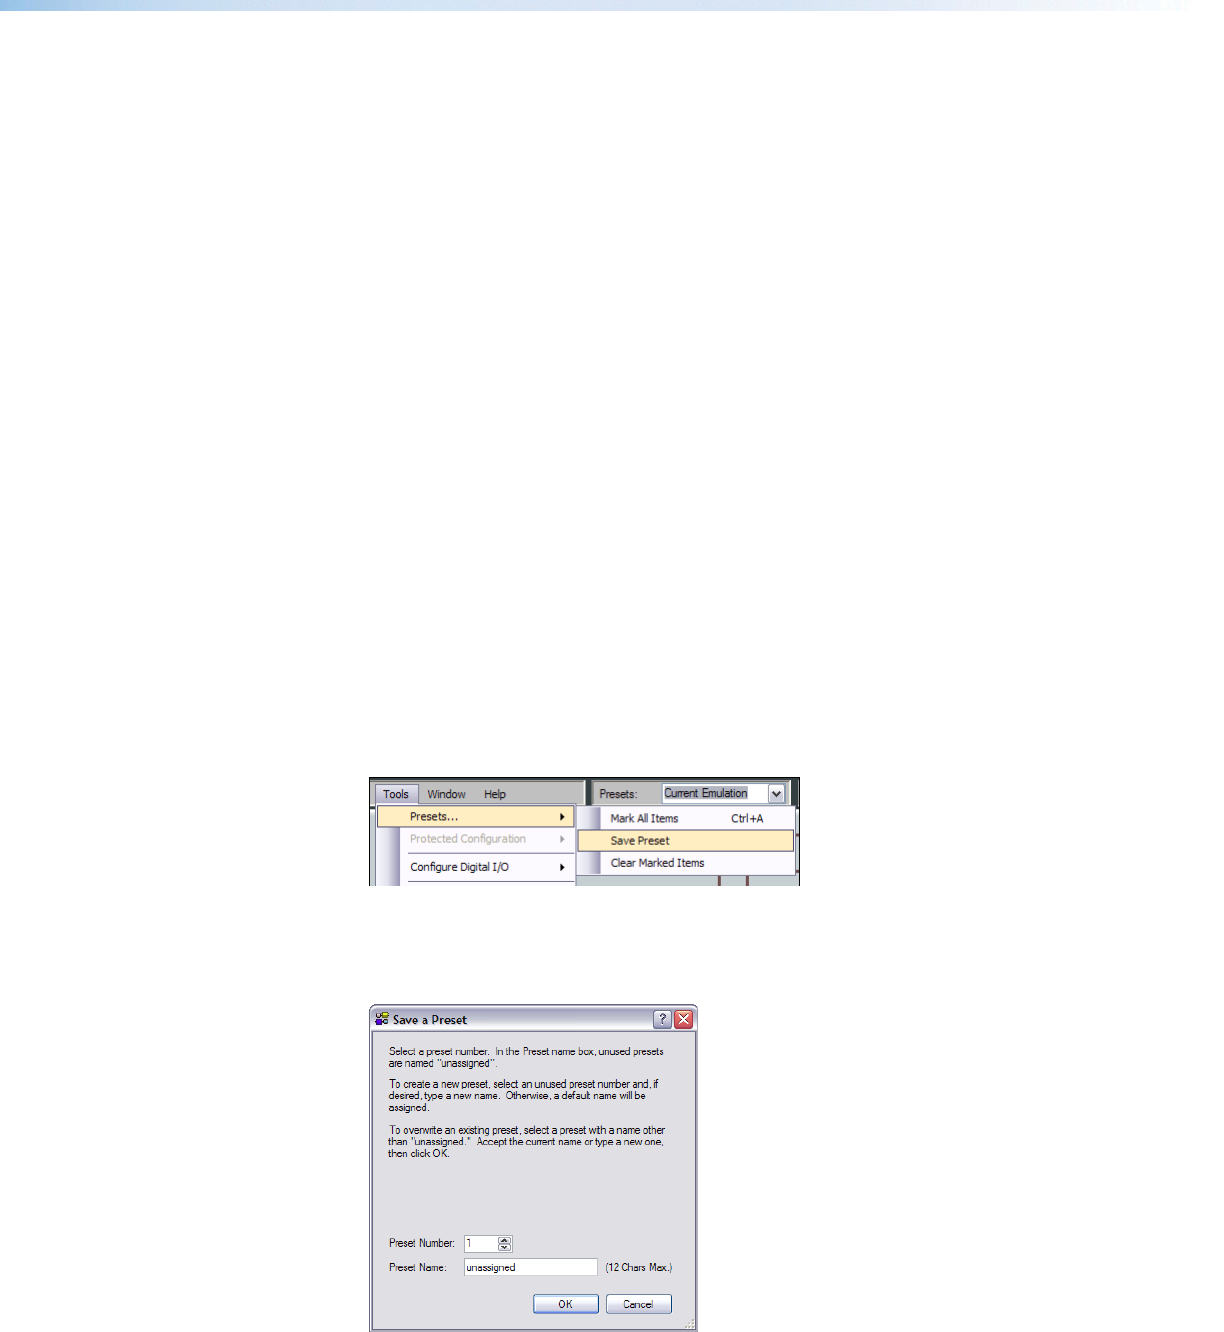
2. Select Tools>Presets>Save Preset in the main structural menu.
3. Select a preset number. In the Preset Name field, unused presets are named
unassigned. To create a new preset, select an unused preset number and type a
preset name. If no name is entered, a default name will be assigned. To overwrite an
existing preset, select a preset with a name other than unassigned.
Figure 55. Save Preset
4. Click OK to save the preset, or Cancel to stop the save preset operation.
DMP64 • Software Control 82
