32
MR-8 Owner’s Manual
ENTER
MENU
CURSOR
UNDO
/REDO
CONTRAST
0 RETURN
TIME BASE
SELECT
STORE
PLAY
REWIND F FWD
MASTERING
-1
+1
J K L 4
Y Z 9
V W X 8
S T U 7
NO
YES
[UNDO/REDO] key
5) Set the track 1 fader and [MASTER] fader to the
nominal position (marked by “
”).
Raising these faders allows you to monitor the
input sound. If these faders are not raised, you
cannot monitor the sound via headphones.
<Note>
These faders are used to adjust the monitor level.
To adjust the recording level, use the [TRIM] con-
trol on the [INPUT A] section.
6) Press the [RECORD] key.
The armed track (track 1, in this case) now changes
from tape monitoring to input monitoring, while
" " is shown on the screen.
7) While playing the guitar, adjust the recording level
using the [TRIM] control on the [INPUT A] section.
The screen shows the input level of track 1, as well
as the output levels of the stereo outputs (L and R).
Turning the [PHONES VOL] control clockwise raises
the headphone monitor level.
Adjust the built-in distortion effect level using the
[GUITAR DISTORTION] control.
<Note>
Adjust the [TRIM] control properly so that the
PEAK indicator does not light at the loudest part
of the guitar sound. If the input level is too high,
the PEAK indicator lights and the sound may be
distorted or noisy.
<Tip>
When receiving a line level signal, set the [TRIM]
control to left ("LINE") to get the appropriate
level. When receiving a microphone signal (ex-
ternal or internal), set the [TRIM] control to right
("MIC") to get the appropriate level.
<Note>
If you do not use the built-in distortion effect,
turn the [GUITAR DISTORTION] control fully left.
Starting recording
8) While holding down the [RECORD] key, press the
[PLAY] key to start recording.
<Tips>
After completing recording, press the [REC SE-
LECT] key for track 1 to unarm track 1.
Playing back the recorded track
10) While holding down the [STOP] key, press the
[REWIND] key.
The recorder instantly locates to the beginning of
the song and stops.
11) Press the [PLAY] key to start playback.
You can adjust the monitor level using the fader for
track 1, [MASTER] fader or [PHONES VOL] control.
If you are not satisfied with the result, use the undo/
redo function to cancel the recording and try again.
If you are satisfied with the result, make recording
onto the next track by following the same
procedure.
Undo/redo
If you press the [UNDO/REDO] key after finish-
ing recording, you can return to the condition
before the recording started (UNDO operation).
Therefore, you can try recording again.
If you press the [UNDO/REDO] key again (after
UNDO), the undo operation is canceled and you
can return to the condition when the recording
finished (REDO operation).
<Notes>
The undo/redo function can be used for all kind of
recordings, however, if you carry out any of the fol-
lowing operations after making recording, you cannot
undo the recording.
• Carrying out new recording.
• Carrying out new editing.
• Turning off the power.
• Carrying out song select, song delete or song
name editing.
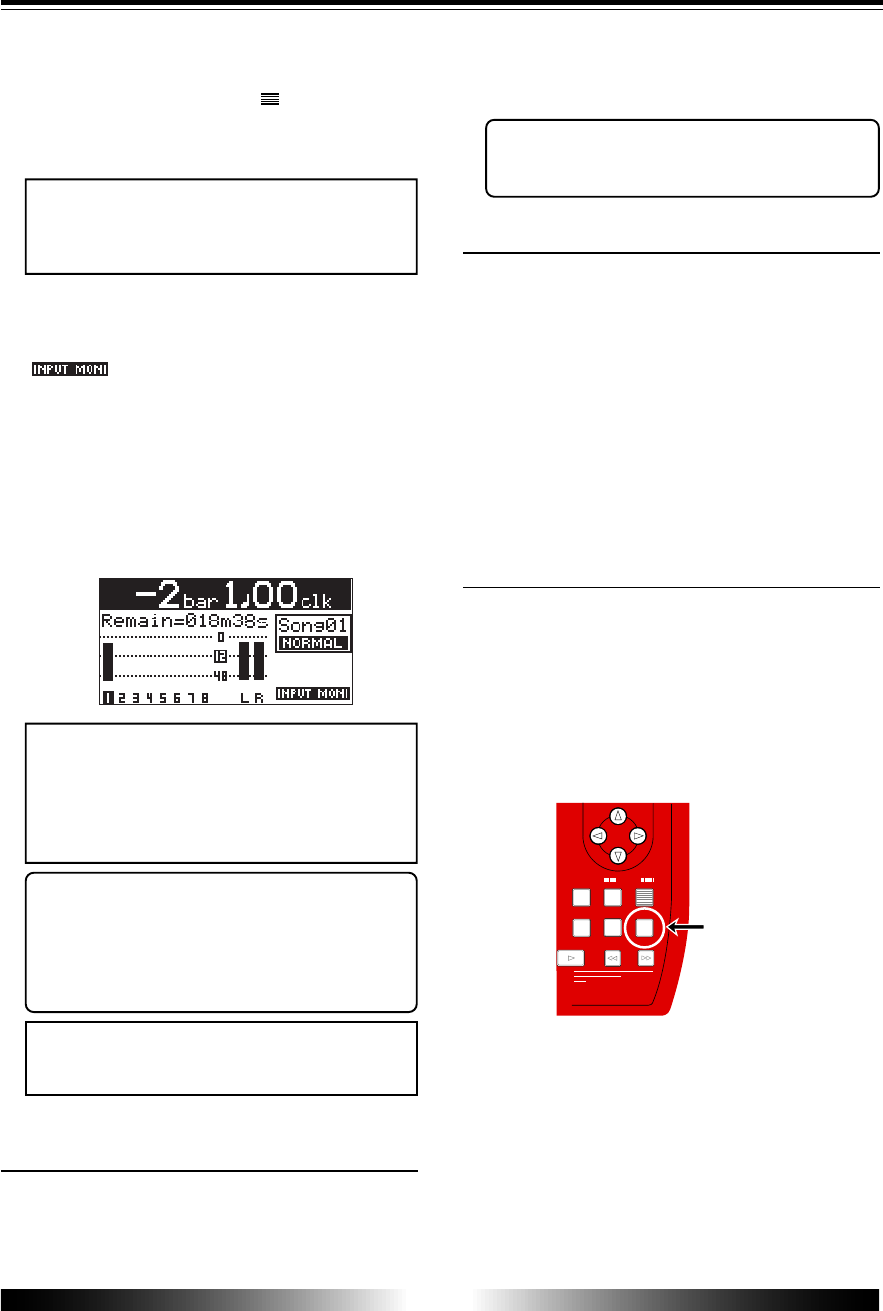
9) When finishing recording, press the [STOP] key to
stop the recorder.


