70
MR-8 Owner’s Manual
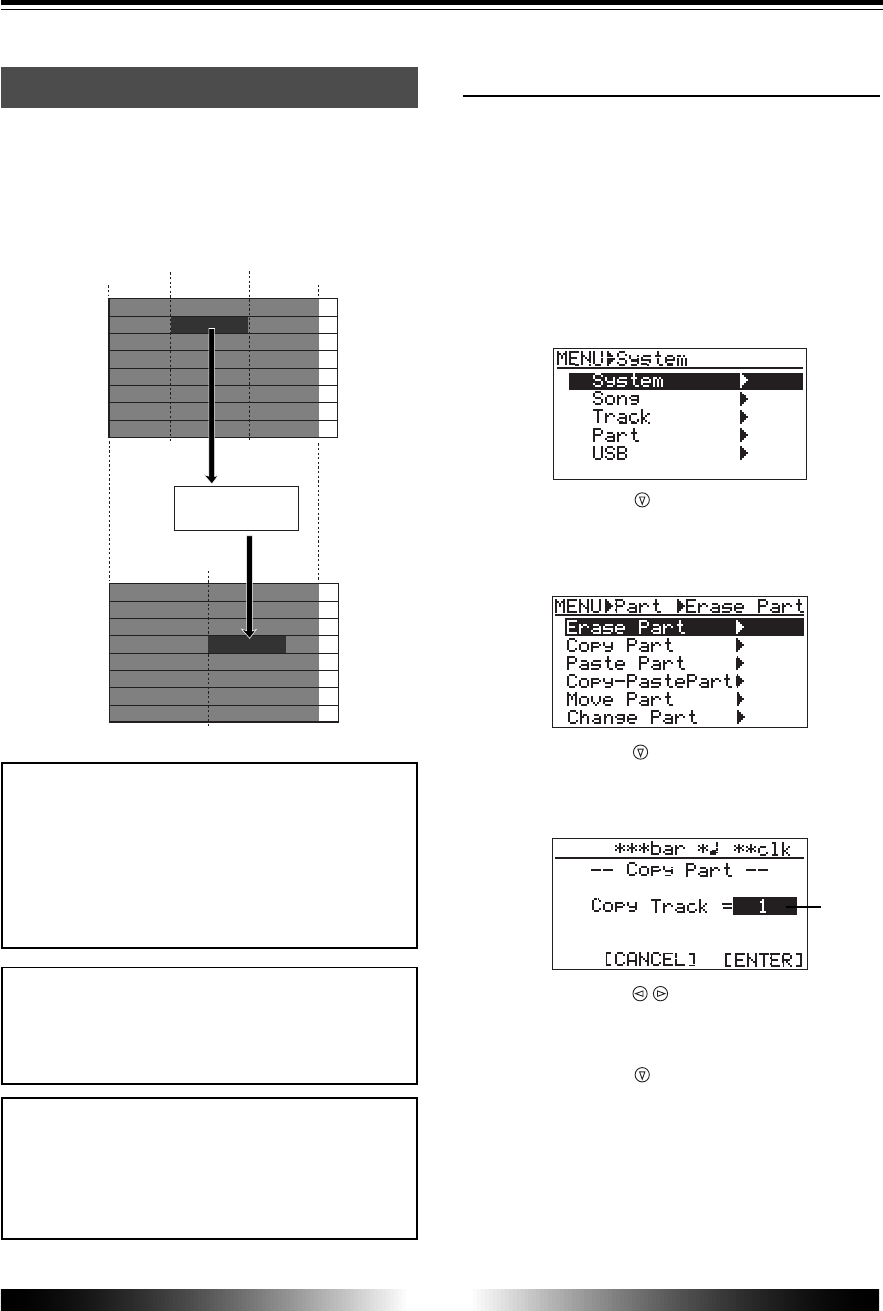
TRK 1
TRK 2
TRK 3
TRK 4
TRK 5
TRK 6
TRK 7
TRK 8
LOCATE A
point
LOCATE B
point
Clip Board
(Virtual)
ABS ZERO
REC END
TRK 1
TRK 2
TRK 3
TRK 4
TRK 5
TRK 6
TRK 7
TRK 8
LOCATE A
point
Copying/pasting (1)
You can copy a part of the mono or stereo track(s)
and paste it to the desired position of the other
track(s). The source part is copied to the (vir-
tual) clipboard first, then pasted to the desired
position of the other track(s).
<Note>
If you want to copy a part and paste it to the
same position of the other track(s), we rec-
ommend to use the other copy/paste method
described later in "
Copying/pasting (2)
" (though,
of course, you can make such a copy/paste
operation with the method described here).
<Note>
You cannot copy/paste track data of a song
protected. Release the protection before mak-
ing the copy/paste operation.
<Note>
If you turn off the power after copying data
to the clipboard, the data on the clipboard
disappears. Also note that you cannot undo
copying data to the clipboard.
• Copying to the clipboard
1) Load the song you want to edit.
2) Store the LOCATE A and LOCATE B points (see
page 53).
You can check the part by playing back between
the LOCATE A and LOCATE B points (see page 68).
3) While the recorder is stopped, press the [MENU]
key to enter the menu mode.
The display shows the menu selection screen, in
which "System" is highlighted initially.
4) Use the [CURSOR ] key to highlight "Part", then
press the [ENTER] key.
5) Use the [CURSOR
] key to highlight "Copy Part",
then press the [ENTER] key.
The display now shows the screen for selecting the
track(s) of which you copy data.
6) Use the [CURSOR / ] keys to select the track(s).
You can select from among mono tracks (1 through
8) and stereo pair tracks (1/2, 3/4, 5/6 and 7/8).
7) Use the [CURSOR ] key to move the cursor to
"[ENTER]" at the lower right on the screen, then
press the [ENTER] key.
The display now shows the part edit menu selec-
tion screen, in which "Erase Part" is highlighted ini-
tially.
The display shows "Please Wait!", immediately fol-
lowed by "Completed!" when the MR-8 completes
the copy operation. To cancel the copy operation,
move the cursor to "[CANCEL]" at the lower left on
the screen, then press the [ENTER] key.
flashing


