34
VR800 Owner’s Manual (Handling Programs)
SHIFT P.EDIT
LOC MEM
RECORD
STOP
PLAY REW F FWD
AUTO PUNCH
CLIPBOARD
AUTO RTN
OUTIN
ENDOUTINSTART
EJECT
ACCESS
5678
OL
24
12
6
0
1234
RECORD TRACK
4321 5
678
EXECUTE
/ YES
EXIT
/ NO
DISP SEL
UNDO / REDO
EDITHOLD/
STORE
SETUP
JOG
VARI PITCH SCRUBLOCATEAUTO PLAY
PGM SEL
AUTO RTN
TIME BASE SEL
SHUTTLE
LOCATE REC END
LOCATE ABS 0
CLIPBOARD PLAY
PUNCH
AUTO
OPTICAL
A SYNC
PREVIEW
PGM 01
PGM 02 PGM 03 PGM 04
PGM 05
PGM 06 PGM 07
PGM 01
PGM 02 PGM 03 PGM 04
PGM 05
PGM 06
After deleted
1
2
3, 4
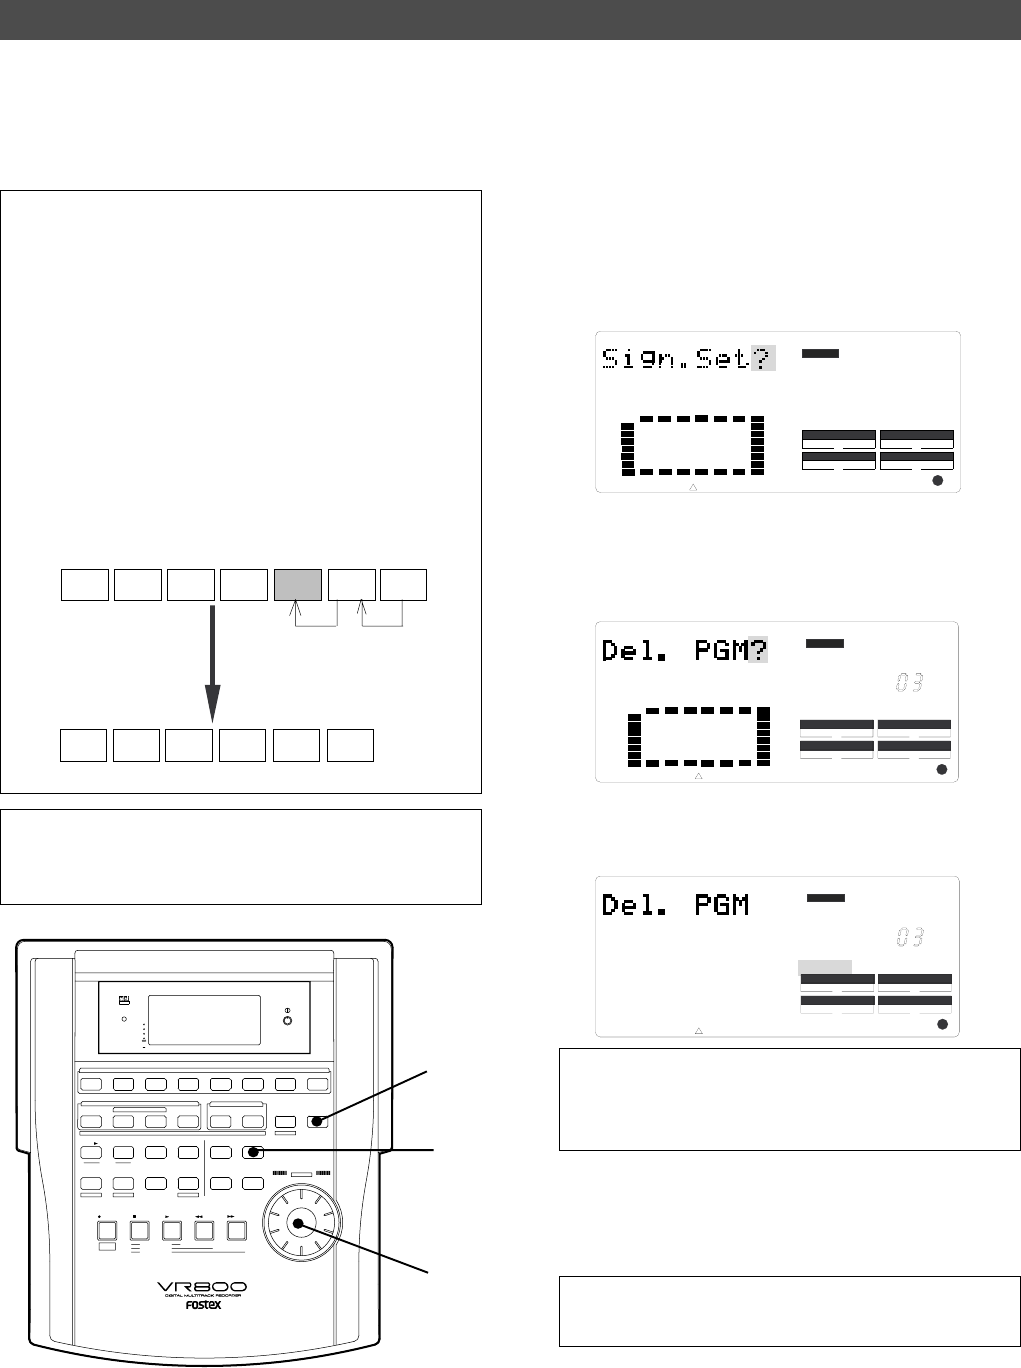
This section explains how to delete a program.
Deleting an unnecessary program will expand the recordable area, making your work flow more smoothly, since
recording or editing requires free space on the disk. Use the [Del. PGM ?] menu in SETUP mode to delete a
program.
Deleting a Program
<Notes on deleting a Program>
• You can delete only the currently-selected program. Refer to the
previous section, “Using a program change function,” for information
on how to select the desired program before you proceed to delete
the program.
• <IMPORTANT> If only one program exists and you try to delete it,
data contained in the program will be deleted, but the program itself
will remain. For example, assume that PGM 01 -07 exist and you
try to delete PGM 05. Program number 05 will remain, but the data
inside PGM 05 will be replaced with the data of PGM 06.
The subsequent programs’ data will move in the same way.
Therefore, it will appear that PGM 07 has been deleted.
If you delete the last program (PGM 07 in this example), PGM 07
will be completely deleted.
If you try to deleted PGM 05, only the
data of PGM 05 will be deleted and
the data of PGM 06 will move into
PGM 05.
1. Press the SETUP key while the VR800 is stopped.
The VR800 will enter the SETUP mode, and display the
first hierarchy of the SETUP menu that was displayed
before you turned off the power.
The default setting is [Sign. Set ?] menu (setting a time
signature).
2. Turn the JOG dial to select the first hierarchy of the
[Del. PGM ?] (deleting a Program) menu.
Or, you can use the HOLD/> key, the REWIND button, or
the F FWD button.
3. Press the EXECUTE/YES key.
The number of the program to be deleted appears and
[SURE ?] flashes.
To cancel the delete operation, press the EXIT/NO key while
[SURE ?] is flashing. Each time you press the button or key, the
VR800 will return to a higher level in the hierarchy, and finally exit
the SETUP mode.
4. Press the EXECUTE/YES key again.
When the VR800 displays [Deleting...] and finishes
deleting the program, the data of the next program
number moves in, and its ABS time appears.
Note:
You cannot use the Undo/Redo function to delete
programs. Make sure that you delete the correct
program.
• To check the REMAIN time and free space, press the DISP SEL
key to display the [REMAIN] indication after the program is deleted.
SETUP
DRIVE
AUTO A.PUNCH
SYNC OUT
CLK
SCSI
44.1kHz
DIGITAL
CLK
SYNC OUT DRIVE
SCSI
AUTO A.PUNCH
SETUP
PGM
44.1kHz
DIGITAL
CLK
SYNC OUT DRIVE
SCSI
AUTO A.PUNCH
SETUP
PGM
44.1kHz
DIGITAL
SURE ?


