176
Chapter 10 Various Settings
Chapter 10
Using the Track Buttons to Choose the Part
That Makes the Keys Move
Upon power-up, the instrument is set so the keys move along
with the performances of the Whole, Upper, and Lower
tracks. You can choose a different part to make the keys
move by pressing the Track buttons, and changing the
buttons that are lighted.
1.
Choose the song to play (p. 75).
2.
Press the Track button you want to have associated
with key movement a number of times, until the
button’s light is flashing.
Each time you press a Track button, its light changes to
the next state, in this order: lighted
→
extinguished
→
flashing
→
lighted
→
....
The following shows the relationship between the Track
buttons, played parts, and keyboard movement.
3.
Press the [ (Play/Stop)] button.
Song playback starts, and the keys move along with
what is played as a result of the flashing Track button or
buttons.
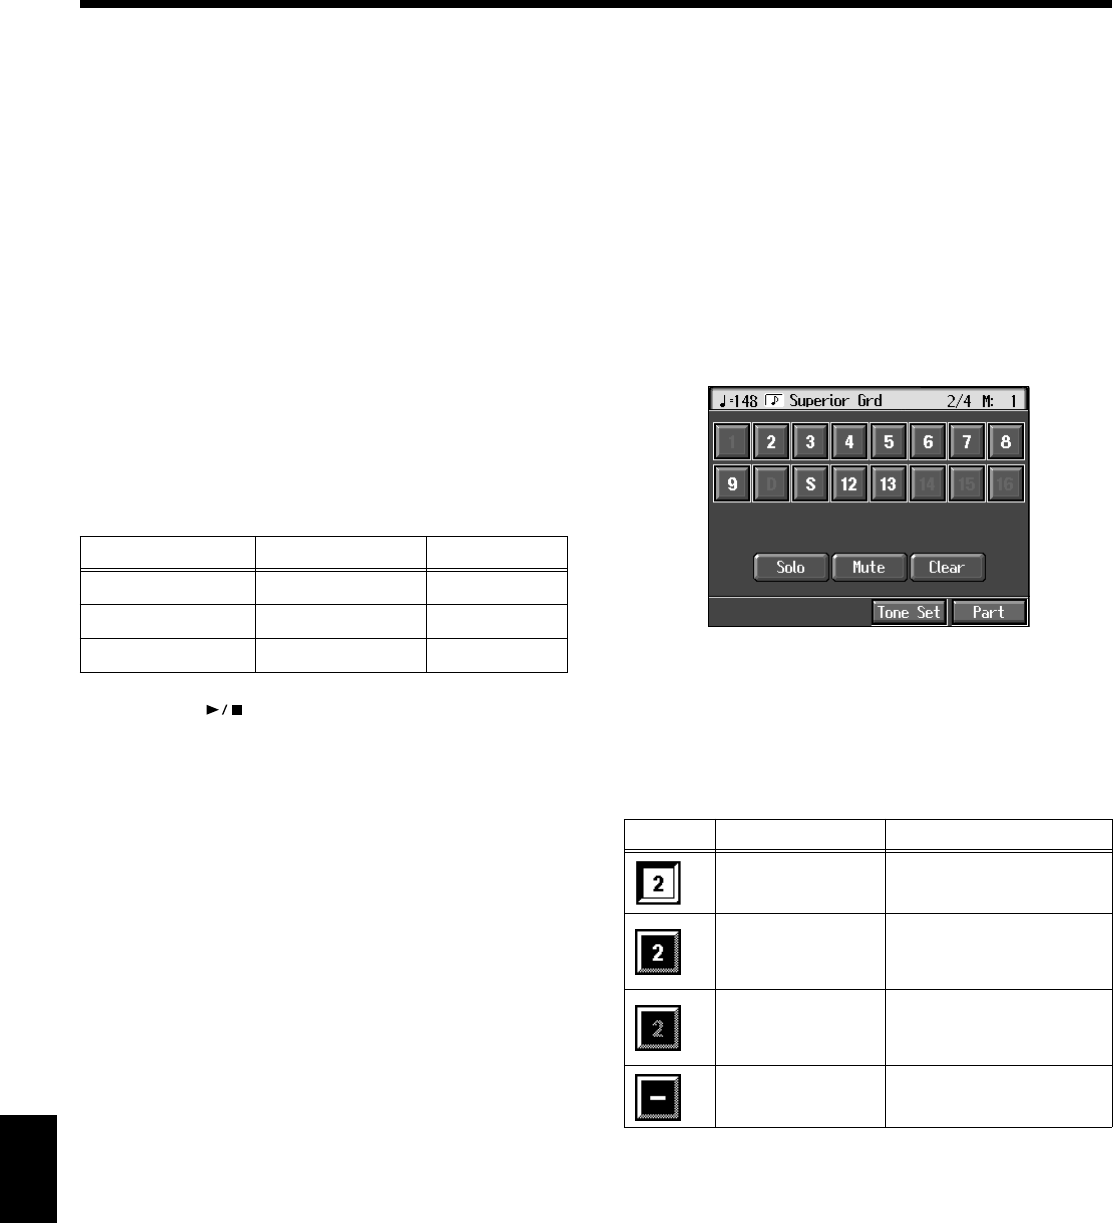
Using the 16 Track Sequencer Screen to
Choose the Part That Makes the Keys Move
You can get the keys to move along with the performance of
parts selected with the 16 Track Sequencer screen.
1.
Choose the song to play (p. 75).
2.
Press the [Menu] button.
The “Composer Menu” or the “A/V Sync” screen
appears.
3.
Touch <16tr Sequencer>.
A screen like the one shown below appears.
fig.d-16tr.eps_50
4.
Touch the part you want to have associated with key
movement.
The following shows the relationship between the
indication in the display (icons), played parts, and
keyboard movement.
5.
Press the [Exit] button to return to the Functions screen.
Indicator Keyboard Sound
Indicator flashing Movement Sound
Indicator on No movement Sound
Indicator off No movement No sound
Icon
Keyboard Sound
Movement
Sound
No Movement
(This part is not
selected)
Sound
No movement
No sound
(no performance data for
this part)
No movement No sound
KR117_115_r_e.book 176 ページ 2006年2月27日 月曜日 午前11時55分
