Part III Sequencer
74
QQTG0701
Sequencer
Ⅲ
ⅢⅢ
Ⅲ
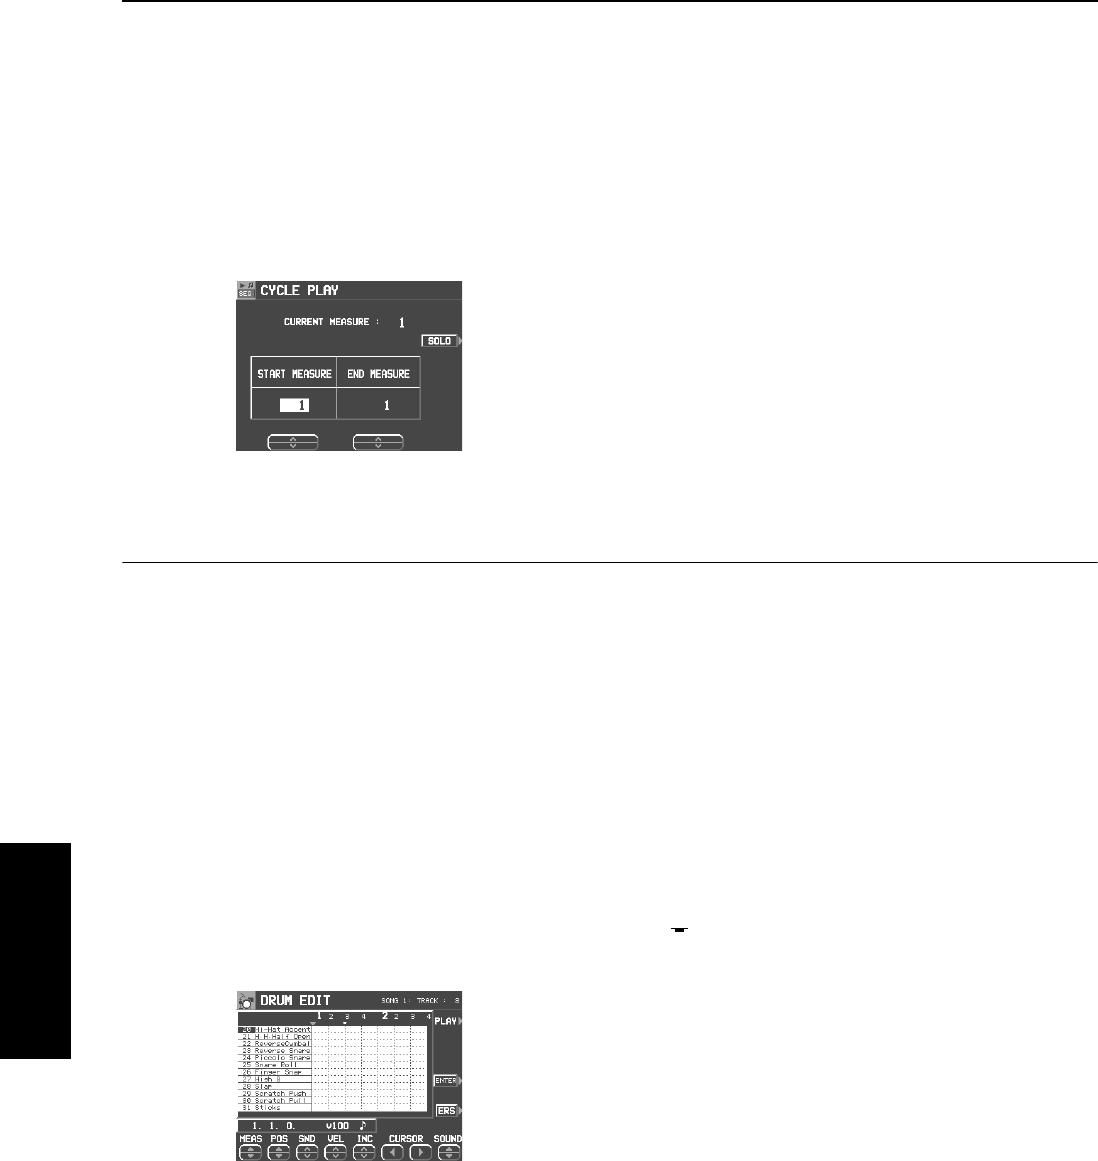
CYCLE PLAY
You can aurally check the data you are editing by
accessing the CYCLE PLAY display from the
NOTE EDIT display.
• If you wish other tracks to be played back, they should be
selected beforehand on the SEQUENCER PLAY display.
(Refer to page 61.)
1.
On the NOTE EDIT display, press the PLAY
button.
• The display looks similar to the following.
2.
Use the START MEASURE
∧
and
∨
buttons
to select the beginning playback measure.
3.
Use the END MEASURE
∧
and
∨
buttons to
select the last playback measure.
4.
Press the START/STOP button.
• Cycle playback of the specified measures begins.
• If the SOLO button is turned on, playback changes to that
of the recording track only. If it is turned off, all the tracks
specified on the SEQUENCER PLAY display are played
back.
5.
To stop cycle playback, press the START/
STOP button again.
• During playback stop, if the SEQUENCER RESET (FILL
IN 1) button is pressed, the SEQUENCER returns to the
measure number specified in step 2. If the SEQUENCER
RESET button is pressed again, the SEQUENCER
returns to measure 1.
Drum Edit
The DRUMS part can be edited on a specialized display. This differs from the normal STEP RECORD edit
procedure, and is a convenient way to check the data for each note.
1.
On the SEQ MENU display, select RECORD
& EDIT.
2.
On the RECORD & EDIT display, select
DRUM EDIT.
3.
On the PART SELECT display, select the
track for the DRUMS part.
• The CHORD, RHYTHM and CONTROL tracks cannot be
selected.
• The display looks similar to the following.
4.
Use the SOUND
∧
and
∨
buttons to select the
percussion instrument you wish to edit.
• The number to the left of the instrument name is its MIDI
NOTE NUMBER in the Technics arrangement.
• If sounds other than percussion instrument sounds are
assigned, they are not displayed.
5.
Use the MEAS ▲ and ▼ buttons to select the
measure you wish to edit.
6.
Use the CURSOR
ᮤ
and
ᮣ
buttons to move
the cursor (▼) to the point you wish to edit.
• Recorded performance data is shown as vertical bars.
Data selected for editing is highlighted.
• You can use the INC
∧
and
∨
buttons to change the
increment of cursor movement. The resolution can be set
at
q
/96. However, if NOTE data is present between incre-
ments, the cursor will stop.
• Use the POS ▲ and ▼ buttons to change the timing.
Example: 10.2.48 indicates a point in measure
10, beat 2, point 48 (one point is 1/96 of a
quarter note [
q
]).
• is shown at the point where the END command is
stored.
7.
Select the data to edit (it changes to a long
bar). Edit the data.
• Use the POS ▲ and ▼ buttons to move the timing, the
SND
∧
and
∨
buttons to change the percussion instru-
ment sound, and the VEL
∧
and
∨
buttons to change the
velocity (how hard the keys are played).
• If the ERS button is pressed, the selected NOTE data is
erased.
8.
Repeat steps 4 to 7 to continue editing.
08_Part III.fm 74 ページ 2003年5月16日 金曜日 午後5時41分


