


250 Chapter 19—Pro Tools Remote Layer
DM2000 Version 2—Owner’s Manual
Automation
Viewing the Automation Mode
The Automation mode setting of each channel can be viewed as follows.
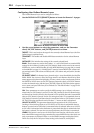
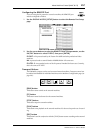
1 Press and hold a channel’s [AUTO] button.
The channel’s Automation mode is displayed on the corresponding channel strip display
while the [AUTO] button is pressed.
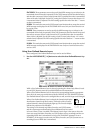
The Automation mode settings of all channels can be viewed as follows.
2 Press and hold the AUTOMIX [DISPLAY] (AUTO STATUS) button.
The Automation modes of all channels are displayed on the channel strip displays while the
AUTOMIX [DISPLAY] (AUTO STATUS) button is pressed.
Setting the Automation Mode
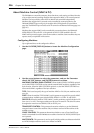
The Automation mode can be set as follows.
1 While holding down a channel’s [AUTO] button, press the AUTOMIX
[WRITE], [TOUCH], [LATCH], [TRIM], [READ], or [OFF] button.
The channel’s Automation mode is displayed on the corresponding channel strip display
while the [AUTO] button is pressed.
Grouped channels are set together. You can temporarily disable a group in order to set indi-
vidual channels by pressing and holding the USER DEFINED KEYS [12] (CTRL/CLUTCH)
button.
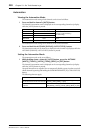
The following shortcuts apply.
Pro Tools Channel Strip Displays [AUTO] Button Indicators
Auto write Wrt
Flashing red (Record Ready)
Red (Recording)
Auto touch Tch
Auto latch Ltch
Auto read Read Green
Auto off Off Off
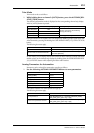
To do this... Do this!
Set the Automation mode of all channels
USER DEFINED KEYS [5] + AUTOMIX [WRITE], [TOUCH],
[LATCH], [TRIM], [READ], or [OFF]
Set the Automation mode of all selected
channels
USER DEFINED KEYS [5] + USER DEFINED KEYS [4] + AUTO-
MIX [WRITE], [TOUCH], [LATCH], [TRIM], [READ], or [OFF]