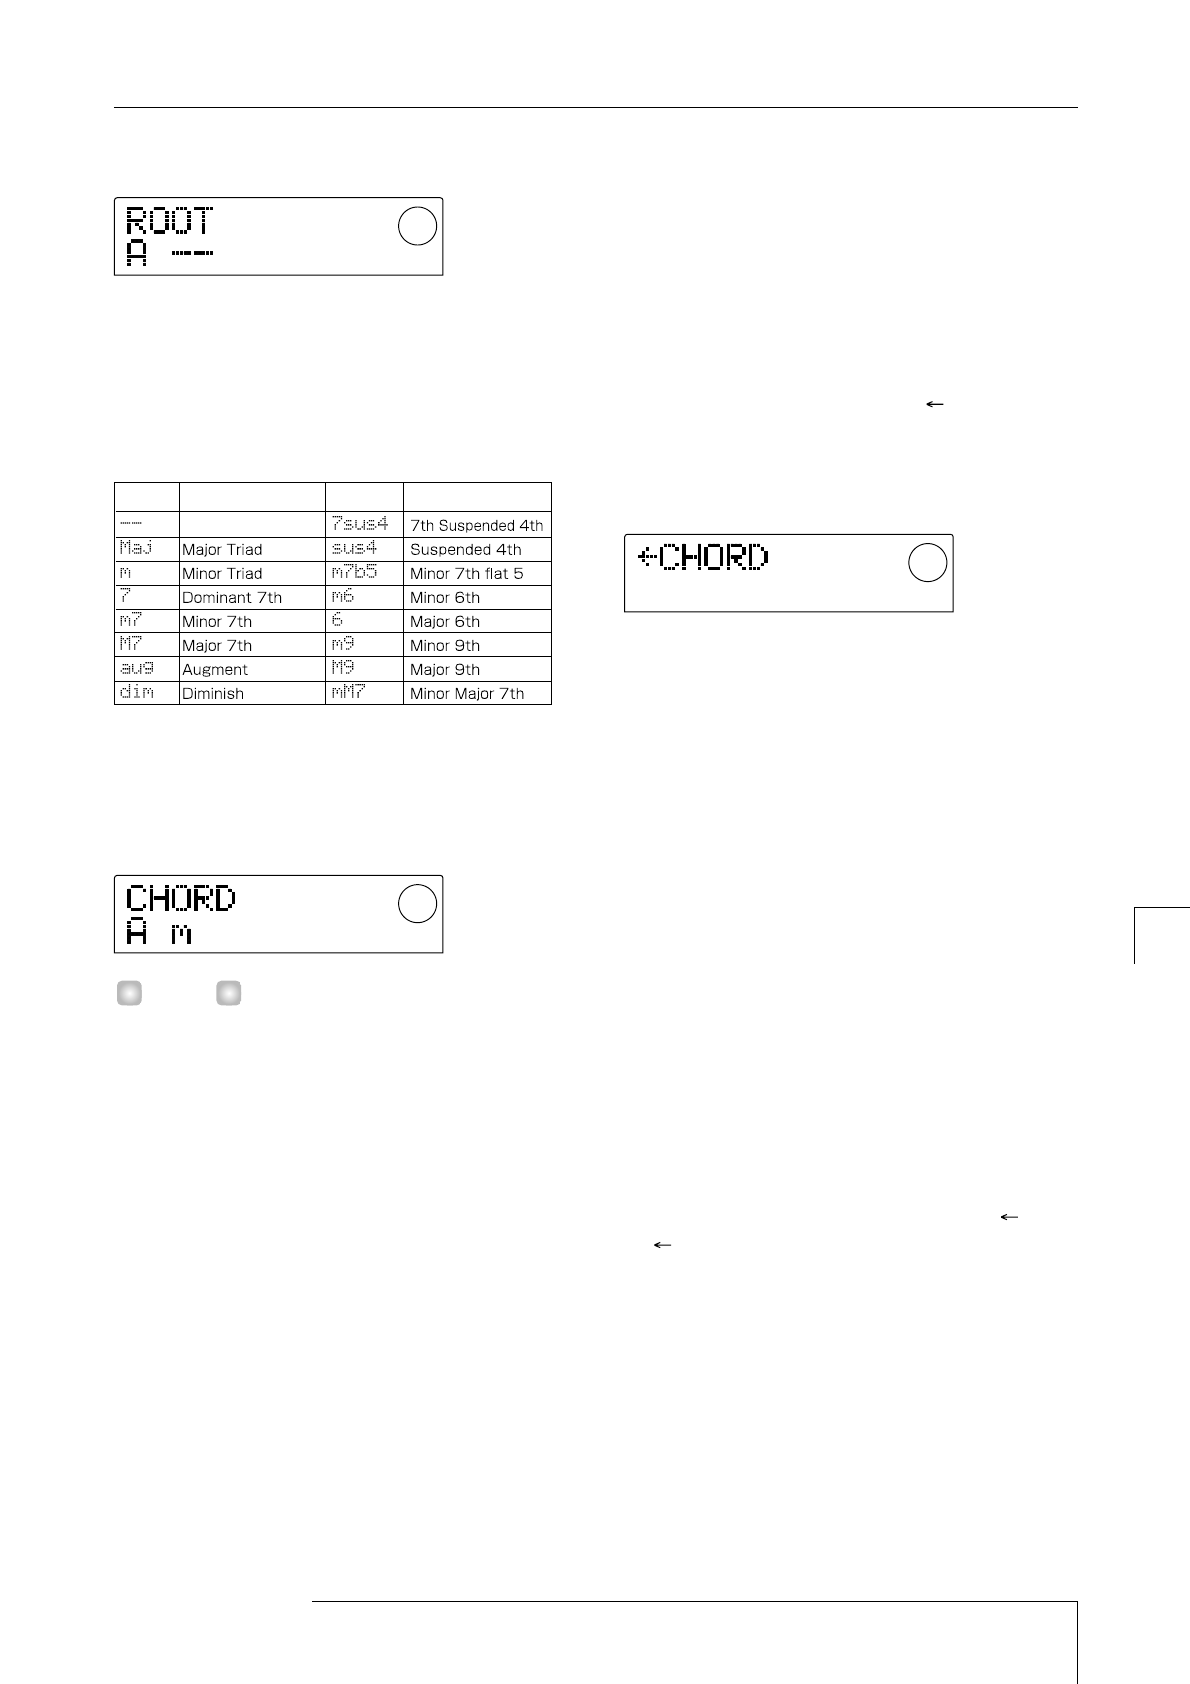
root has been changed to A.
5.
To specify the chord type, press the cursor [
W
] key
once to make the display read "CHORD."
6.
Turn the dial to select the chord type.
You can choose from the following chord types.
The following screen shows an example of when the chord
type has been changed to minor (m). With these settings,
chord data of "A minor" has been input at the beginning of
the rhythm song.
If you select "--" (no conversion) as the chord type, only the
bass will be transposed, and the phrase will not be
converted. Select this when you want the original phrase to
be played without change.
7.
Move to the location at which you want to input the
next chord data, and input chord data in the same
way as described in steps 2 – 5.
Chord data does not necessarily have to be input at the
same location as the rhythm pattern data. You can also
change the chord in the middle of a rhythm pattern, or in
the middle of a measure. The input location can be changed
in the following ways.
(1) Moving in steps of a measure
Use the cursor [
E
]/[
R
] keys to move to the beginning of
the preceding or following measure.
(2) Specify the location in 4th note units
Use the REW [
T
]/FF [
Y
] keys to move to the beginning
of the preceding or following quarter note.
(3) Specify the location in 16th note units
Repeatedly press the cursor [
Q
] key to make the display
read "EV→", and turn the dial to move forward or
backward in 12-tick (16th note) units.
When you use methods (1) or (2), a " " symbol will be
displayed to the left of "CHORD" or "ROOT" at locations
where no chord data has been input. This indicates that the
preceding chord data will remain in effect.
When you use method (3), the symbol displayed at the
right of "EV→" will indicate the type of data that is input
at the current location. For example, "Pt" indicates rhythm
pattern data, and "TS" indicates time signature data. (For
details refer to the table on p.63.)
8.
Input the remaining chord data in the same way.
Chord data that you input can be edited in the following
ways.
●
To change the chord
Move to the location at which the chord data is input, use
the cursor [
Q
]/[
W
] keys to switch the display to "ROOT"
(chord root) or "CHORD" (chord type), and turn the dial to
change the chord.
●
To delete chord data
Move to the location at which the chord data is input, use
the cursor [
Q
]/[
W
] keys to switch the display to "ROOT"
or "CHORD," and press the [ERASE] key. The chord data
will be erased, and the display will change to " ROOT"
or " CHORD."
9.
When you have finished, press the STOP [
P
] key.
You will return to the rhythm song screen. Then press the
[EXIT] key to return to the main screen.
HINT
Display Content Display Content
No conversion
ZOOM MRS-1044
61
Reference [Rhythm]
Creating a rhythm song


