50
Editing
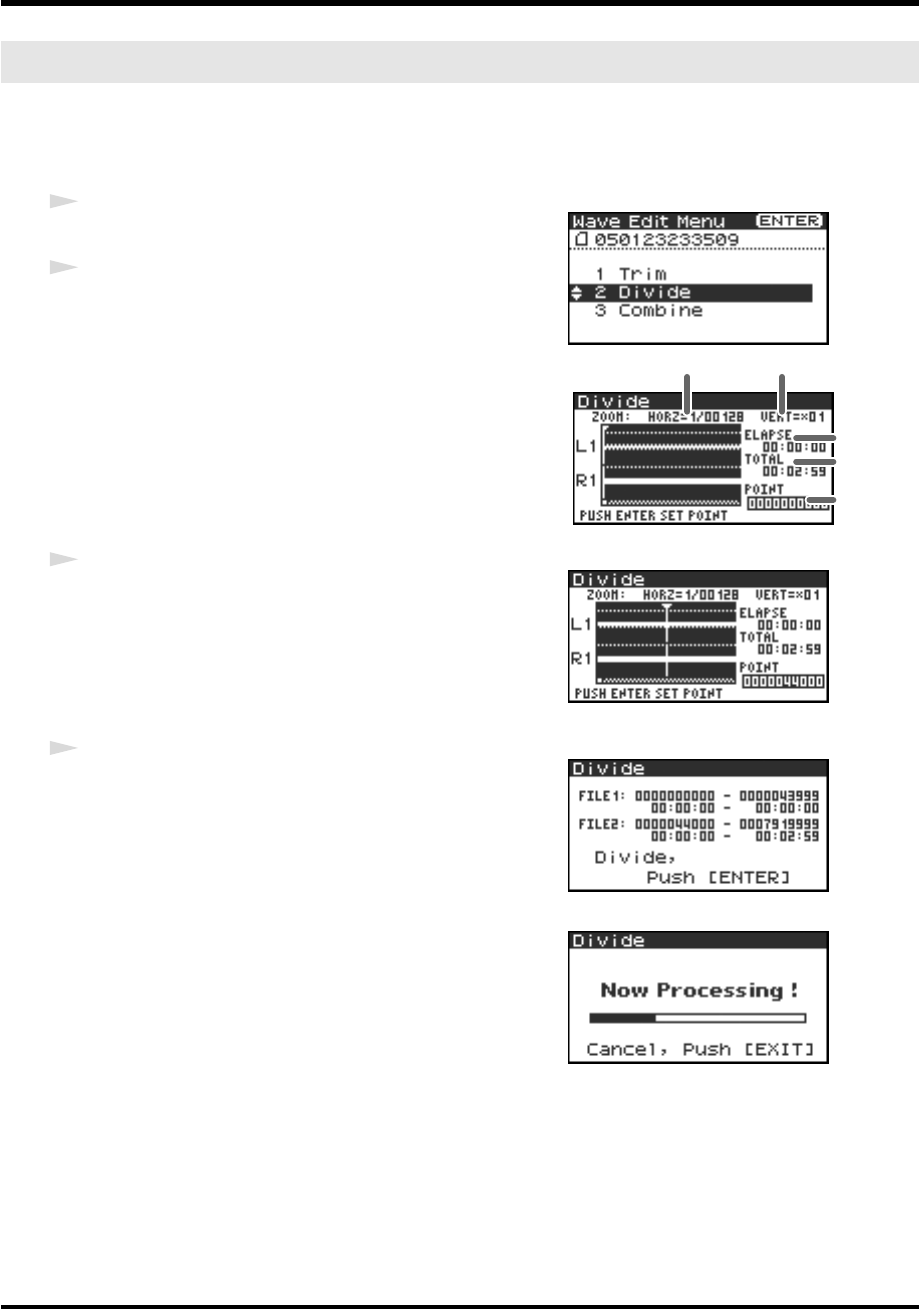
This command divides the project at the point you specify in the waveform. Two new projects will be
created.
You can perform playback, stop, or operate the scrub dial and shuttle dial even while using this command.
However, you cannot perform A-B Repeat or marker-related operations.
fig.wave2-1.eps
1
Press the R-4’s
[WAVE EDIT] button
. The Wave Edit Menu
screen appears in the display.
2
Use the
[CURSOR] buttons
to choose
2 Divide
, and press the
[ENTER] button
.
The editing screen shown at the right will appear.
fig.wave2-2.eps
Time axis zoom (1/1–1/65536)
Use the
[CURSOR] left/right buttons
to adjust this
Waveform level zoom (x1–x64)
Use the
[CURSOR] up/down buttons
to adjust this
* If you decide not to adjust the settings, press the
[EXIT] button
.
fig.wave2-3.eps
3
While playing or fast-forwarding, press the
[ENTER] button
when you reach the point at which you want to divide the project.
Alternatively, you can use the scrub dial or shuttle dial to specify
the point instead of doing so during playback.
fig.wave2-4.eps
4
A screen asking you to confirm the specified point will appear.
fig.wave2-5.eps
To execute the Divide operation at the point you specified, press
the
[ENTER] button
.
If you decide not to execute the Divide operation, press the
[EXIT]
button
.
Even when the screen shown at the right is displayed, you can halt
execution by pressing the
[EXIT] button
.
* Don’t turn off the power while a project is being saved or while processing is being performed.
* It may take some time to save the project if it contains a large amount of data.
Divide
Waveform level
zoom
Time axis zoom
Elapsed
time
Total time
Specified
point
R-4_e.book 50 ページ 2005年2月10日 木曜日 午後3時36分
