196
Editing Your Musical Performance Data
9.
Touch < >< > to set “From” (the measure
at which copying will begin).
10.
When you’re done making the settings, touch
<Exit>.
11.
Touch the “For” value (the number of
measures to be copied).
12.
Touch < >< > to set “For” (the number of
measures to be copied).
If you want to specify all of the data up to the final
measure, select “ALL.”
13.
When you’re done making the settings, touch
<Exit>.
14.
Touch the “To” value (the copy-destination
measure number).
15.
Touch < >< > to set “To” (the copy-
destination measure number).
If you select “END,” the data will be copied following
the end of the last measure.
16.
When you’re done making the settings, touch
<Exit>.
17.
Touch the “Time” value (the number of times
that the data will be copied).
18.
Touch < >< > to set “Time” (the number
of times that the data will be copied).
19.
When you’re done making the settings, touch
<Exit>.
20.
Touch <Execute>.
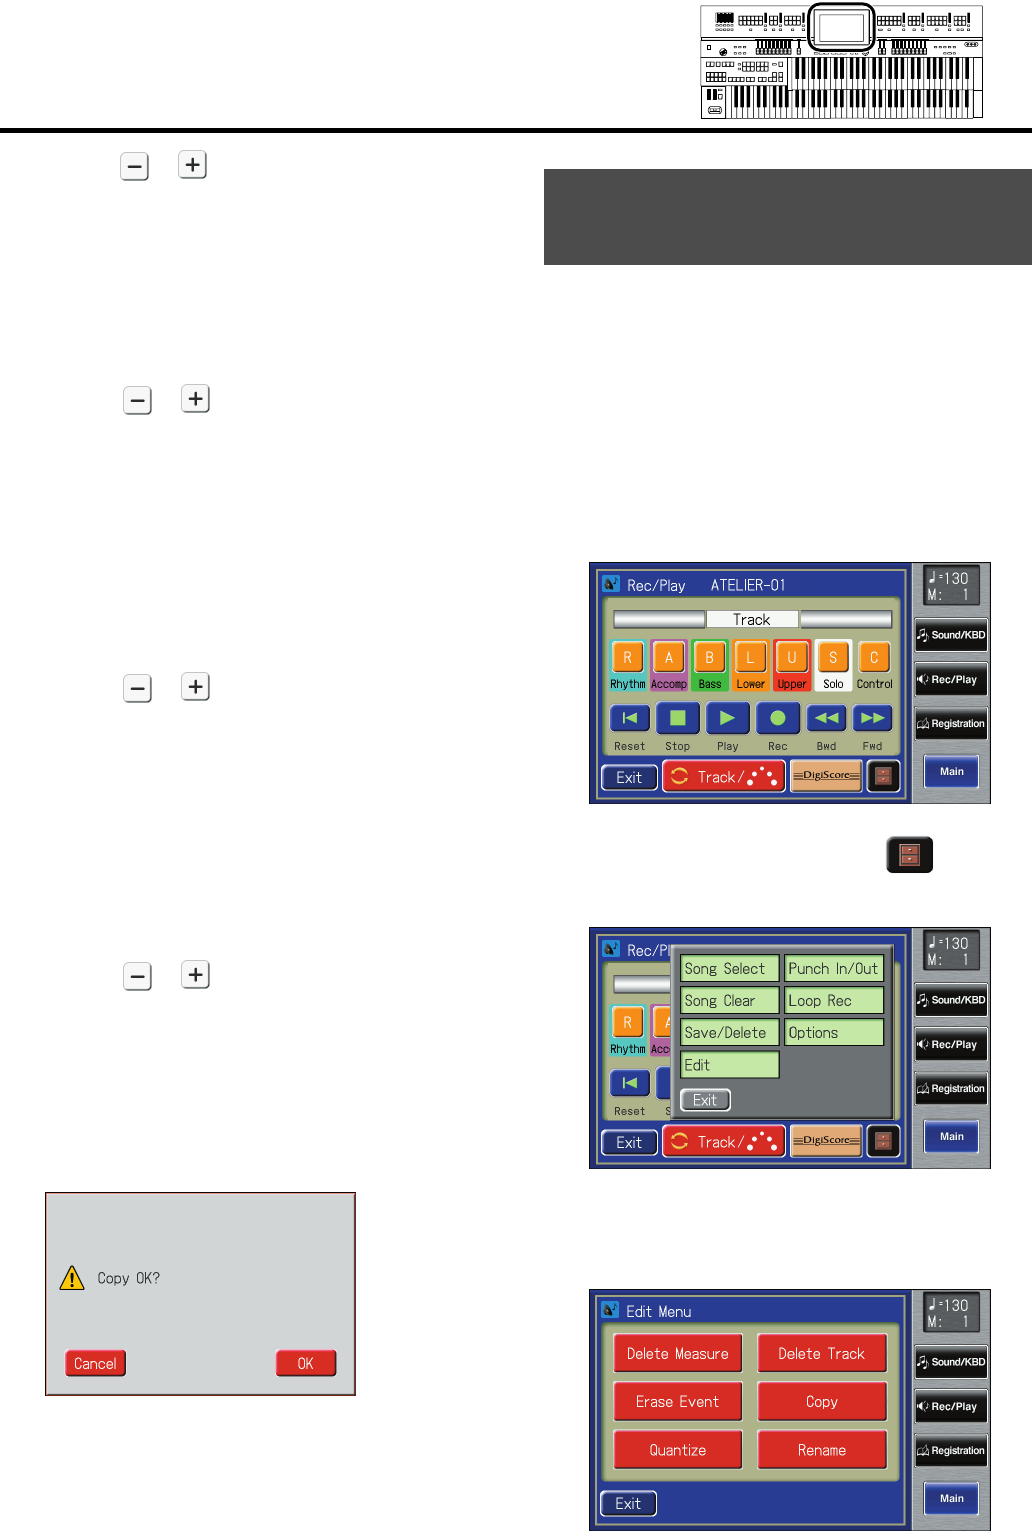
The following display appears.
fig.08-24.eps
To cancel operation, touch <Cancel>.
21.
Touch <OK> to copy the measures.
Once the measures have been copied, you are returned
to the Copy screen.
You can correct for timing discrepancies in a recorded
performance by having the music be aligned with a timing you
specify. This is called “Quantizing.”
For example even if you intend to play at quarter-note timing,
the notes may be slightly earlier or later than precise quarter-
note intervals. In this case, if you quantize at quarter-note (1/
4) timing, you can correctly match the rhythms.
1.
Touch <Rec/Play> on the Main screen.
The Rec/Play screen appears.
fig.08-02.eps
2.
In the Rec/Play screen, touch < > (Utility)
to open the Utility screen.
fig.08-03.eps
3.
In the Utility screen, touch <Edit>.
The Edit Menu screen appears.
fig.08-08_50
Correct Timing Inaccuracies
(Quantize)
AT-900_e.book 196 ページ 2007年9月7日 金曜日 午前8時43分
