


71
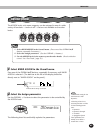
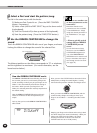
Guidelines for sampling
DIGITAL SAMPLING
• Connections:
If you are using a microphone, make sure that it is
connected to the MIC jack and not the LINE IN jack.
Connecting a microphone to LINE IN will not damage
the DJX; however, it will be impossible to get a
recordable signal (the microphone level is too low).
• Sample start points:
Always record your sample as close to the intended
start point as possible, since this cannot be changed
later. For example, if you are sampling a four-beat
rhythmic phrase from a CD, cue up the selection
(and pause it) so that when you hit PLAY, the phrase
plays from the top of the measure.
The trigger level setting can help with this as well,
since it effectively puts sample recording on standby
until a strong enough signal (e.g., the first beat of
phrase) arrives to start recording. (See “Trigger
Level” below.)
• Avoiding feedback:
To avoid feedback, make sure that the microphone
is pointed away from the speakers and is placed
relatively distant from them.
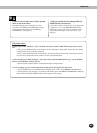
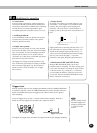
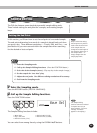
• Proper levels:
In general, you’ll want to record the signal as “hot”
as possible — loud enough to record and be heard
properly, but soft enough to avoid clipping and
distortion. The level meter is a total of 8 bars in
height; try to keep the input level at a maximum of 7
bars.
Signal peaks that occasionally push the meter to “8”
may still result in a clean recording. However, you
should avoid letting the signal pin the meter to “8”
(unless you want a deliberately distorted recording).
Also, let your ears be the judge — if you hear
distortion in the signal, bring the input level down.
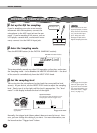
• Simultaneous MIC and LINE IN use:
Both the MIC and LINE IN inputs can be used
simultaneously for sampling. The key to mixing your
voice with a line input is in having an output control
on the line source (e.g., CD player) — in that way
you can adjust the balance of the line source with
your vocals, then use the INPUT LEVEL knob on the
DJX to control the overall level.
Level meter at “7.”
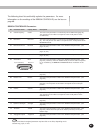
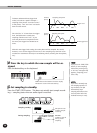
Trigger Level
Actually, the DJX does not start sampling immediately when the START/STOP button
is pressed (in step #5). Once the START/STOP button is pressed, the DJX waits for a
signal of a suitable level (set by the trigger level). When it hears such a signal, it
starts sampling.
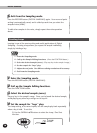
To set the trigger level, use the +/- buttons of the numeric keypad. Press the +
button to raise the trigger level, and press the - button to lower it.
The higher the trigger level, the louder the signal must be to start (trigger) sampling.
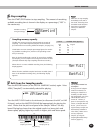
You can instantly restore
the default trigger level
setting by pressing both
+/- buttons simulta-
neously.
BWD
0
velocity
7 8
rest
9
3
FWD
Trigger level meter