


74
Deleting a sample
You can easily delete any specific sample you’ve recorded. To do this:
1 Enter the Sampling mode.
Press the RECORD button (in the DIGITAL SAMPLING section).
2 Press the original key of the sample.
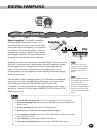
DIGITAL SAMPLING
Recording additional samples
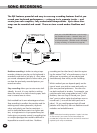
The DJX has space for a total of twelve samples. Recording of additional samples is
very easy. Simply follow the same steps as you did in recording your first sample, but
select a different key in step #4.
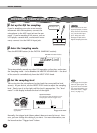
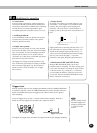
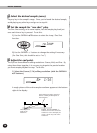
Additional samples are mapped to the
keyboard so that there is equal space
between samples. For example, if you’ve
recorded one sample to C3, and then
recorded a new sample to A3, the samples
are mapped to the keyboard in this
fashion:
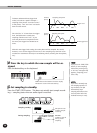
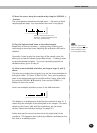
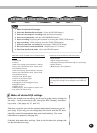
• Forgotten where all your samples are?
If you’ve recorded several samples, it may be hard to
keep track of which keys you’ve recorded them to. The
DJX lets you easily check where the original key of
each of your samples is.
Each original key is darkened in the display. Since
there is not enough room in the display to show the
entire keyboard, each octave is shown separately
(indicated by the number at the bottom). To step up or
down through the octaves, use the OVERALL +/-
buttons.
Second sample recorded at A3.
("Split point" between the
samples is half the distance
between the original keys.)
Range of first
sample
Range of second
sample
First sample
recorded at C3.
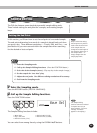
DEMO START
Displays the
next higher
octave.
Displays the next
lower octave.
3
Indicates original
keys of each sample.
Indicates currently
displayed octave.
BWD
0
velocity
7 8
rest
9
3
FWD
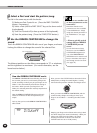
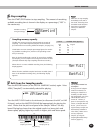
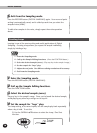
Delete?
YES
3 Delete the sample by pressing the +/FWD button.
At the “Delete?” prompt in the display, press the +/FWD button
to actually delete the sample.
“End” appears briefly in the display, before operation returns
If you’ve inadvertently pressed the key to a sample you wish to
keep, press the -/BWD button to cancel.