


97
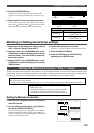
Changing the initial setting (SETUP mode)
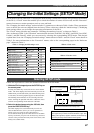
<Table-1> “Changing the initial settings” menu
Parameters Default setting Refer page
Setting a time signature 001BAR 4/4 98
Setting a Tempo 001BAR 1
120 100
Setting the metronome function oFF 101
Setting a preroll time 00 102
Setting MIDI sync output signal CLk (Clock) 103
Setting an MTC frame rate 25 frame 104
Setting an MTC offset value 00H 59M 57S 00F 00SF 104
Setting Offset mode ABS 105
Setting the slave mode oFF 106
Setting the slave type VAri 107
Setting the record protect function oFF 108
Setting digital input tracks L- r- (No assign) 109
Setting digital output tracks L-
r- (ST. OUT L, R) 110
Setting BAR/BEAT resolution mode oFF 111
Setting the MIDI device ID number 00 112
<Table-3> “Execution” menu
Execution item Refer page
Deleting a Program 35
Editing a Program title 36
Saving song data to an external digital device (DAT, adat, SCSI) 85
Loading song data from an external digital device 85
Formatting an current drive disk 28
Formatting an backup drive disk 31
<Table-2> “Check” menu
Check item Refer page
Check of the Event number on the track. 112
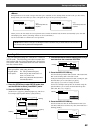
SETUP
DRIVE
AUTO A.PUNCH
SYNC OUT
CLK
SCSI
44.1kHz
Changing the Initial Settings (SETUP Mode)
Selecting SETUP mode
Follow the steps below to select the desired SETUP menu in SETUP mode.
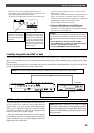
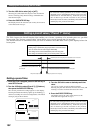
1. While the FD-8 is stopped, press the SETUP key on
the control panel.
Pressing the SETUP key causes the FD-8 to enter SETUP
mode. The FD-8 displays the first hierarchy level of the
SETUP menu you selected before you turned off the power.
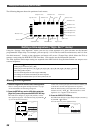
At this time, the menu graphics appear as shown below.
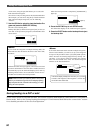
The flashing menu indicator is the currently-selected
menu. Turning the JOG dial will select a different menu
and the corresponding menu indicator will flash.
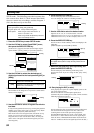
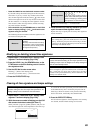
2. Select the desired menu using the JOG dial, then
press the EXECUTE/YES key.
The FD-8 displays the second hierarchy level of the
selected SETUP menu, where you can set parameters.
(Refer to the next page for more information.)
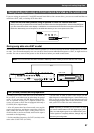
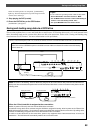
To exit SETUP mode, press the STOP button or the EXIT/
NO key. Each time you press one of these keys, the FD-8
returns to the previous hierarchy level of the menu, and
finally exits SETUP mode.
This indicates the position of the SETUP menu. Selecting a
menu via the JOG dial will move the flashing cursor.
The title of the SETUP menu
appears. You can select a different
menu via the JOG dial.
This lights up when the FD-8
enters SETUP mode.
Note:
With the factory initial settings, or when you turn on the
power again after you format an external SCSI disk, “Sign. Set?
(Setting a time signature)” appears. Otherwise, the first hierarchy
level of the previously-selected SETUP menu appears.
SETUP mode of the FD-8 offers the “Changing the initial settings” menus that configure the operating environment
of the FD-8, a “Check” menu that enables you to check the number of events of each track, and the “Execution”
menus that execute certain operations, such as save and load.
The “Changing the initial settings” menus include 15 parameters as shown in Table-1 below. These parameters
were set before the unit was shipped from the factory (These values are called the “initial settings.”). Modifying
these settings allows you to change the operating environment of the FD-8.
The “Check” menu provides one parameter “Checking the number of events” as shown in Table-2.
Also, as shown in Table-3, the “Execution” menus include six items: Title Edit?, Del. PGM?, Load PGM?, Save PGM?,
Format?, and [Bk Format?], which you can execute by selecting the corresponding SETUP menu. This chapter
explains how to use the “Changing the initial settings” menus shown in Table-1 and the “Check” menu shown in
Table-2. For more information on the “Execution” menus, refer to the corresponding pages in the “Reference
page” column in Table-3.