95
Basic functions
Sampling mode
Using Time Slice to divide a sam-
ple and play it in Sequencer
mode
Time Slice automatically detects the attacks of the kick
and snare etc. in a rhythm loop sample (a looped sam-
ple containing a drum pattern, etc.), and automatically
divides the sample at the appropriate points. The
resulting samples can be automatically turned into a
multisample and program. Sequencer mode perfor-
mance data for replaying the divided samples can also
be created automatically.
Here are some ways that you can use a time-sliced
sample in a Sequencer mode song.
• Adjust the tempo of several rhythm loop samples
(all of differing tempos) without affecting their
pitch.
• Make realtime changes to the tempo without
changing the pitch.
Here is an example of the procedure for time-slicing a
rhythm loop sample in Sampling mode, and for play-
ing the resulting rhythm loop samples in Sequencer
mode.
You can try this using a rhythm loop sample that con-
tains a drum performance. You can record this on the
TR or use Media mode to load data from SD card etc.
When trying this for the first time, start with a fairly
simple one-measure 4/4 drum pattern. In this example
we are using a 120 BPM rhythm loop sample.
1 Access the SMPL 3.1: Loop Edit, Edit1 page.
2 In “SMPL,” select a 120 BPM rhythm loop sample.
3 Access the SMPL 3.1: Loop Edit, Edit2 page.
Play back the sample, and check whether the beat
plays accurately across the looped point. If not,
access the SMPL 3.1: Loop Edit, Edit2 page, adjust
“S (Start)” (start address) and “E (End)” (end
address), and execute the “Truncate” utility menu
command. (
☞p.92, ☞PG p.109)
4 Choose the “Time Slice” utility menu command.
The Set Sample Tempo dialog box will appear.
5 Specify the quarter note time signature and the
tempo of the sample.
If you know the BPM, set the “Source BPM” field. If
you do not know the BPM, set “Beat” and the BPM
will be calculated automatically. In this example we
already know the BPM, so we will set “Source
BPM” to 120.
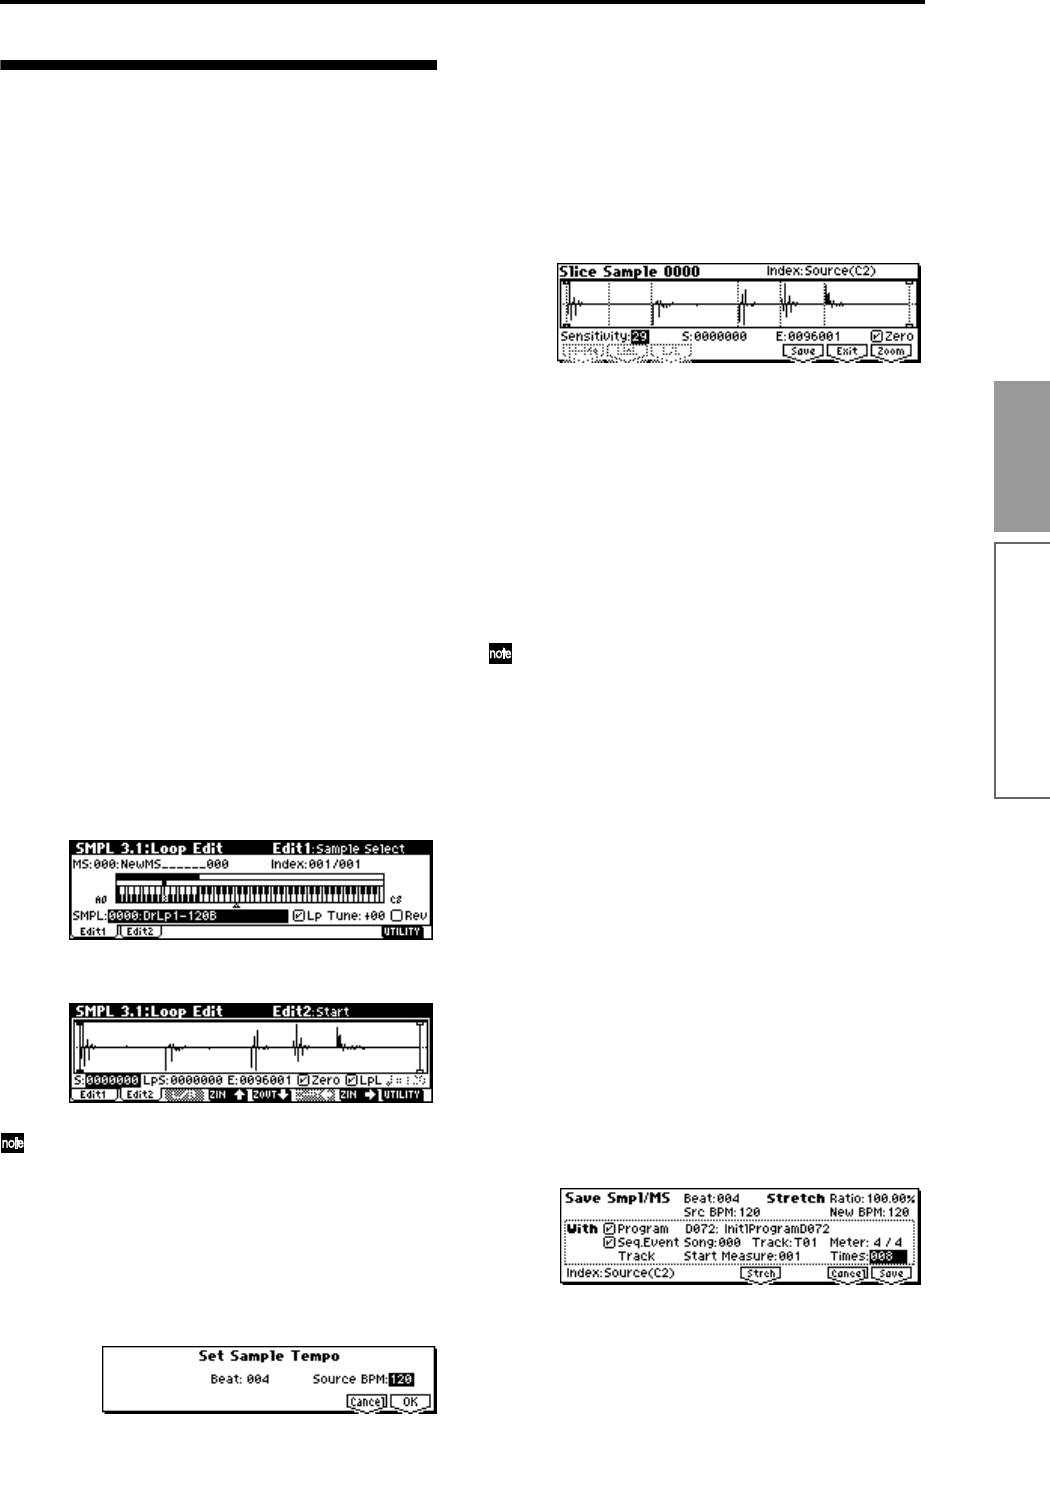
6 Press the [F8] (“OK”) key.
The sample will be sliced automatically, and the dia-
log box will appear.
When you play the keyboard, C2 will sound the
original sample (Source), and the keys D2 and
above will play the divided samples.
While you listen to each of the divided samples,
adjust “Sensitivity” so that each of the drums or
percussion instruments are separated. For some
samples, you may not be able to slice the samples
cleanly by adjusting “Sensitivity.” If the attack por-
tion of the next sample is heard at the end of a sam-
ple, or if two sounds are heard in a single sample,
you will need to make further edits.
To edit, hold down the [ENTER] key and select the
“Index” that is assigned to the key you want to
edit. (That portion of the waveform display will be
highlighted.) Then you can adjust “S (Start)” and
“E (End),” use Divide to divide samples, or use
Link to join samples. (
☞PG p.111 step 7)
7 Press the [F6] (“Save”) key.
The Save Smpl/MS dialog box will appear.
From here you can save the time-sliced samples and
multisample.
At this time, you can adjust the settings in the
“With” area to specify which program will use the
samples and multisample, and the destination of the
Sequencer mode performance data (track or pat-
tern) that will be used to playback the rhythm loop
sample.
• To create performance data in a track
Check “Program” and “Seq.Event”
Program: D072
Seq.Event: Track
Song: 000, Track: 01, Meter: 4/4
Start Measure: 001, Times: 008
Press the [F8] (“Save”) key to save your settings.
You will return to the dialog box of step
6.
• To create performance data in a pattern
In order to insert the data into a pattern, press the
[F6] (“Save”) key once again to access the Save
Smpl/MS dialog box.
Check “Program” and “Seq.Event”
Program: D073


