


70
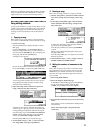
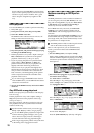
Press the track 2 “SOLO On/Off” and press the
[INC] key once.
The display will change, and only the playback of
tracks 1 and 2 will be heard.
To turn off the Solo function, select the “SOLO
On/Off” and press the [DEC] key once again.
Select the track 1 and 2 “SOLO On/Off” and press
the [DEC] key once each.
The display will change, and the playback of tracks
1 and 2 will be muted. If the Solo function is turned
off for all tracks, playback will be according to the
“PLAY/MUTE/REC” settings.
By using the Utility menu command “Solo
Selected Track,” you can listen to the sound of
only the selected track. This is convenient when
you want to set track parameters or to make effect
settings. (
☞PG p.51)
[LOCATE] settings
By pressing the [LOCATE] key you can move to a
specified location.
The location is specified by the Utility menu command
“Set Location.” You can also hold down the [ENTER]
key and press the [LOCATE] key to set the location
even during playback (
☞PG p.54).
Normally you will set this to 001:01.000. You will
return to the beginning of the song.
When you select a song, the [LOCATE] setting will
automatically be set to 001:01.000.
Making track settings for a new song
Here’s how to make basic settings for a new song, such
as assigning a program to each track, and setting the
volume etc. You can check these settings for the tem-
plate song you loaded earlier.
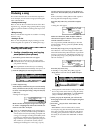
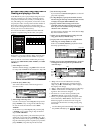
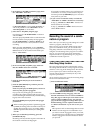
1. Assign a program to each track
(SEQ 1.1: Play/REC, Program page)
In the SEQ 1.1: Play/REC, Program page, use “Pro-
gram Select” to assign a program to each track.
At this time you can also use the Utility menu com-
mand “Select by Category” to select programs by
category (
☞PG p.55).
You can also use the Utility menu command “Copy
From Combi” to copy settings from a combination
(
☞p.77, PG p.52).
When assigning a program, you can use “Track
Select” to select the track for which you are mak-
ing assignments, and try playing the sound.
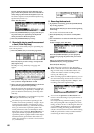
2. Set the pan and volume of each track
(SEQ 1.1: Play/REC, Mixer page)
In the SEQ 1.1: Play/REC, Mixer page, “Pan” sets
the pan of each track, and “Volume” sets the vol-
ume of each track.
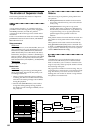
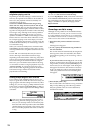
3. Specify the tone generator and MIDI channel
that will sound each track (SEQ 3.1: Param1,
MIDI page)
In the SEQ 3.1: Param1, MIDI page, “Status” speci-
fies whether each track will sound the internal tone
generator or an external tone generator. “MIDI
Channel” specifies the MIDI channel for each track.
If the track status “Status” is set to INT, playing the
track data or operating the TR’s keyboard or con-
trollers will cause the TR’s internal tone generator to
be sounded and controlled.
If “Status” is set to EXT, EX2, or BTH, playing the
track data or operating the TR’s keyboard or con-
trollers will cause an external tone generator to be
sounded and controlled. (The MIDI channel of the
external tone generator must be set to match the
“MIDI Channel” of TR tracks that are set to EXT,
EX2 or BTH.)
If “Status” is set to BTH, both the external tone gen-
erator and the TR’s own tone generator will be
sounded and controlled.
If you are using the TR’s Sequencer mode as a 16-
track multi-timbral tone generator, set this parame-
ter to INT or BTH. (
☞”Status” PG p.62)
In general, you should set “MIDI Channel” to dif-
ferent channels 1–16 for each track. Tracks that are
sent to the same MIDI channel will sound simulta-
neously when either is recorded or played.
4. Make effect settings
(SEQ 7.1: Insert FX, SEQ 7.2: Master FX)
Make settings for each effect in SEQ 7.1: Insert FX
and SEQ 7.2: Master FX. (
☞p.114, PG p.84)
5. Set the tempo and time signature
(SEQ 1.1: Play/REC)
Make these settings in SEQ 1.1: Play/REC. “Tempo”
sets the tempo, and “Meter” sets the time signature.
(
☞PG p.50)
6. Make other settings as necessary
As necessary, make arpeggiator settings (SEQ 6.1:
Arp.) and MIDI filter settings (SEQ 4.1–4.4: MIDI
Filter 1–4). (
☞PG p.49–87)