


93
Basic functions
Sampling mode
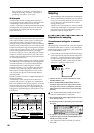
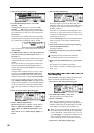
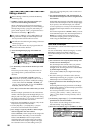
The following dialog box will appear.
Check “Grid,” set “Resolution” as desired, and
press the [F8] (“OK”) key. The dotted grid lines will
appear.
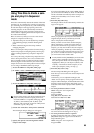
2 Set “ (Grid Tempo)” to the desired BPM tempo
value.
3 Set the end address so that it coincides with a dot-
ted line of the grid.
This will cause the loop interval to be the same
length as the BPM value.
The grid display will be based at “LpS (Loop Start)”
if looping is on. If looping is off, the grid will be
based at “S (Start).”
4 To hide the grid display, select the Utility menu
command “Grid”, uncheck “Grid,” and press the
[F8] (“OK”) key.
The grid is displayed according to the playback
pitch of the base key (the key shown in gray in the
“Keyboard & Index” area).
You can select the base key by holding down the
[ENTER] key and playing a note on the keyboard.
Sample (waveform data) editing
Editing the waveform data of the sample is done in 2.1:
Sample Edit. You can use commands such as cut, copy,
and normalize to edit the waveform data.
1 Select the sample that you wish to edit.
Use “SMPL (Sample Select)” or “Index” in the 2.1:
Sample Edit, Edit 1 page or the 1.1: Recording, Sam-
ple page to select the sample. (
☞p.91)
If you use “SMPL (Sample Select)” to select the
sample, be aware that the index assignment will
also change.
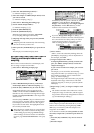
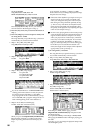
2 Select the 2.1: Sample Edit, Edit2 page.
The waveform data of the currently selected sample
will be displayed.
The waveform display of a sample that was sam-
pled with a “Mode (Sample Mode)” setting of
Stereo can be switched between the L and R wave-
forms by pressing the [F3] (“L/R”) key. When you
do so, [L] or [R] will be displayed alternately in the
upper right.
3 Use “S (EditRangeStart)” and “E (EditRangeEnd)”
to specify the range that you wish to edit.
The selected range will be highlighted.
If you wish to hear the sound of the selected range,
press the [START/STOP] key. The selected range
will play back at the pitch of the base key (the key
shown in gray on the keyboard display). You can
select the base key by holding down the [ENTER]
key and playing a note on keyboard.
When you play a key to which the sample is
assigned (the highlighted range of the keyboard dis-
played in “Keyboard & Index”), and the sample will
be played back according to its loop settings.
The procedure for using the ZOOM and “Zero
(Use Zero)” check boxes is the same as for 3.1:
Loop Edit.
4 From the list of Utility menu, select the desired
editing command. Make the appropriate settings
in the dialog box, and press the [F8] (“OK”) key to
execute.
For details on each command (
☞PG p.101).
A note on saving samples
In the dialog boxes of some Utility menu, there is a
“Save to No.” setting that lets you specify the sample
number to which the edited sample will be saved. At
this time, a vacant sample number will be selected
automatically, so you will change the setting only if
you want to specify the save destination number.
If you check “Overwrite” in the dialog box of the com-
mand, the data prior to editing will be deleted, and
will be overwritten by the edited data. Normally, you
will execute the Write operation without checking this,
so that the unedited data is preserved. When you are
completely finished with your editing, you can use the
Utility menu command “Delete SMPL” to delete
unneeded samples.
In Sampling mode, there is no Compare function
that lets you compare the data before and after
editing.
If you wish to preserve the unedited state of the
multisample or sample, use “Copy SMPL” or
“Copy MS” (
☞PG p.96, 97) to copy the multisam-
ple or sample before you begin editing it.
For some Utility menu commands in 2.1: Sample
Edit or 3.1: Loop Edit, you can execute without
checking the “Overwrite” setting in the dialog
box, so that the sample data previous to editing
will be preserved.