


8
13.SEQUENCER/SAMPLING
(If the separately sold EXB-SMPL option is
installed)
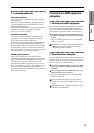
[PAUSE] key
This key pauses playback of a song or cue list (the key
will light). Press the key again to cancel Pause (the key
will go dark).
[ REW] key
This key rewinds playback of a song or cue list.
Rewind will occur when you press the key (the key
will light). (This will not operate during recording.)
[FF ] key
This key fast-forwards playback of a song or cue list.
Fast-forward will occur when you press the key (the
key will light). (This will not operate during record-
ing.)
[LOCATE] key
This key resets the playback location of a song or cue
list to a specified location. You can also press this key
when “stuck notes” occur for some reason.
[REC/WRITE] key
When you press this key in Sequencer mode, the TR
will enter recording-ready mode (the key will light). If
you then press the [START/STOP] key, recording will
start. (
☞p.81)
When you press this key in Program, Combination, or
Global modes, a dialog box will appear. If you then
press the [F8] (“OK”) key, the edited content will be
written. (
☞p.43, 45)
When you press this key in Sampling mode (if the
EXB-SMPL option is installed) and then press the
[START/STOP] key, sample recording will begin.
(
☞p.35)
[START/STOP] key
In Sequencer mode, this key starts/stops song record-
ing/playback, or cue list playback. (The key will blink
in time with the beat during recording or playback.)
In Sampling mode (if the EXB-SMPL option is
installed), press the [REC/WRITE] key and then press
the [START/STOP] key to start/stop sample recording.
In the SMPL 2.1–2: Sample Edit, Edit2 page, pressing
this key will sound the sample.
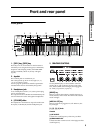
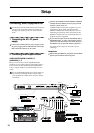
Rear panel
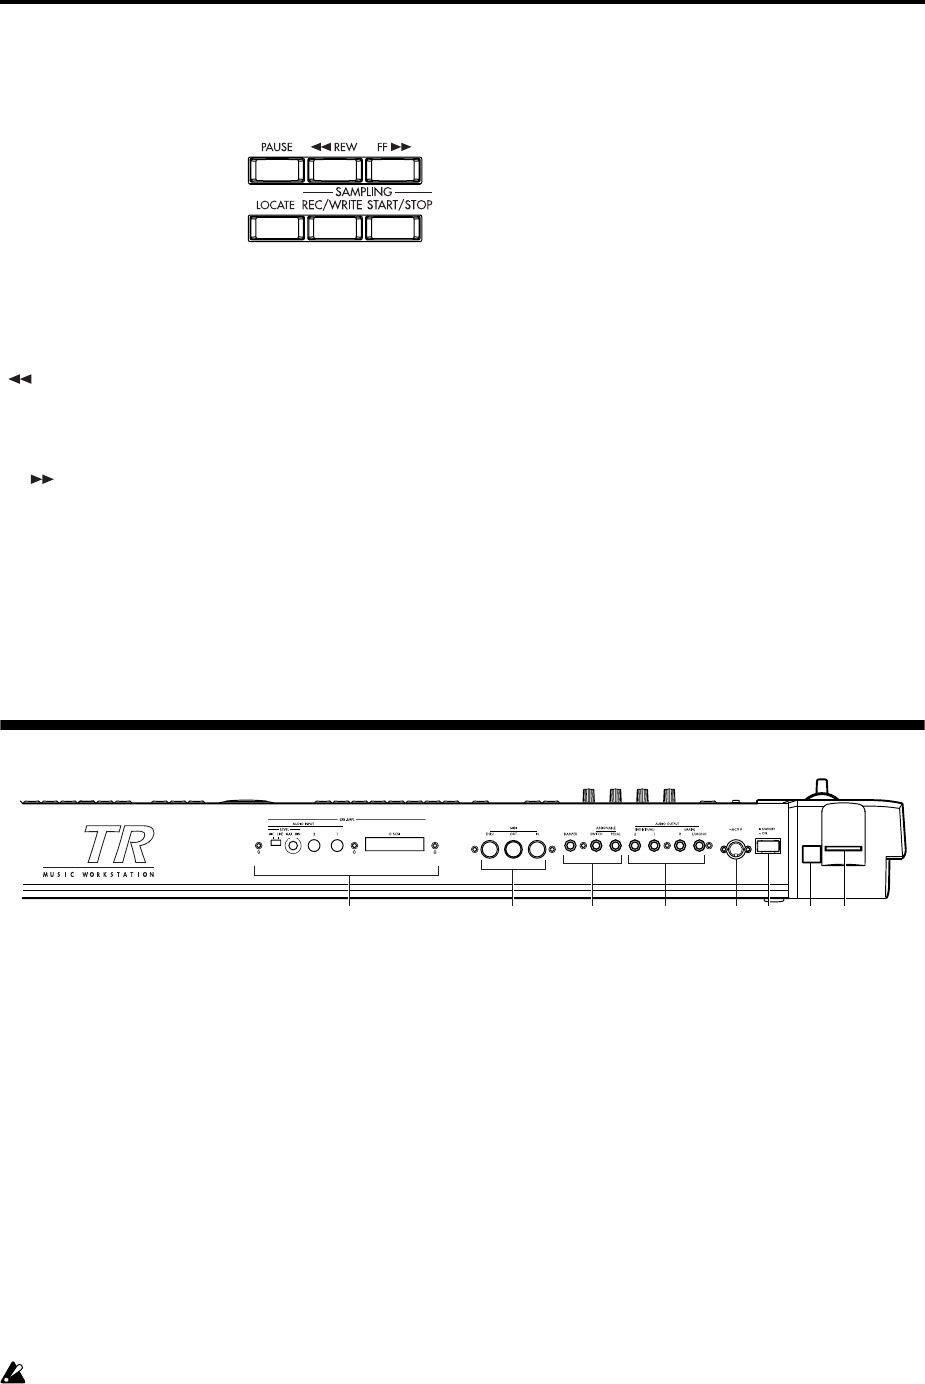
1. SD card slot
You can insert an SD card in this slot.
Refer to p.14 for details on inserting, removing, and
handling media.
2. USB B connector (for connecting to a
computer)
You can connect your computer to this connector.
Using a single USB cable, your TR can send and receive
MIDI information to and from a computer . This elimi-
nates the need for a MIDI interface and the associated
cables. (
☞PG p.233)
What is USB?
USB stands for Universal Serial Bus, and is an interface
for transferring data between a computer, a keyboard
and/or peripheral devices.
The USB connector of the TR is only able to trans-
mit and receive MIDI data.
3. [POWER] switch
This switch turns the power on/off (☞p.18).
4. AC power supply connector (~AC9V)
Connect this to the included AC/AC power supply.
After connecting the power supply cable to TR, con-
nect the other end to an AC outlet (
☞p.12).
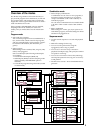
5. AUDIO OUTPUT
Connect these outputs to the input jacks of your amp
or mixer. In addition to the L/MONO and R main ste-
reo audio outputs, TR provides two individual audio
outputs. The sound from each oscillator, drum, tim-
bre/track, or insertion effect can be freely routed to
any output (
☞p.112–).
3
4
6
78
2
1
5