


29
Performance
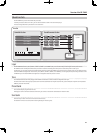
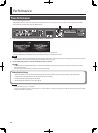
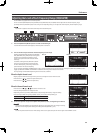
Playing Di erent Tones in Two Di erent Sections of the Keyboard
Such a division of the keyboard into right- and left-hand sections is called a “ Split,” and the key where the division takes place is called the “Split Point.”
While in Split mode, a sound played in the right side is called an “UPPER part,” and the sound played in the left side is called a “LOWER part.” The
split-point key is included in the LOWER section.
The Split Point has been set at the factory to “F#3.”
MEMO
You can change the split point. Please refer to “Changing the Keyboard’s Split Point” (p. 29).
1 2
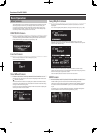
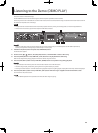
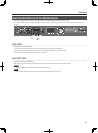
1. Press the [SPLIT] button, getting the indicator to light.
[LOWER 1] button lights.
Try ngering the keyboard.
The UPPER tone plays in the right-hand section of the keyboard, and the
LOWER tone plays in the left-hand section.
2. To exit Split mode, press the [SPLIT] button once more, and the indicator light goes out.
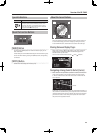
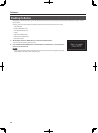
Changing the Keyboard’s Split Point
You can change the point at which the keyboard is divided (the Split Point) in Split mode.
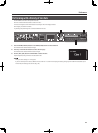
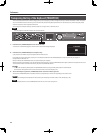
1. Hold down the [SPLIT] button for several seconds.
Current value of the setting is displayed.
2. While holding down the [SPLIT] button, press the key that is to become the new split point.
When you release the [SPLIT] button, the previous display will reappear.
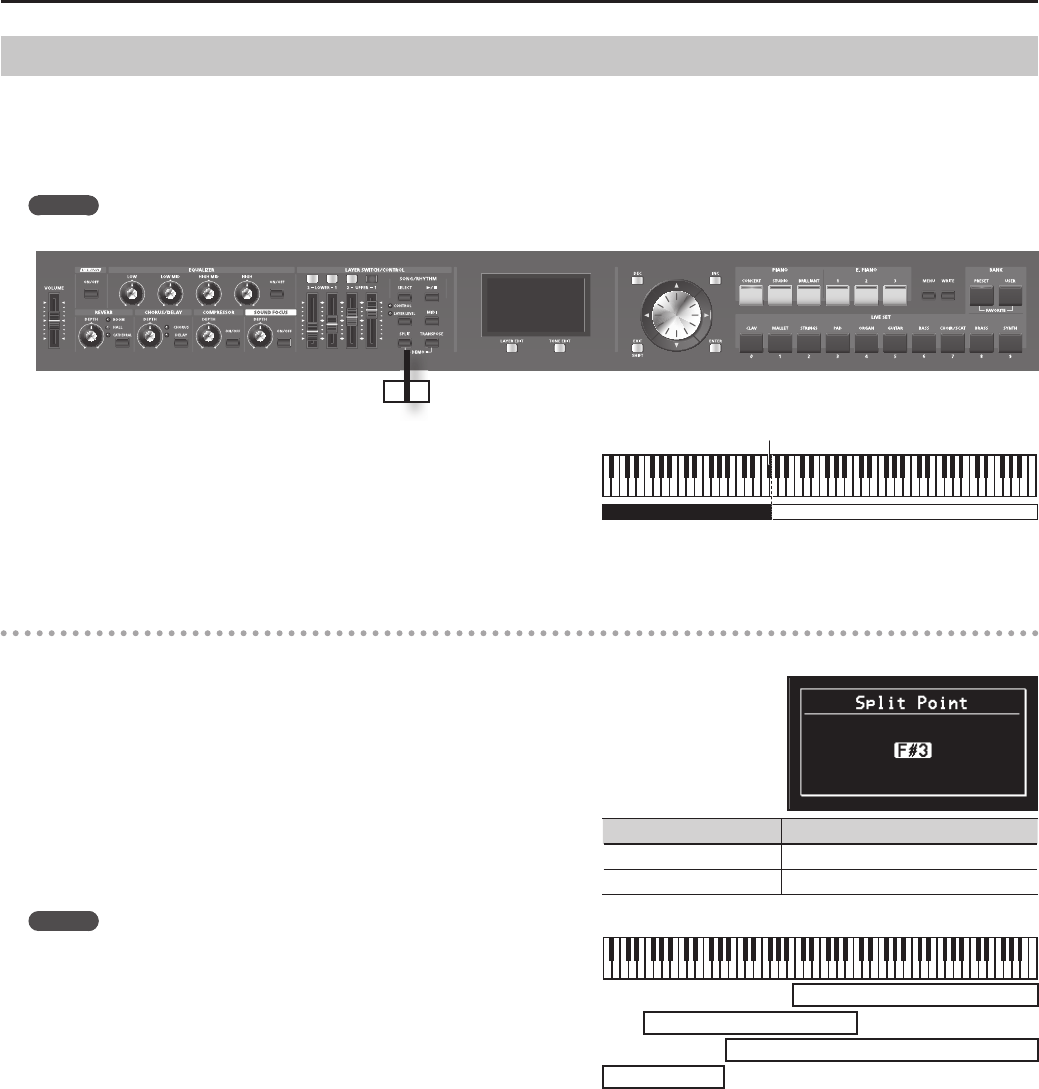
The split-point key is included in the LOWER section.
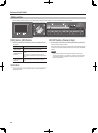
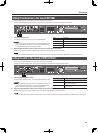
When you specify the split point, each layer’s key range “LWR (Key Range
Lower)” (p. 56) and “UPR (Key Range Upper)” (p. 56) will be divided to left and right
at the split point, and will be set to the values shown in the table.
MEMO
• When the split point is changed, the Key Range “LWR (Key Range Lower)”
(p. 56), “UPR (Key Range Upper)” (p. 56) value also changes.
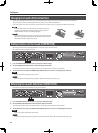
• You can change the split point, adjusting it in semitone increments, by
holding down the [SPLIT] button and pressing the [DEC] [INC] buttons. You
can also use the VALUE dial to change the split point.
• You can freely set whatever key ranges you like to each layer. For details,
refer to “LWR (Key Range Lower)” (p. 56), “UPR (Key Range Upper)” (p. 56).
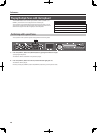
Split Point (F#3)
LOWER 1 UPPER 1
Layer Range
UPPER 1, UPPER 2 Split Point +1–C8
LOWER 1, LOWER 2 A0–Split Point
UPPER 1
UPPER 2
LOWER 1
LOWER 2