59
Chapter 6. Pattern Editing
1.
Go to the Pattern Play screen (p. 15).
2.
Turn the VALUE dial or use [DEC][INC] to select the pattern you want to edit.
You can also select a pattern from the pattern list (p. 24).
3.
Press [F2] (EDIT) to get the PATTERN EDIT screen.
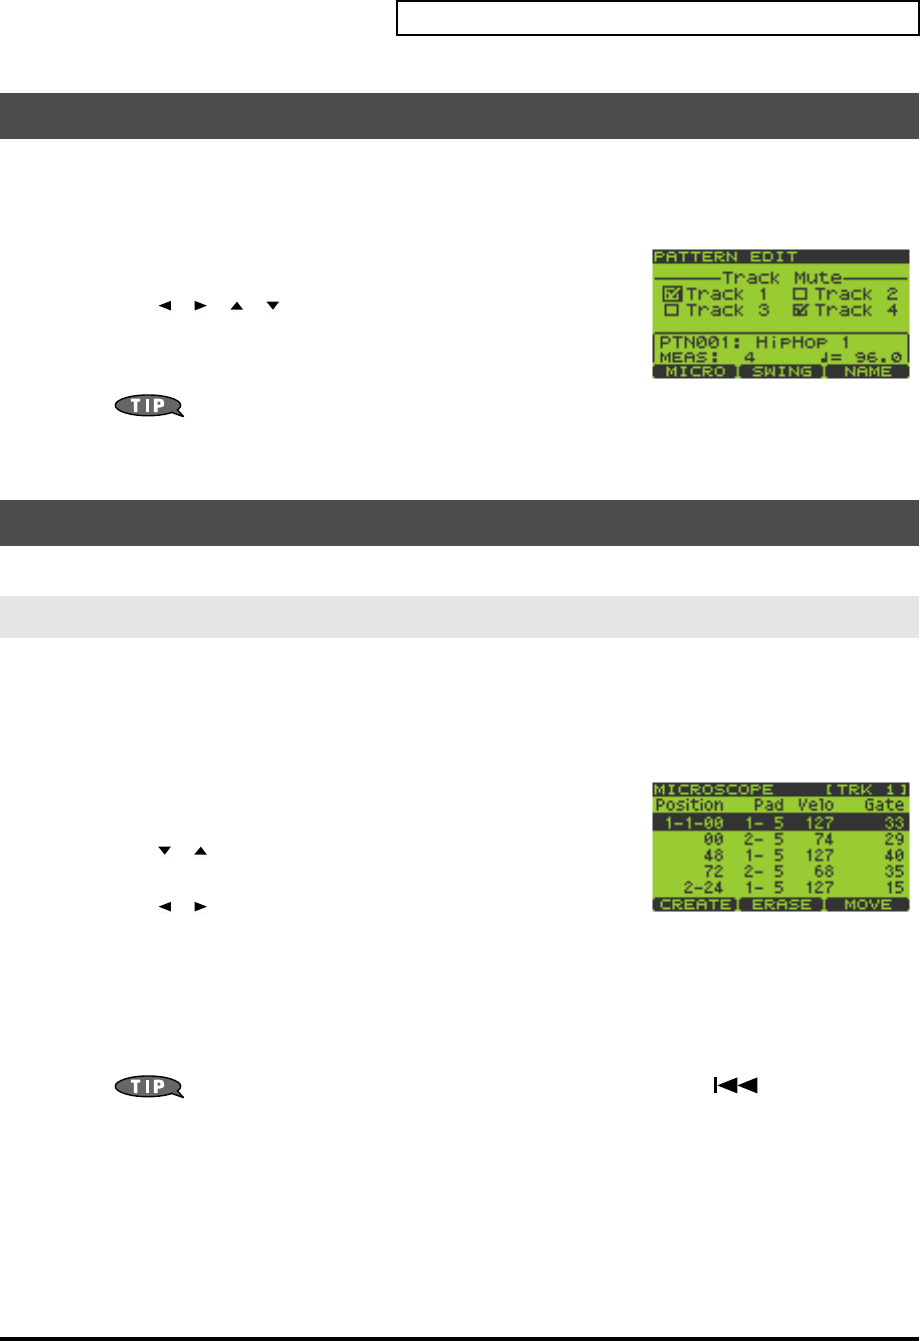
The upper line of the screen will indicate “Track Mute.”
4.
Use [ ][ ][ ][ ] to move the cursor to Track 1–4, and turn
the VALUE dial or use [DEC][INC] to add or remove a check mark.
Tracks with a check mark are muted. The mute status for each track is
stored in the pattern.
You can also use TRACK [1]–[4] to add or remove check
marks in the “Track Mute” screen.
5.
Press [EXIT] to return to the Play screen.
You can use Microscope editing to make detailed changes in the performance data of a pattern.
1.
Go to the Pattern Play screen (p. 15).
2.
Turn the VALUE dial or use [DEC][INC] to select the pattern you want to edit.
You can also choose a pattern from the pattern list (p. 24).
3.
Press [F2] (EDIT) to get the PATTERN EDIT screen.
4.
Press [F1] (MICRO) to get the MICROSCOPE EDIT screen.
5.
Press TRACK [1]–[4] to select the track you want to edit.
6.
Use [ ][ ] to move the cursor to the location of the performance
data you want to edit.
7.
Use [ ][ ] to select the parameter you want to edit.
From the left, the parameters are
Pad
(pad bank number - pad number; 1-
1–32-16),
Velocity
(the force with which you strike the pad; 1–127), and
Gate
(note duration; 1–65535).
8.
Turn the VALUE dial or use [DEC][INC] to edit the parameter value.
9.
Repeat steps 5–8 to continue editing.
10.
When you are finished, press [EXIT].
You can execute Undo/Redo by holding down [FUNC] and pressing [ ] (Top) (p. 15).
Storing Track Mute Settings in a Pattern
Microscope Editing
Basic Procedure for Microscope Editing
SP-606_e.book 59 ページ 2004年6月21日 月曜日 午前10時8分


