E-62
Measurement
To perform measurement, you need to switch from a screen in which “BREAK” is displayed to the meas-
urement screen.
To perform measurement, follow the procedure given below:
Note
• Prior to start of measurement, be sure to perform white calibration. For details, refer to “White Calibration” (page E-46).
• To measure color difference, it is necessary to set target colors first and then select the one to be used for measurement.
• For accurate measurement, make sure to keep measurement conditions (ambient temperature etc.) constant.
[Operating Procedure]
1
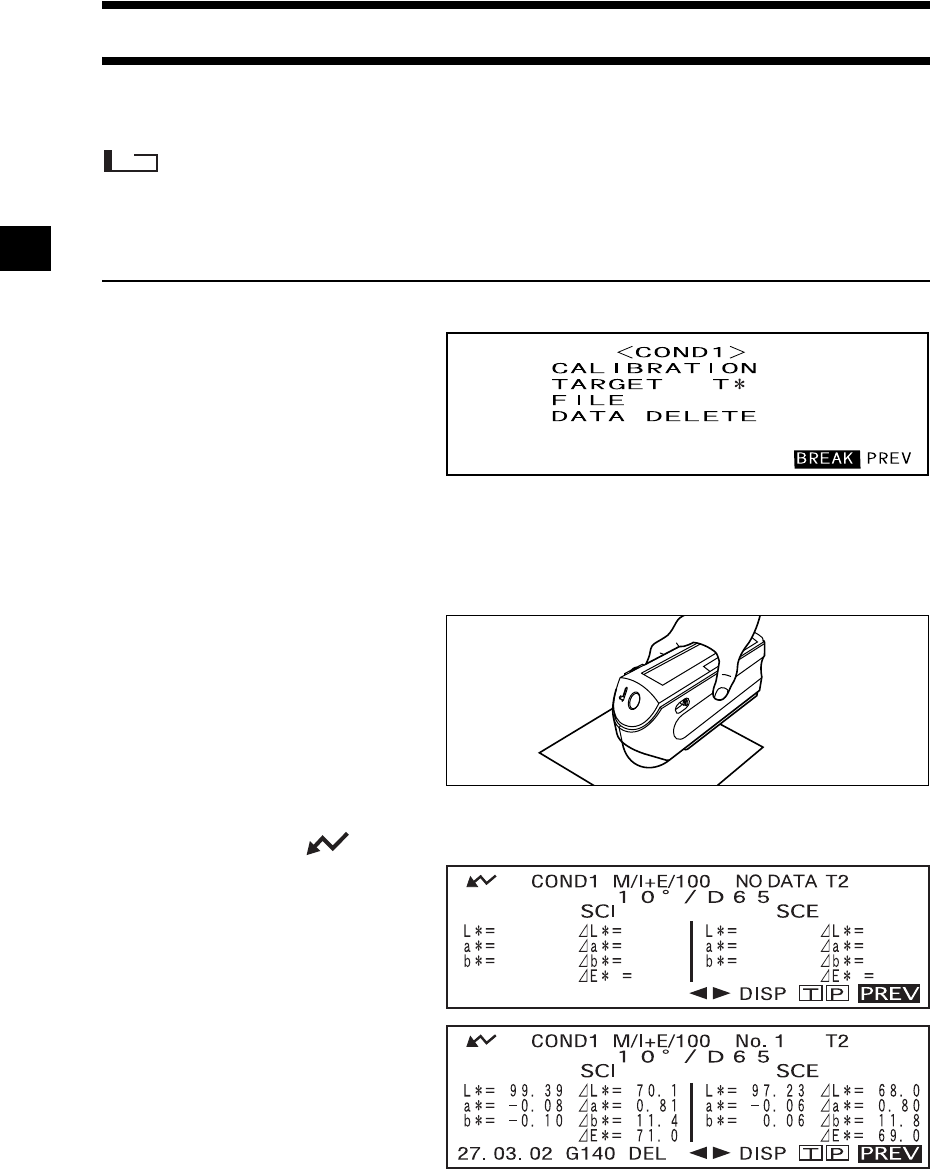
Turn B to select “BREAK”, then press A.
• Example for <COND1> screen.
• “T*” is the number of the color difference target data for the next
measurement. If nothing is selected, “T---” appears.
• “T*” does not appear if “defined in COND.” mode is selected.
2
Place the specimen measuring port to the specimen.
• If necessary, slide the viewfinder lever to check the position of the specimen.
3
Make sure that is displayed, then press C (MEAS. button).
The lamp will flash, measurement
will be taken, then the result will ap-
pear on the LCD.
• Example when “DIFF&ABS” is selected as the display mode.
