


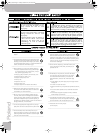

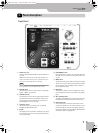


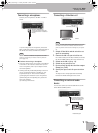
Panel description
12
r
VIMA JM-5
K
VOCAL EFFECT button
The [VOCAL EFFECT] button activates the vocal effect.
Press and hold it to select the desired voice transfor-
mation or harmony effect (page 25). Pressing this
button together with the [SPACE ECHO] button will
activate TALK mode (page 25).
L
AMBIENCE knob
This knob controls the level of the reverb effect
(called “Ambience” on the JM-5) that is added to the
[MIC1] and [MIC2] signals.
M
CURSOR/VALUE dial
This dial can be used to move the cursor in the dis-
play, to select parameters and to set values. By press-
ing it, you can select items in the display (SELECT).
N
[ª] button (Stop)
Press this button to stop playback of the currently
selected song and to return to the beginning.
O
[®÷π] button (Play/Pause)
Pressing this button starts or temporarily halts play-
back of the currently selected song.
P
MELODY MUTE button
This button lets you mute the melody part of the
selected Standard MIDI File, or attenuate the vocal
part at the center of an audio file (WAV or mp3),
allowing you to sing or play that part yourself.
Pressing and holding this button opens the “Melody
Mute” page.
Q
[º] (Rewind) and [‰] (Fast-Forward) buttons
These buttons allow you to rewind or fast-forward
within the currently selected song.
R
REC button
This button allows you to activate audio recording on
the JM-5.
S
CONTROL KEY button
This button
selects the
JM-5
’s transpose function
whose
setting applies to MIDI and audio files as well
as the signals received via the AUDIO IN socket. If the
[KEY] button doesn’t light, the song (audio or MIDI)
and audio input signals use their original pitch.
T
CONTROL TEMPO button
Press this button to select the “Tempo” function and
to change a related setting.
U
PLAYLIST button
This button calls up the “Playlist” function (page 36).
V
NEXT button
This button selects the next song in the playlist and
starts a fade-out of the song that is currently playing
while the new song you selected is gradually faded
in. This also works for songs on the connected USB
memory (irrespective of whether or not you select
them by hand).
W
FINDER button
Press this button to select the JM-5’s convenient
“Finder” function that allows you to search for a song
or picture whose location you don’t remember.
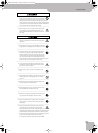
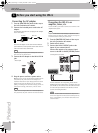
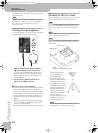
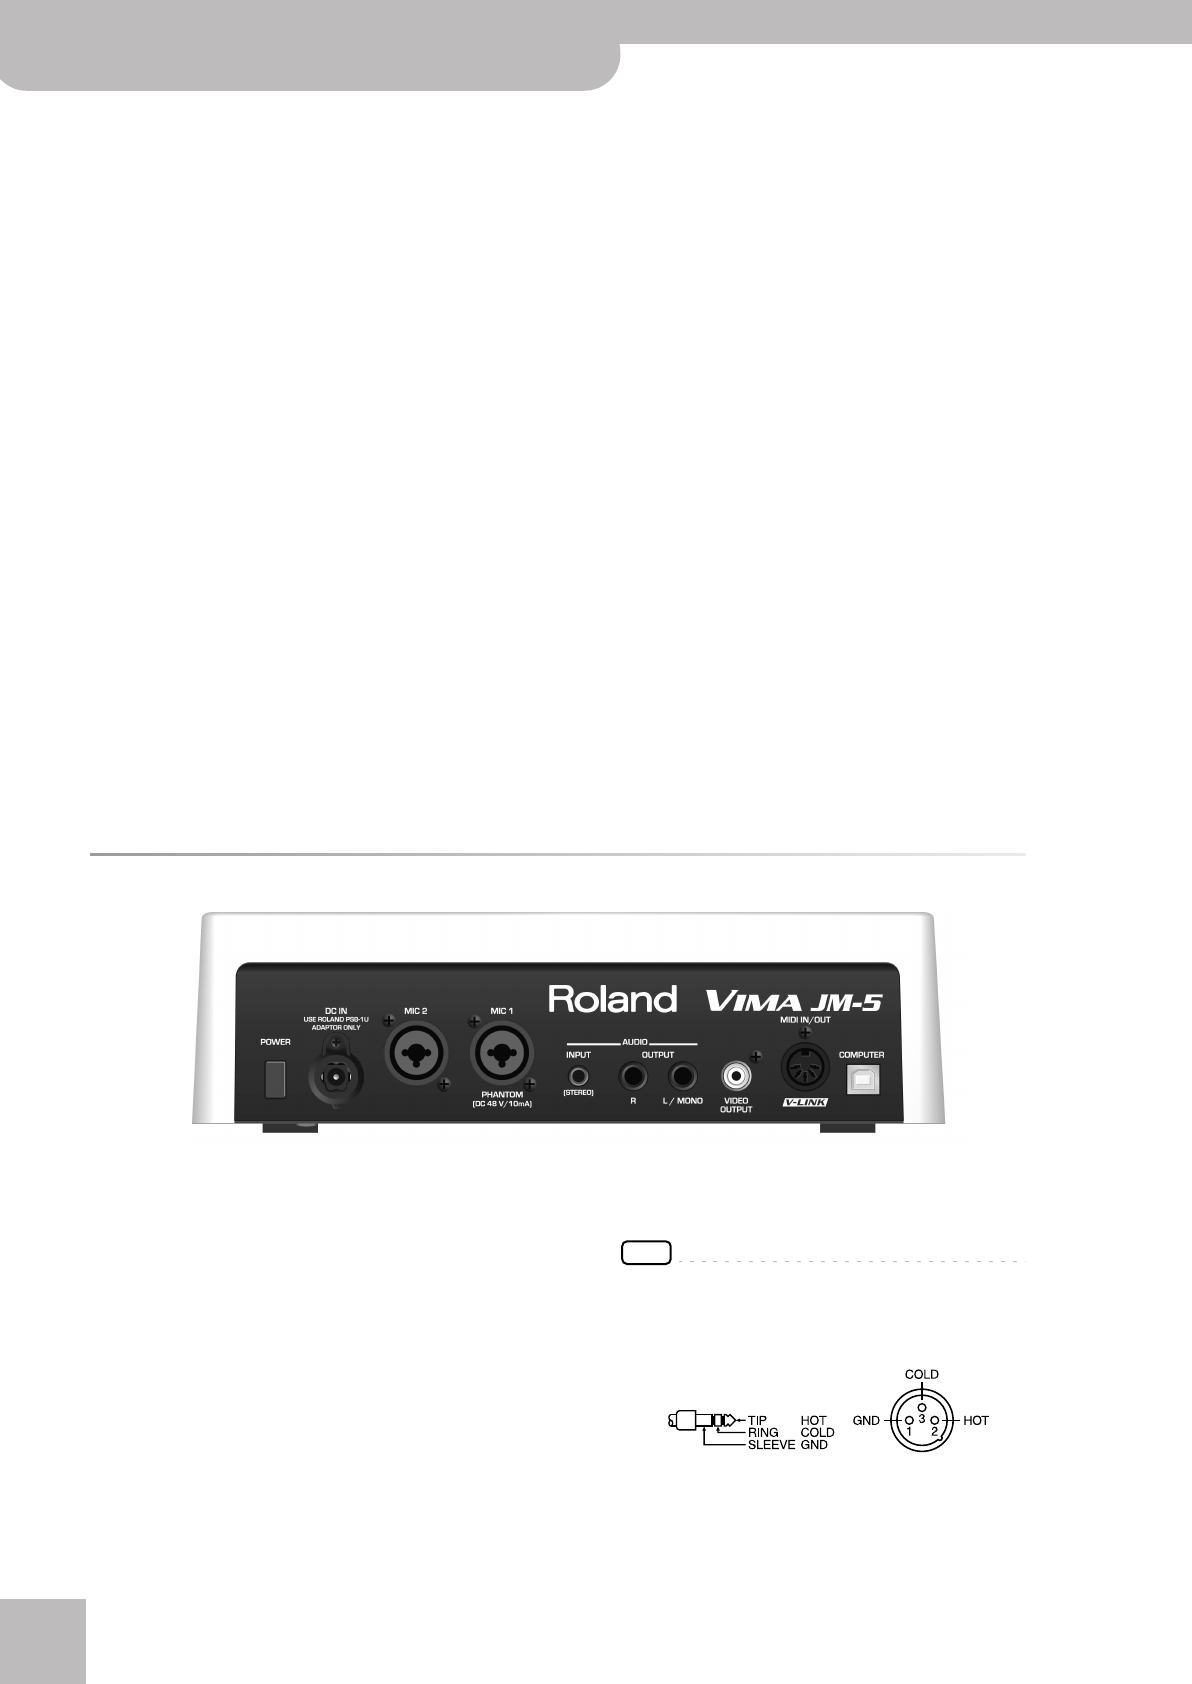
Rear panel
A
POWER switch
Turns the power on/off (page 17).
B
DC IN socket
Connect the supplied AC adapter PSB-1U here
(page 14).
C
MIC2 socket
This is a combo socket to which you can connect
either a balanced XLR or an unbalanced 1/4” phone
jack.
D
MIC1 socket
This is a combo socket to which you can connect
either a balanced XLR or a balanced/unbalanced 1/4”
phone jack, depending on the cable that is connected
to your microphone. This is the main microphone
input whose signal can be processed with the JM-5’s
harmony function.
The JM-5 can provide phantom power to this socket,
allowing you to use a condenser microphone. See
(page 27) for details about phantom power.
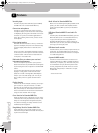
NOTE
This instrument is equipped with balanced (XLR and 1/4”
phone) type jacks. Wiring diagrams for these jacks are
shown below. Make connections after first checking the
wiring diagrams of other equipment you intend to connect.
E
INPUT (STEREO) socket
This socket allows you to connect the audio outputs
of an external signal source (CD/mp3 player, synthe-
sizer, etc.). This is a stereo TRS socket to which you
AB C D
EFG
H
I
JM-5_US.book Page 12 Tuesday, December 14, 2010 10:29 AM