


58
Creating and Editing Samples (Sample Mode)
Naming a Sample (SAMPLE Name)
Assign a new name to the sample. You can assign a name consisting
of up to twelve characters.
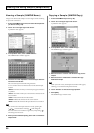
1. Access the SAMPLE Top screen, and select the sample that
you want to name (p. 56).
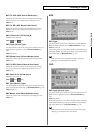
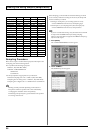
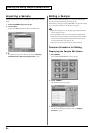
2. Touch <▼> in the upper right of the screen.
A pulldown menu appears.
fig.04-03_50
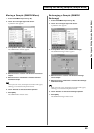
3. In the pulldown menu, touch <SAMPLE Name>.
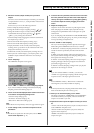
The SAMPLE Name window appears.
fig.04-04_50
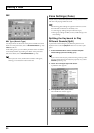
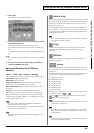
4. Touch the on-screen alphabetic or numeric keys to enter the
new name in the text box.
The on-screen keys have the following functions.
<←><→>: Move the cursor in the text box to the desired input
location.
<SHIFT>: Turn this on when you want to input uppercase letters
or symbols.
<Insert>: Turn this on when you want to insert a character at the
cursor location.
<Clear>: Erases all characters in the text box.
<Delete>: Deletes the character at the cursor location.
<Back>: Deletes the character that precedes the cursor location.
You can also move the input location cursor by pressing the
[][] cursor buttons. Pressing [ ] will change the
character at the cursor location to uppercase, and pressing [ ]
will change it to lowercase.
5. When you have finished inputting, touch <OK> to finalize the
sample name.
Copying a Sample (SAMPLE Copy)
1. Access the SAMPLE Top screen (p. 56).
2. Touch <▼> in the upper right of the screen.
A pulldown menu appears.
fig.04-03_50
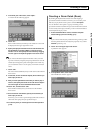
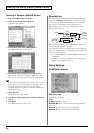
3. In the pulldown menu, touch <SAMPLE Copy>.
The SAMPLE Copy window appears.
fig.04-04a_50
4. Move the cursor to “Source” and select the copy-source
sample.
5. Move the cursor to “Destination” and select the copy-
destination sample.
When you touch <List>, the Sample List window will appear,
allowing you to select the sample from the list.
6. Touch <Execute> to execute the copy operation.
7. Press [EXIT].
The SAMPLE Copy window closes.