


34
Track Exchange
Up to now, we changed the input channel according to the track to record. However, there is also a way to record
all tracks with one input jack. You can do this by exchanging a recorded track that was recorded normally with
an unrecorded track. This procedure is called “Track Exchange”.
This feature is convenient to use when recording with all G and H [INPUT] jacks that can be connected with a
condenser mic or balanced output, for example. Note that the VF-16 comes with 16 tracks, plus 8 additional
tracks. The Track Exchange feature makes it possible to exchange these tracks with any unneeded tracks 1-16.
Instructions
For this procedure, you need a recorded track and a
blank track.
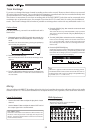
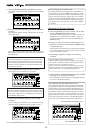
1. Repeatedly press the [EDIT] key while the recorder is in
the STOP state to find and display the “Track Exchange”
mode.
The mode can also be selected by pressing the [EDIT] key
then turning the [JOG] dial.
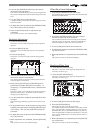
2. Press the [ENTER/YES] key.
The track selection menu of the Track Exchange mode
appears.
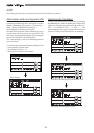
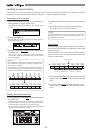
3. Turn the [JOG] dial to select the track to exchange from.
Mono tracks from trk 1-24 and the 8 tracks from 01-08
are selectable.
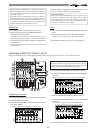
4. Press the [HOLD/>] key, then move the cursor to the track
to exchange to.
The cursor moves every time the [HOLD/>] key is pressed.
The cursor can also be moved using the [REWIND] key or
[F FWD] key.
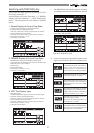
5. Turn the [JOG] dial to select the track to exchange to.
If the track to exchange from is 01-08 then tracks 09-16
or 17-24 are selectable. Mono tracks can be selected as
the exchange site if the tracks are exchanged from the
mono track.
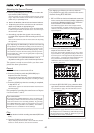
6. Press the [ENTER/YES] key.
[Exchange] appears on the LCD and the exchange process
takes place instantaneously. [Completed!] appears on the
LCD when the exchange process is completed. Then the
system returns to the Normal Display.
Tips:
“Select Err!” appears on the LCD and the exchange process
is invalidated if the same track is selected for the track to
exchange from and track to exchange and [ENTER/YES]
is pressed. (Ex: 3<->3 and so on)
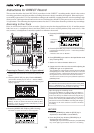
Mixing
After recording with DIRECT Recording, adjust the play level, equalize the sound or add some effects to the audio
sound of track 1-16. This section describes how to adjust the level, PAN, equalizer, effect send level and effect.
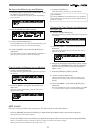
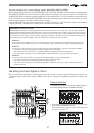
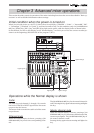
Level Adjustment
* Use the Channel Fader to adjust the play level of each
channel.
* Use the Master Fader to adjust the stereo OUT level of
the output signal of the sounds mixed.
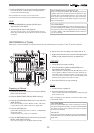
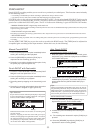
Tips: Master Level
Check the stereo OUT level with the L/R level meter on
the LCD. If the output level is too high, the output will
distort. Adjust the Master Fader so it does not exceed 0
on the L/R level meter.
PAN Adjustment
1. Press the [PAN] key.
The PAN setup menu appears on the LCD.
“Select CH!” will be flashes.
flashing