


56
Flashing
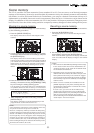
<Viewing the event memories>
The event memories created in real-time by the proce-
dure described above can be viewed by the operation
below.
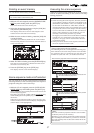
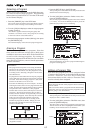
1. While the VF-16 is stopped, press the [SCENE STORE/
MAP] key while holding down the [SHIFT] key.
The screen shows the event memory list as below, in
which you can view and check the event memories
created in real-time.
Creating an event memory by specifying the desired time
<Notes>
• The following procedure is assumed that no event
memory has been created.
• Event memory 00 cannot be edited.
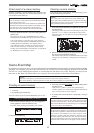
While "Non" is flashing, you can selects the scene
number from those currently stored by rotating the [JOG]
dial. The corresponding scene names are also shown
below. If no scene memory except the initial setting "S00
Init Mix" is stored, selecting any scene number (01 to 99)
except 00 shows "Un-defined" on the screen.
In the description here, we skip selecting a scene
number ("Non" continues to flash) and go to the next step
for time editing. You may, of course, select a scene
number after editing the event time.
3. Use the [F FWD] key to select the flashing (editing) field
in the time display.
Each time you press the [F FWD] key, the flashing (edit-
ing) field moves from h -> m -> s -> f -> sf, while each press
of the [REW] key moves the flashing field in reverse
order.
4. Rotate the [JOG] dial to enter the desired value for the
editing field.
Repeat step 3 and 4 to enter the desired values to all fields.
5. Press the [ENTER/YES] key after editing the time.
The event memory with the edited time is created, and
the display returns to the Normal Display.
6. To create other event memories, repeat step 1 through
5.
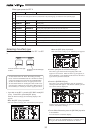
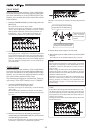
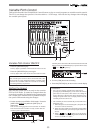
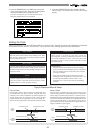
1. While the VF-16 is stopped, press the [SCENE STORE/
MAP] key while holding down the [SHIFT] key.
The display shows the screen for selecting event memory
numbers. When no event memory is created, the screen
shows as below.
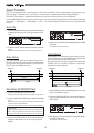
2. Select "01 New Event" using the [JOG] dial, and press
the [ENTER/YES] key.
Rotate the [JOG] dial to highlight "01 New Event".
By pressing the [ENTER/YES] key, the event edit screen
appears, where "Non" flashes in the Scene number field.
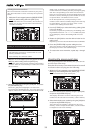
Creating the scene event map
After preparing the event memory list, you can cre-
ate the scene event map.
Note that all necessary scene memories must be stored
in advance when carrying out the following.
1. While the VF-16 is stopped, press the [SCENE STORE/
MAP] key while holding down the [SHIFT] key.
The screen shows the event memory list.
2. Select the desired event memory using the [JOG] dial,
and press the [ENTER/YES] key.
The display shows the screen for selecting the scene
number for the selected event memory ("Non" flashes).
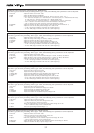
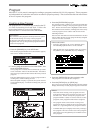
3. Select the desired scene number by using the [JOG] dial,
and press the [ENTER/YES] key.
The selected scene number is assigned to the event
memory. In the example shown below, a scene number
is assigned to each event memory.