


67
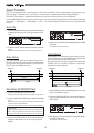
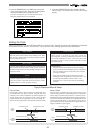
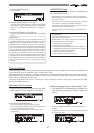
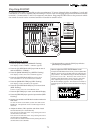
flashing
flashing
flashing
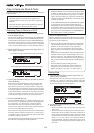
4. Press the [ENTER/YES] key.
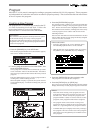
“Sure?” flashes.
5. Press the [ENTER/YES] key once again.
The erase process will takes place. “Wait Erasing!” flashes
on the display while data is being erased. “Completed!”
lights up on the display when the data is successfully
erased.
6. Press the [EXIT/NO] key (or [STOP] key).
The LCD returns to the Normal Display prior to the editing
mode.
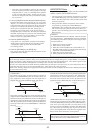
<Remember!>
To erase all data between ABS 0 and REC END, it is
recommended that the time after REC END is set as the
ERASE end point (AUTO PUNCH OUT point) to ensure
that all the data is completely erased. In such case, move
the current location of the recorder to the REC END point
prior to setting the AUTO PUNCH OUT point and then
press the [PLAY] key from that REC END point to move
the REC END point slightly forward. Then press STOP.
By setting that STOP point (time) to the [AUTO PUNCH
OUT] key, it becomes possible to thoroughly erase all data
from that section. The hard disk does not access any point
after the REC END point, even when PLAY is started. When
there is no data on that section, only the time will be
counted.
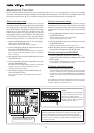
UNDO/REDO Erase
The erase procedure can be undone and redone with
the UNDO/REDO feature.
* Data eased can be undone (unerased) by pressing the
[UNDO/REDO] key after ERASE. The data will return to
the pre-erase status.
* The data erased but undone (unerased) can be redone
(re-erased) by pressing the [UNDO/REDO] key
immediately after undoing the erase process. The data
will return to the post-erase status.
Note the following when executing the UNDO/REDO
feature.
<Precautions>
The UNDO/REDO feature is valid only when the
recorder is in the STOP state.
UNDO/REDO is no longer possible if the following
procedures take place after ERASE.
1. When data is newly recorded.
2. When data is newly edited.
3. When the AUTO PUNCH mode is ON and PLAY (or
RECORD) mode is effected, and the point has already
passed the AUTO PUNCH IN point.
4. When the power is turned OFF.
5. When program selection takes place.
Track Exchange
“Track Exchange” allows the tracks currently on the program to be interchanged (all real tracks and additional
tracks) on mono track or multiple track (8 tracks each) units.
This function makes it possible to exchange real tracks. A real track can be emptied by moving a real track to a
blank additional track. This means that real track can be recorded with other data. All-in-all, track exchange
allows effective utilization of the tracks.
As already described in the “Erase” section, the “Track Exchange” feature is necessary to check the REC END
point of an additional track.
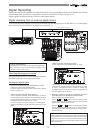
Executing Track Exchange
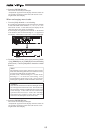
1. Press the [EDIT] key while the recorder is in the STOP
state, and show “Track Exchange?” on the display.
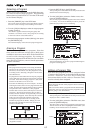
2. Next press the [ENTER/YES] key.
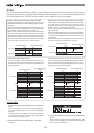
The track exchange selection display appears.
The current display indicates that track 1-8 and track 9-
16 can be exchanged in 8 track units.
To select another combination, go to the next step,
respectively.
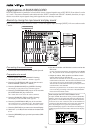
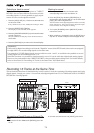
When exchanging tracks 1-8 and tracks 17-24.
1. Press the [HOLD/>] key, [REWIND] key or [F FWD] key to
move the flashing “01-08” (left) to “09-16” (right) that is
flashing.
2. Turn the [JOG] dial to select “17-24” to flash on the
display.
Tracks “09-16” and “17-24” can alternately be selected
by turning the dial.