


83
flashing
flashing
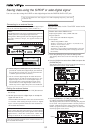
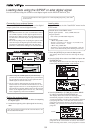
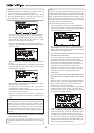
If you save data using the adat digital signal, select
"adat". If you save data using the S/PDIF digital
signal, select "SPDIF". If you save/load data using
the SCSI (described later), select "SCSI".
4. Use the [JOG] dial to select the program to be saved
and press the [ENTER/YES] key.
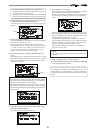
The display shows the "Save Length" screen.
Initially, the recorded time length of the selected
program (ABS 00 to REC END) is shown as the time
length of data saving. Normally you do not need to edit
the length but you may edit it to the desired value if
needed.
For example, if the actual recorded time is 9 min. 00
sec., you can make the length of the data to be saved
shorter or longer than 9 min. 00 sec., as long as the
length does not exceed 59 min.59 sec.
The initially displayed value here is the length of the
Real track, therefore, as noted earlier, you may edit the
value to match the length of the Additional track if it is
longer.
To edit the save length
Press the [REWIND] or [F FWD] key to move the
flashing field between "minutes" and "seconds".
Use the [JOG] dial to set the value for the flashing
field.
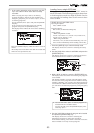
5. Press the [ENTER/YES] key.
The display shows the screen for selecting tracks to be
saved.
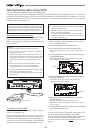
6. Select tracks to be saved.
Press the [REWIND] or [F FWD] key to move the flashing
field between "From" and "To".
Use the [JOG] dial to set the track number for the
flashingfield. For the "From" field, you can select from
1, 9 and17. For the "To" field, you can select from 8,
16 and 24. For example, if you select "From 1 to 24",
data forall tracks (1 to 24) will be saved.
<Note>
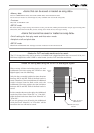
When you save tracks including Additional tracks,
read <Notes for saving data using the S/PDIF or adat
digital signal> on page 79 before executing the save
operation.
7. After selecting tracks, press the [ENTER/YES] key
again.
The display shows "Rec Start Recorder!" together with
the program and tracks to be saved, and "Sure?" flashes.
This means "are you sure to start saving data to
recorder?".
8. After checking any preparations on the external digital
recorder are made, start it recording.
It may be a good idea to put a START-ID (for DAT) or
set a locate memory at the starting position so that you
can easily find the position when you load the data
later.
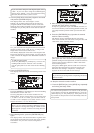
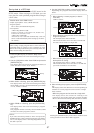
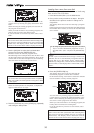
9. Press the [ENTER/YES] key right after the external
machine starts recording.
The display shows something like the one below.
After a few seconds, the unit starts saving the data and
"Wait time" starts counting down.
For the first several seconds, the VF-16 transmits the
pilot signal that will a reference for locating the tape
position during the load operation, and the actual data
saving starts from the position at which "Wait time"
starts counting down.
Using the S/PDIF signal, data is saved in 2-track unit.
Using the adat signal, data is saved in 8-track unit.
When the data saving is completed, "Completed!"
appears on the screen and the VF-16 stops.
<Note>
If you interrupts saving before completing, the saved
data is invalid.
10. Stop the external recorder machine.
11. Press the [EXIT/NO] key (or the [STOP] key) repeatedly
until exiting the Setup mode.
To cancel each operation or to return to the previous
screen before pressing the [ENTER/YES] key, press the
[EXIT/NO] key (or the [STOP] key). Each press of the
key returns to the previous screen and finally exits the
Setup mode.