


38
8. Press the [EXIT/NO] key to return to the Normal Display.
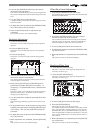
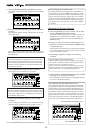
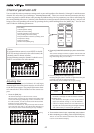
4. Press the [BUSS-SOURCE] key (GREEN: Flashing).
The display to select the source channel sent to REC BUSS
appears.
5. Press the [CH STATUS/CH SEL] key of ch16 (ORANGE:
Flashing).
The signals of input H started with the fader of ch16 is
sent to REC BUSS.
It is possible to apply effect to the input signals by setting
EFF1 or EFF2 to the source at the same time. Details are
described later.
<Note>
The channel signal sent to REC BUSS (ch16 in this case)
are not directly output from the stereo OUT L/R chan-
nels. It will be output from the stereo OUT L/R channels
with the track recorded set to the input monitor mode,
with later procedures.
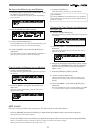
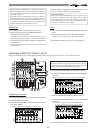
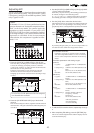
6. Press the [BUSS-REC TRK] key (RED: Flashing).
The display to select the REC track appears.
<Note>
When the signals of input H are started with the ch16
fader, it will not be possible to listen to the play sound
of the track. Therefore, it is prohibited to put track 16
in the READY (REC) mode.
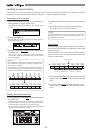
7. Press the [CH STATUS/CH SEL] key of ch 1 (RED:
Flashing).
Track 1 will go to the "READY" state, and allow the input
signal of source channel H to be recorded to track 1.
Adjusting the Source Channel
9. Press the [RECORD] key, then set track 1 to the input
monitor ([RECORD] Key: RED Flashing).
Sound for monitoring purposes can be heard from the
headphones or speakers from this point. Adjust the
volume of the monitor sound with the [MON OUT] or
[PHONES] knob.
10. Set the ch1 fader, ch16 fader and master fader to “0”.
11. Check the sound source and adjust the [TRIM] 8/16/H to
an appropriate gain.
The guideline for optimal gain is when the [PEAK] LED
is just about to light up when the sound source is turned
up to the maximum volume.
12. Accordingly, equalize the signals of ch16 being
recorded.
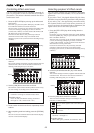
Tips: Equalizing the Source Channel
Press the [HI-G/F/Q] key, [MID-G/F/Q] key or [LO-G] key
and switch to channel parameter edit EQ edit mode to
equalize the source channel to record.
Then, press the [CH STATUS/CH SEL] key of ch16 to
adjust the sound with a customized equalization (For
more details refer to "Adjusting the Equalizer").
13. The final REC level (REC BUSS Master Level) is adjusted
according to the following instructions.
After adjusting the master level, press the [EXIT/NO] key
to return to the Normal Display.
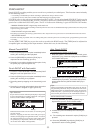
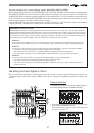
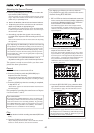
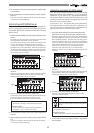
Tips: Adjusting the REC BUSS Master Level
Turn the [JOG] dial with the system showing the follow-
ing display to make the final adjustments for the REC
BUSS Master Level. Press the [BUSS-REC TRK] key once
more to switch to this display from the Normal Display.
The default setting of the REC BUSS Master Level is fac-
tory preset to level "80". Use the JOG dial to turn the
[REC LVL] knob on the LCD as shown below, and adjust
the number setting in real-time. The REC BUSS Master
Level can also be adjusted (adjustable range: 00-99).
REC BUSS Master Level adjustment icon
REC BUSS Master Level appears
Tips: Changing the recording mode
To change the BUSS recording mode to the DIRECT re-
cording mode, press the [DIRECT-REC TRK] key while
the tracks to be directly recorded are selected in the step
above. "Rec Mode Change!" appears and "Sure?" flashes
on the screen. Pressing the [ENTER/YES] key cancels the
selection of tracks for the BUSS recording and changes
the display to the track selection screen for the DIRECT
recording.