


20
SETTING UP AND PLAYING YOUR GW50
GUIDED TOUR (TUTORIAL)
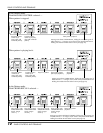
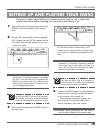
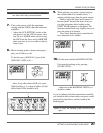
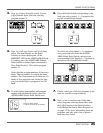
Example 1 — One Input
Example 2 — Two Inputs
Example 3 — Guitar Amp(s) and Stereo System
Example 4 — Mixing Console
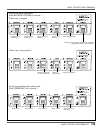
In examples 2, 3 and 4 above, only the Backing
parts (rhythm, accompaniment, etc.) are output
from the BACKING/MONO jack and only the
instrument/effect sound is output from the L/L + R
jack or the L/L + R and R jacks.
You can also listen to the GW50 through a set
of headphones. Connect them to the PHONES jack
on the rear panel.
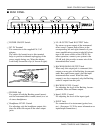
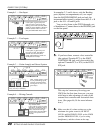
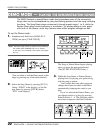
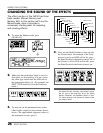
5. If you have them, connect a foot controller
(the optional Yamaha FC7) to the FOOT
CONTROLLER jack, and a footswitch (the
optional Yamaha FC5 or FC4) to the FOOT
SW jack.
This step isn’t necessary for using your
GW50 for the first time; however, you may
wish later to take advantage of some of the
external foot controller and footswitch func-
tions. (See pages 46, 56 for more informa-
tion.)
6. Make sure that all volume settings are at the
minimum: the guitar controls, the INPUT
LEVEL and BACKING LEVEL on the GW50
(and the PHONES LEVEL, if you’re using
headphones), and the volume on the amp.
In this system, a guitar amp with
two inputs is used. The balance
between the instrument/effect
output and the Backing sound can
be adjusted on the amp.
Stereo
System
Mixing
Console
This set up is best used with the
Amp Simulator effect.
In this system for studio recording
applications, the Backing sound
only goes into one channel of a
mixer, while the left and right
channels of the instrument/effect
sound go into separate mixer
channels.
Here, a stereo system is used
for only the Backing sound,
while the instrument/effect
sound goes into one or two
guitar amps.
Use this (the L/L + R) jack
if only one amp is available.
In this system, a guitar amp with
only one input is used. Since the
Backing sound and instrument/effect
sound are output together, adjust the
balance between the two with the
rear panel BACKING LEVEL control.