


BACKING SECTION
33
GUIDED TOUR (TUTORIAL)
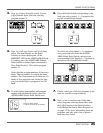
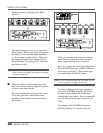
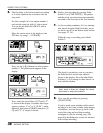
6. While one of the patterns is playing, try this:
Hold down [SHIFT] and press [ACCOMP].
Notice that the accompaniment parts have
dropped out, and that all you hear are the
bass and drums. To bring the accompaniment
back in, hold down [SHIFT] and press
[ACCOMP] again. Try doing this in time
with the rhythm, pressing the button at the
end of a measure.
Try doing the same with the bass and drum
parts as well, using [SHIFT] + [BASS] and
[SHIFT] + [DRUMS].
After you’ve played around with this for a
while, turn all of the backing sounds back on.
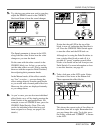
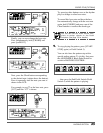
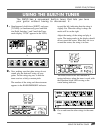
7. Now, let’s change chords while the pattern is
playing. The automatic chord features of the
GW50 are very sophisticated, so for the
moment we’ll show you one of the easiest
ways to change chords — by using the Pedal
Switches.
To set this up, press the ASSIGNABLE Type
switch until the CHORD RECALL LED is
lit. (You can also use the ASSIGNABLE
Block Pedal Switch to switch between
BACKING CONTROL and CHORD RE-
CALL.)
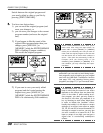
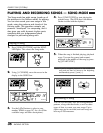
You can also use Pedal Switch 5 (in the
Reverb/Delay block) to start the pattern.
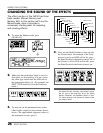
While the pattern is playing, you can use the
[–]/[+] buttons to select and listen to other
patterns. Try out various patterns to get a feel
for the enormous stylistic range of the Back-
ing section. (There are a total of 248 patterns;
refer to the list on pages 144 and 145 for
more information about them.)
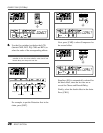
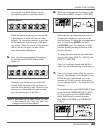
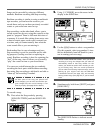
5. Now, play the corresponding fill in pattern
by pressing the Fill Pedal Switch (Pedal
Switch 3).
Normally, you should press the Fill Pedal
Switch at the beginning of the measure you
wish the fill in pattern to play. However, you
can press it in the middle of a measure and
play only the last part of the fill in.
Note: If you press the Fill Pedal Switch too late
in the measure, you may not hear any
change from the normal pattern.
Press Type switch until CHORD RECALL is lit.
Start/stop function
Fill In pattern