


34
BACKING SECTION
GUIDED TOUR (TUTORIAL)
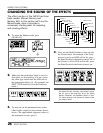
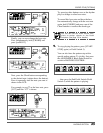
While the pattern is playing, press Pedal
Switch 2.
The chord changes as soon as you press the
Pedal Switch, and the new chord is shown in
the display. Press the other Pedal Switches
(1–4) to change to other chords. (These are
the factory-assigned chord settings for the
Pedal Switches.) Try doing this in time with
the rhythm as well.
Note: Be careful not to press Pedal Switch 5 here,
since it does not change the chord, but starts
or stops the pattern.
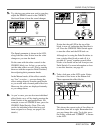
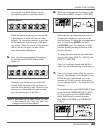
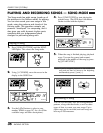
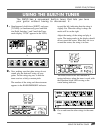
8. While the pattern is still playing, try using
the chord section at the top right of the panel
to select some other chords.
First, let’s change the root note of the chord.
To do this, press the Chord button corre-
sponding to the desired note (written above
the button).
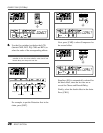
If the root note that you want isn’t selected
(each button has more than one root note),
press it again until the note is selected.
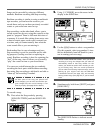
Next, let’s change the chord type. Remember
that the GW50 gives you a total 25 different
chord types for all keys. These chord types
are shown below the Chord buttons.
Note: For more information about the chord types, see the
lists of chord types on pages 76 and 152.
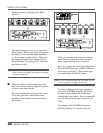
To select a different chord type, simultane-
ously hold [CHORD] and press the Chord
button corresponding to the desired type
(written below the button). Press it repeatedly
until the desired chord type is shown in the
LCD.
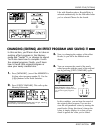
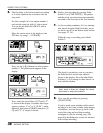
For example, hold [CHORD] and press
[D/E
/E] until the “m” chord is selected.
This mark is used to represent “
” or “sharp.”